
Opening the Page
In the left sidebar, click Organization. The page header reads Organization Management — Manage your organization's settings, branding, and configuration — with a Refresh button at the top right that re-pulls everything on screen.
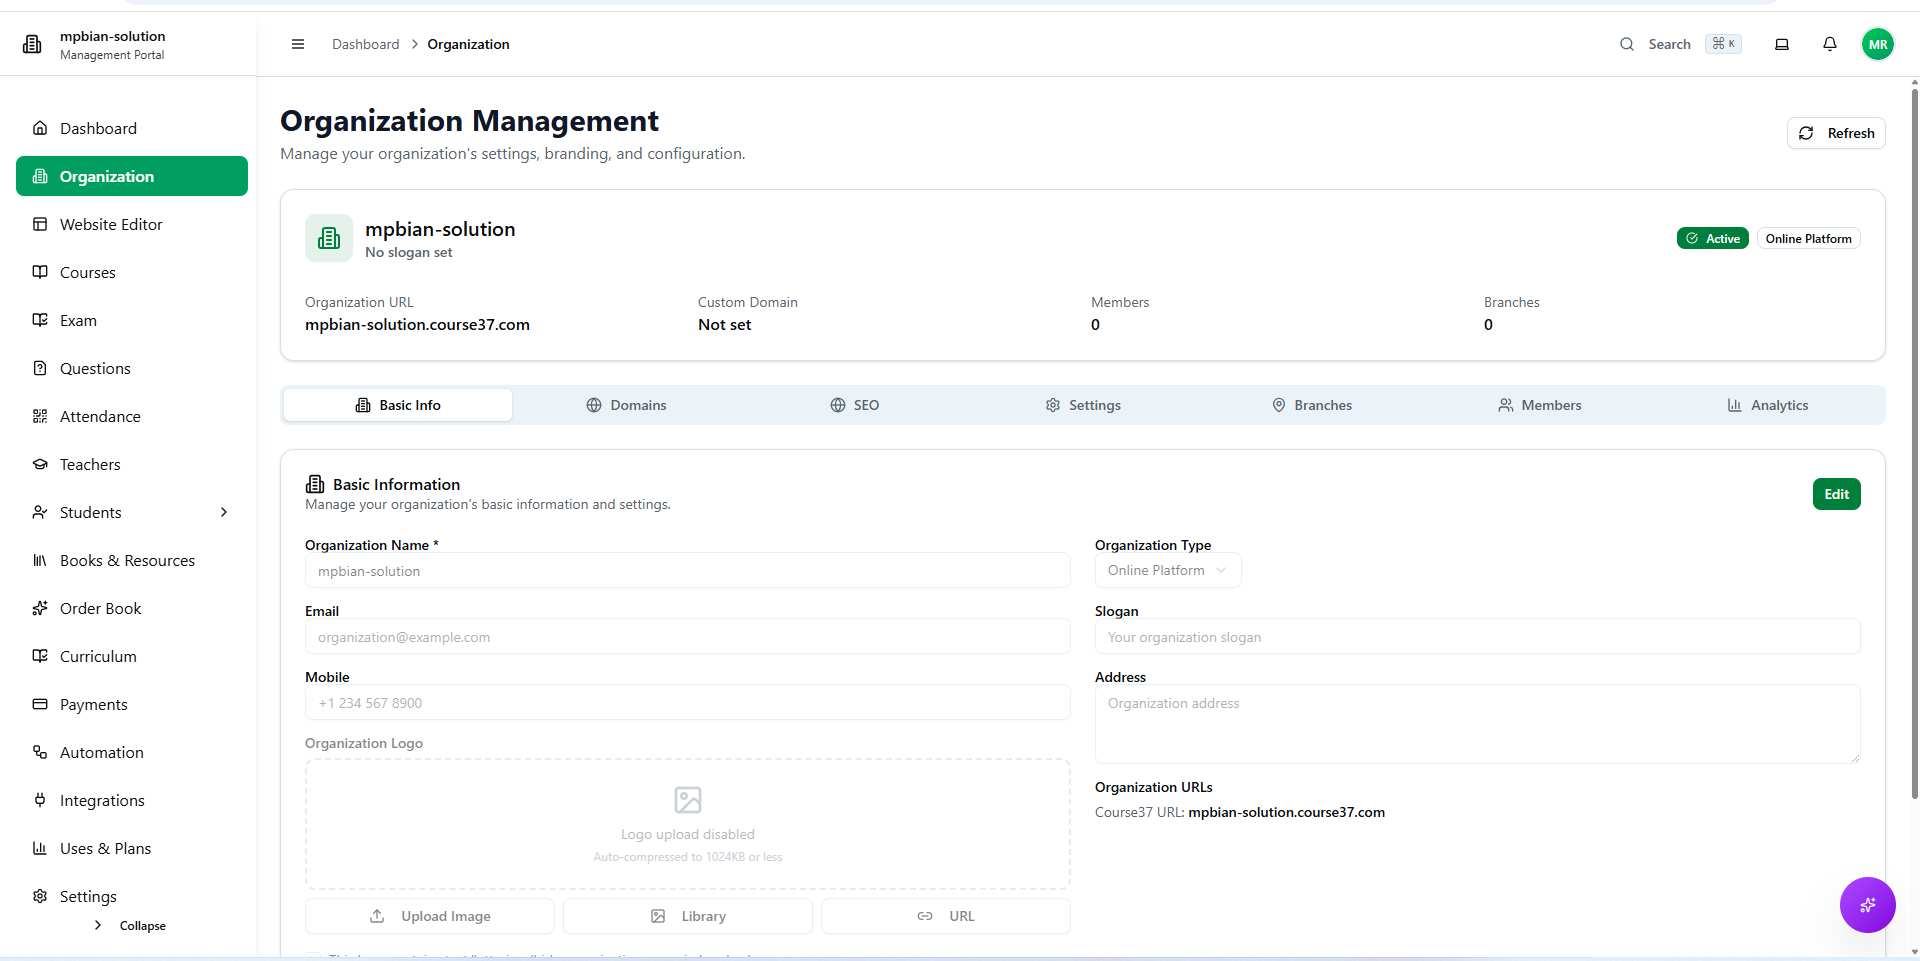
This page controls who your institution is, as opposed to your day-to-day courses and students. Almost everything you change here is visible to your students, either on your public website or on the documents you print for them.
The Summary at the Top
The strip above the tabs is a status report. Nothing there is editable — it reflects what you have already configured below.
- Name and slogan, with No slogan set if you have not written one.
- Active or Inactive, and your organization type — Online Platform, Coaching Center or Individual Educator.
- Organization URL — your free
yourslug.course37.comaddress, which keeps working even after you add your own domain. - Custom Domain — Not set until you add one. Afterwards a green tick means verified and live; an amber warning means DNS is not confirmed yet, so the domain is saved but not serving anyone.
- Members and Branches — how many staff accounts and physical locations exist.
How Editing Works
Nothing saves as you type. Every tab is read-only until you unlock it:
- Click Edit at the top right of the section — Edit Settings on Settings, Edit SEO Settings on SEO.
- The fields unlock. This is why the logo box reads Logo upload disabled when you first arrive — it is not a fault or a plan limit.
- Make your changes, then click Save Changes, or Cancel to discard them.
If your edits seem to disappear, you navigated away before saving.
Basic Info — and What Each Change Does
The Basic Info tab opens by default, headed Basic Information — Manage your organization's basic information and settings. This is the tab with the widest reach: most of it is published to students immediately after you save.
| You change | Students and visitors see |
|---|---|
| Organization Logo | Your logo replaces the placeholder in your website's header and footer, and prints on student ID cards and exam admit cards |
| Organization Name | The site name in your website header, the welcome line on your home page (Welcome to …), your About and Footer sections, and the name on printed cards |
| Slogan | Appears beneath your name; leaving it blank simply shows nothing |
| Becomes the contact email on your website's contact section, as a clickable mail link | |
| Mobile | Becomes the contact phone number, as a tap-to-call link |
| Address | Shown as your location on the contact section, and optionally on ID cards and admit cards |
| Organization Type | Changes your own dashboard, not the public site — it decides whether menus like Attendance and OMR Template appear at all |
Uploading a logo. With the tab in edit mode, use Upload Image for a file from your computer, Library to reuse something already uploaded, or URL to paste a link. Images are auto-compressed to 1024KB or less, so a large file is fine.
If your logo already includes your name in the artwork, tick the box that says the logo contains text or lettering. Course37 then hides the separate organization name next to it, so your name does not appear twice side by side in headers and on printed cards.
Changes here publish straight away. Save a new logo and the next student to open your website sees it — there is no separate publish step for Basic Info.
Full guide: How to Configure Basic Info
The Other Tabs
Each tab has its own web address — switching to Members puts you on /dashboard/organization/members — so you can bookmark one or send a colleague a link straight to it.
| Tab | What you do there | What changes as a result |
|---|---|---|
| Settings | Timezone, date and time format, language, notifications, security rules | Every class and exam time is recorded against your timezone; students receive the notification types you enable |
| Domains | Connect your own domain name | Students visit your brand's address instead of yourslug.course37.com |
| SEO | Meta title, description, keywords, social image, favicon | How your site appears in Google results and when someone shares a link |
| Branches | Record your campuses or centres | Batches and attendance sessions can be assigned to a specific location |
| Members | Invite staff, set roles and access modules | Each person sees only the parts of the dashboard you grant them |