
Basic Info is your organization's identity. Almost everything on this tab is published to students — on your website, and on the ID cards and admit cards you print. It is the first tab that opens when you visit Organization.
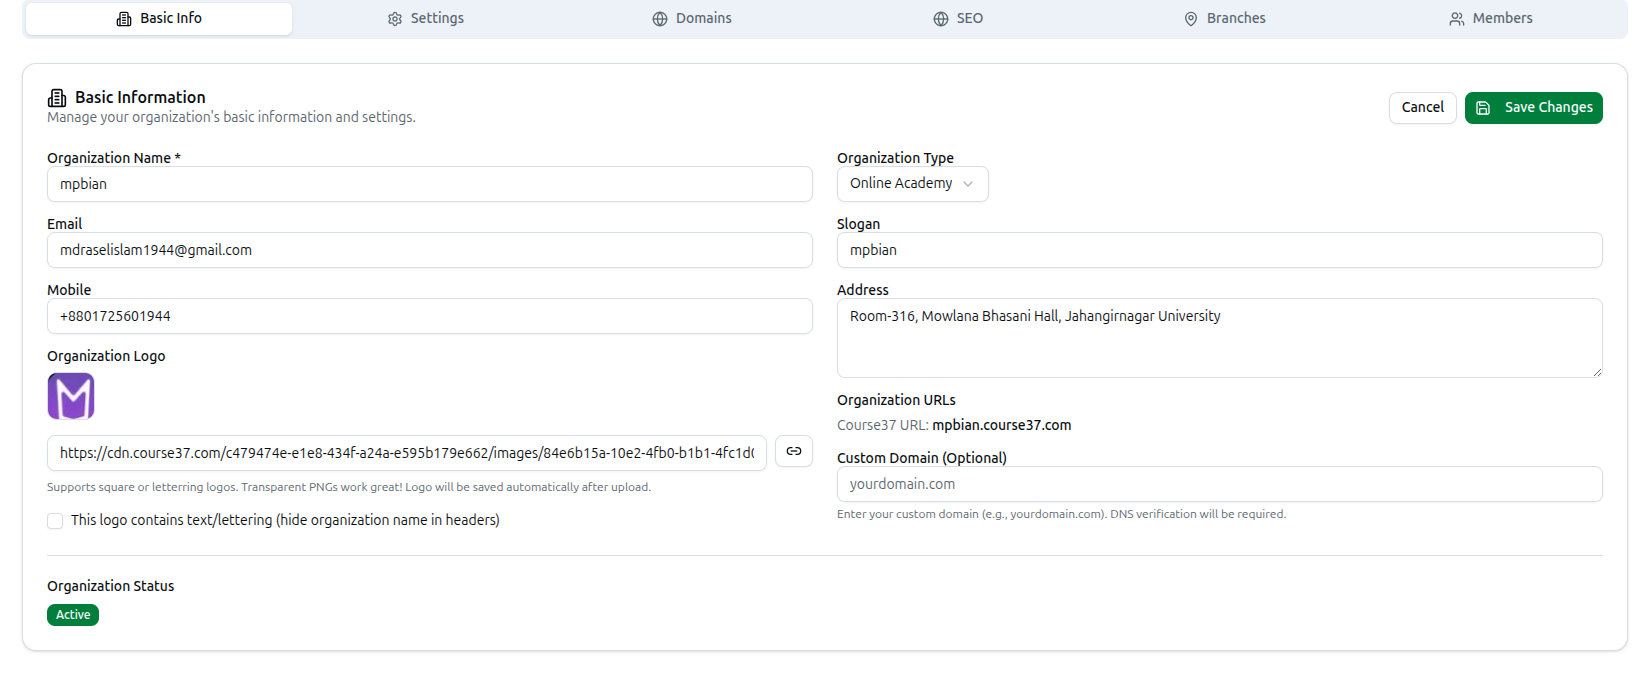
1. Unlock the Form
The whole tab is read-only when you arrive. Fields look greyed out and the logo box reads Logo upload disabled — that is normal, not a fault.
Click Edit at the top right of the Basic Information panel. The fields become editable.
2. Fill In Your Identity
| Field | What to enter | Where students see it |
|---|---|---|
| Organization Name (required) | Your institution's operating name | Website header, the Welcome to … line on your home page, About and Footer sections, printed cards |
| A contact address you monitor | Contact section of your website, as a clickable mail link | |
| Mobile | Your public phone number | Contact section, as a tap-to-call link |
| Slogan | A short tagline | Under your name. Leave it blank and nothing shows |
| Address | Your street address | Your location on the contact section, and optionally on ID and admit cards |
3. Choose Your Organization Type
The Organization Type dropdown offers four choices:
- Online Academy — academic programs delivered online, at scale.
- Coaching Center — physical or hybrid batches.
- Individual Educator — a single teacher selling their own courses.
- Educational Institution — a school, college or university.
This changes your own dashboard, not your public site. Menus appear and disappear based on it — Attendance and OMR Template only exist for a Coaching Center, and Individual Educator organizations are never asked to add a teacher during setup. Switch type and your sidebar changes on the next load.
4. Upload Your Logo
With the form unlocked, choose one of three sources:
- Upload Image — a file from your computer. You can Crop & Upload, or Skip Crop & Upload to keep it as-is.
- Library — reuse an image already uploaded to your organization.
- URL — paste a direct link to an image.
Files are auto-compressed to 1024KB or less, so a large original is fine. Square logos and wide lettering logos both work, and transparent PNGs work great.
The logo saves on its own. You will see Saving logo… and then Logo uploaded and saved successfully! — it is stored the moment the upload finishes, without waiting for Save Changes. Every other field on this tab still needs saving.
Your logo appears in your website header and footer, and prints on student ID cards and exam admit cards — so upload the highest-quality version you have.
If your logo artwork already contains your organization's name, tick This logo contains text/lettering (hide organization name in headers). Course37 then hides the separate name beside it, so your name does not appear twice.
5. Check Your Web Address
Organization URLs shows your free yourslug.course37.com address, which always works.
Custom Domain (Optional) is where you enter your own domain, such as yourdomain.com. Next to a custom domain you will see either:
- Verified — DNS is confirmed and the domain is live.
- Pending Verification — saved, but not yet serving visitors. Finish the DNS steps on the Domains tab.
Organization Status below shows Active or Inactive. It is a read-only indicator, not something you switch here.
6. Save
Click Save Changes at the top right. You will see Basic information updated successfully.
Click Cancel to discard everything instead — except a logo, which has already saved itself.
There is no separate publish step. Once saved, the next student to open your website sees the new details.
Troubleshooting
| What you see | What it means |
|---|---|
| Fields are greyed out and the logo says Logo upload disabled | You have not clicked Edit yet |
| Logo uploaded but failed to save. Please save manually. | The image uploaded but did not attach — click Save Changes to finish |
| Failed to update basic information | The save did not go through. Check Organization Name is not empty, then try again |
| Your name appears twice next to your logo | Tick the This logo contains text/lettering box |
| A custom domain shows Pending Verification | DNS is not confirmed. Complete the steps on the Domains tab |