
The Settings tab holds two separate panels: Advanced Organization Settings, which affects your whole organization, and Security, which is your own password.
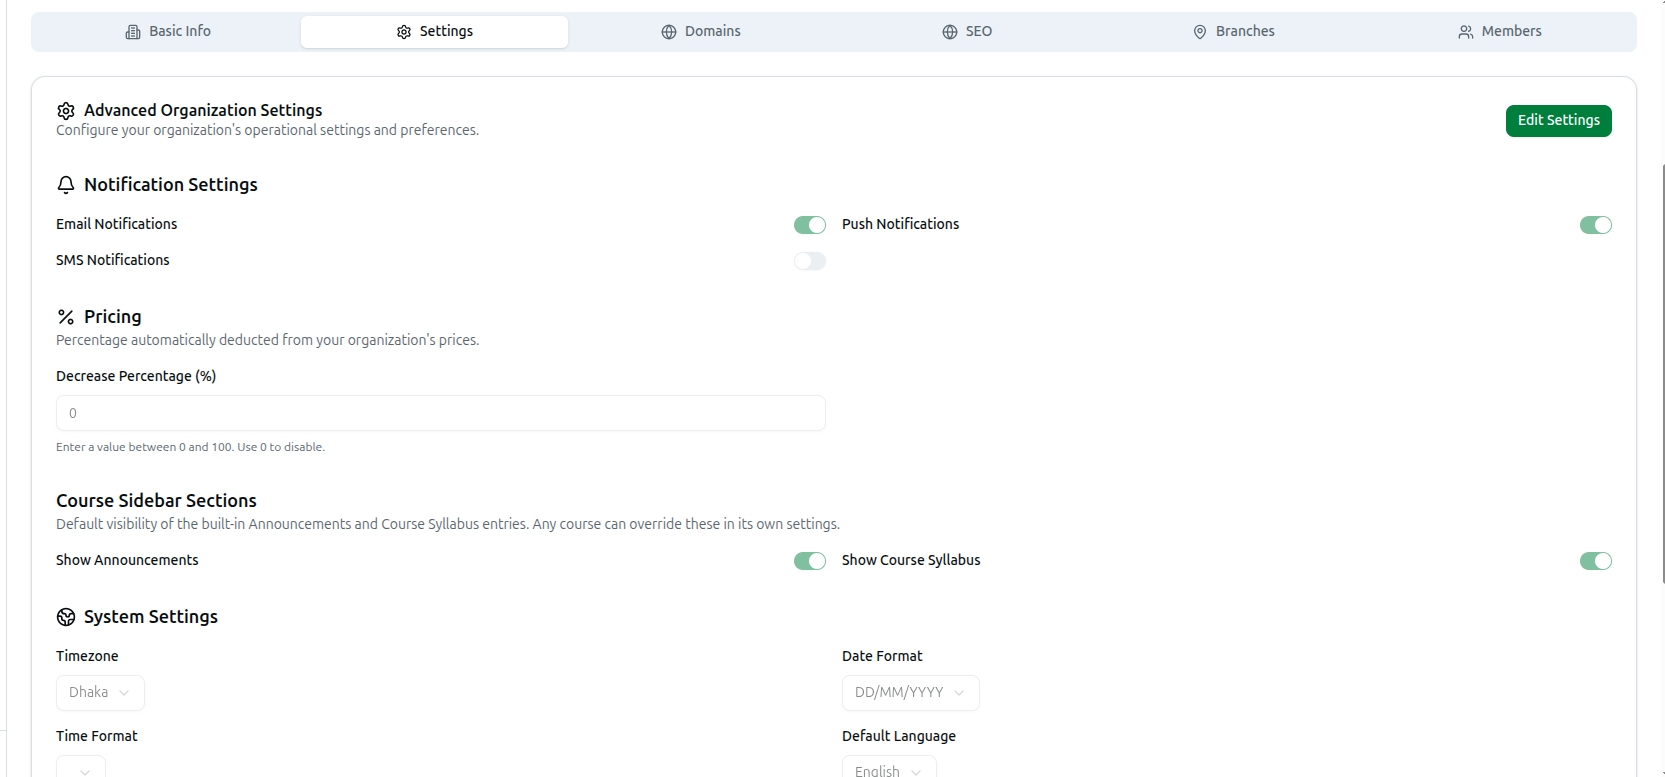
Open it from the left sidebar: Organization, then the Settings tab.
1. Unlock the Settings
Advanced Organization Settings is read-only when you arrive. Click Edit Settings at the top right to unlock every field below. When you are done, click Save — or Cancel to discard.
You will see Advanced settings updated successfully when it saves.
2. Notification Settings
Three switches decide which channels your organization may use to reach students:
- Email Notifications
- Push Notifications
- SMS Notifications
Turning a channel off here stops it organization-wide, no matter what individual courses or automations request. Leave a channel on and it still needs a working provider — set those up under Integrations.
3. Payment Display Reduction
On screen this section is still labeled "Pricing," but it has nothing to do with course prices or plans — it only controls the percentage subtracted from figures shown in your payment summaries.
Decrease Percentage (%) — Enter a value between 0 and 100. Use 0 to disable.
This reduces the money shown in your payment summaries by the percentage you enter. It changes the displayed figures only: the underlying payments, student records and reports are untouched, and payment counts stay exactly as they are.
Leave it at 0 unless you specifically need reduced figures on screen.
4. Course Sidebar Sections
These two switches set the default visibility of the built-in entries in every course's sidebar:
- Show Announcements
- Show Course Syllabus
This is only the default. Individual courses can still override it.
5. System Settings
The regional settings that everything else is measured against.
| Setting | Choices |
|---|---|
| Timezone | 15 zones including Dhaka, Karachi, Delhi, India, Tokyo, London, Paris, Berlin, Sydney, Johannesburg, the four US zones and UTC |
| Date Format | DD/MM/YYYY, MM/DD/YYYY or YYYY-MM-DD |
| Time Format | 12 Hour (AM/PM) or 24 Hour |
| Default Language | English, Spanish, French, German, Italian, Portuguese, Chinese, Japanese, Korean, Hindi or Arabic |
Set your Timezone before you schedule anything. Every class time, exam window, attendance session and payment timestamp is recorded against it. Changing it later does not move events you have already created — they keep the time they were saved with, which is how schedules end up hours out.
6. Security — Your Password
Below the settings sits the Security panel. This one is about your own account, not the organization, and it saves on its own — the Edit Settings button above does not apply to it.
Enter your Current Password, then New Password and Confirm New Password, and submit. Use the eye icons to check what you typed. You will see Password changed successfully.
If you signed up with Google, this panel reads You signed up with Google. Set a password to also sign in with your email. — there is no current password to enter, and setting one lets you sign in either way from then on.
Troubleshooting
| What you see | What it means |
|---|---|
| Every field is greyed out | Click Edit Settings first |
| Decrease percentage must be a number between 0 and 100 | Remove any symbols and enter a plain number, or 0 to disable |
| Failed to update advanced settings | The save did not go through — check your entries and try again |
| New passwords do not match | New Password and Confirm New Password differ |
| Notifications are on but nothing is delivered | The channel is enabled but its provider is not configured — check Integrations |
| Class times look hours out | The timezone was changed after those classes were created |