
Dashboard Analytics Overview
The main Dashboard page (/dashboard) is the first screen you see after logging in. It provides a real-time summary of your organization's health across revenue, students, content, website traffic, and resource capacity.
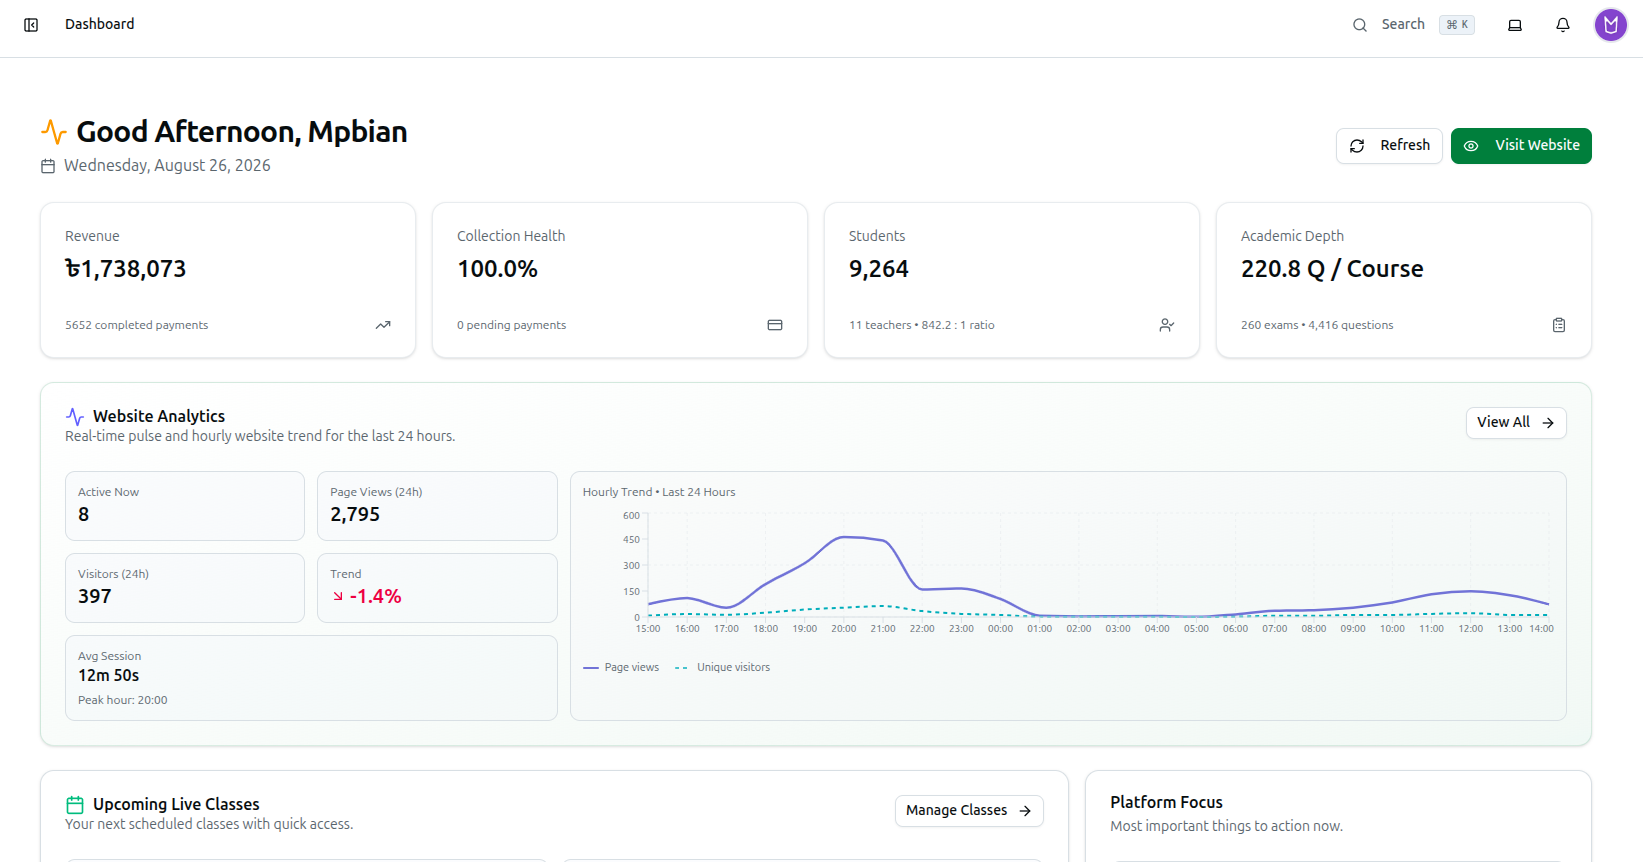
Step 1: Open the Dashboard
- Log in to the admin panel
- You are automatically taken to the Dashboard at
/dashboard - The page header shows a greeting based on the time of day (Good Morning, Good Afternoon, or Good Evening), your name, and the current date
- Click the Refresh button in the top-right to reload all data
- Click Visit Website to open your organization's public website in a new tab
Step 2: Track Your Setup Progress (Onboarding Checklist)
If your organization hasn't finished the initial setup, a Complete Your Setup card appears above the metric cards, right below the header. It stays until every step is done.
- A progress bar and an "X of Y" counter show how many steps are complete
- Up to 7 setup steps are listed, each with an icon, a title, and a short description:
| Step | Links To |
|---|---|
| Set Up Your Website | Website Pages (or the setup wizard if no website exists yet) |
| Set Up Curriculum | Education → Curriculum |
| Add Tags | Education → Tags |
| Create Your First Course | Course creation form |
| Add a Teacher | Teachers |
| Customize Branding & SEO | Organization settings |
| Configure Settings | Organization → Settings |
The Add a Teacher step is hidden for Individual Educator organizations, since a solo educator is usually the teacher themselves — so only 6 steps appear for that organization type.
- Completed steps show a checkmark and a strike-through title; click any incomplete step to jump straight to it
- Click Minimize to collapse the card into a slim progress bar with a Continue Setup shortcut, or click the X to dismiss it entirely — both choices are remembered in your browser and won't reset until you clear site data
- Once every visible step is completed, the card disappears automatically
Step 3: Read the Key Metric Cards
Four clickable metric cards appear at the top of the dashboard:
| Card | Value Shown | Subtitle | Navigates To |
|---|---|---|---|
| Revenue | Total revenue in ৳ | Number of completed payments | Payments → Analytics |
| Collection Health | Completion rate as percentage | Number of pending payments | Payments |
| Students | Total student count | Teacher count and student:teacher ratio | Students |
| Academic Depth | Questions per course ratio | Total exams and total questions | Question Management |
Click any card to jump directly to the relevant detail page.

Step 4: Review the Website Analytics Preview
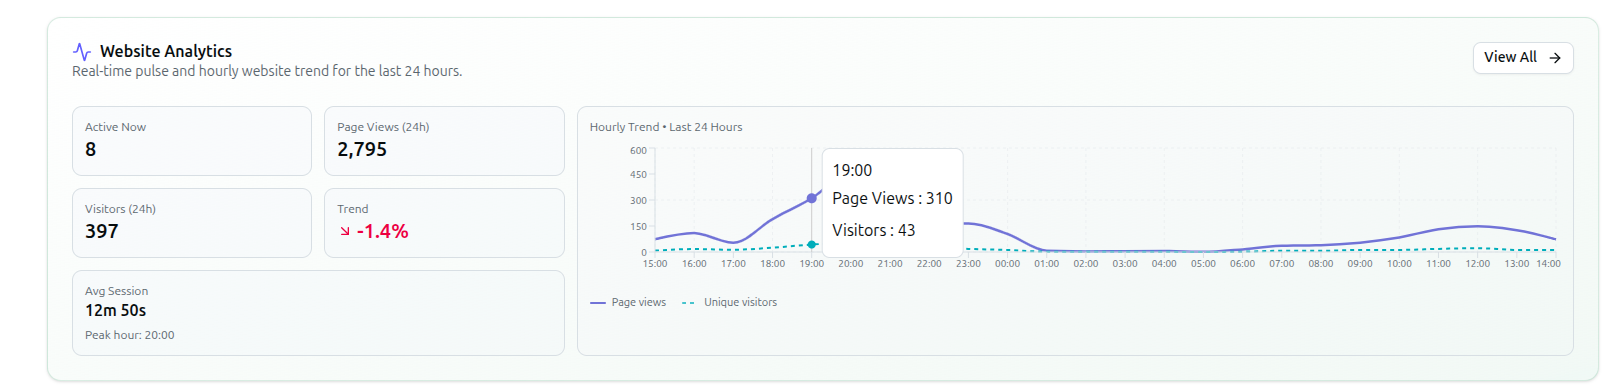
Below the metric cards, a Website Analytics card displays a 24-hour traffic snapshot:
- The card shows five stat tiles:
- Active Now — current live visitors on your website
- Page Views (24h) — total page views in the last 24 hours
- Visitors (24h) — unique visitors in the last 24 hours
- Trend — percentage change in page views (green for positive, red for negative)
- Avg Session — average session duration from the last-7-days GA4 overview, with the Peak hour (the hour with the most page views in the last 24 hours) shown just below it in the same tile
- A Hourly Trend line chart displays page views (solid indigo line) and visitors (dashed teal line) for the last 24 hours. Hover over any point to see the exact page views and visitor count for that hour
- Click the View All button to navigate to the full Website Analytics page at
/dashboard/website-analytics
If Google Analytics is not connected (or returns no data), the card instead shows "No website analytics yet" with the message "Connect Google Analytics 4 to see visitors, page views, and live traffic here." and a Connect Google Analytics button that opens the Integrations page.
Step 5: Check Upcoming Live Classes
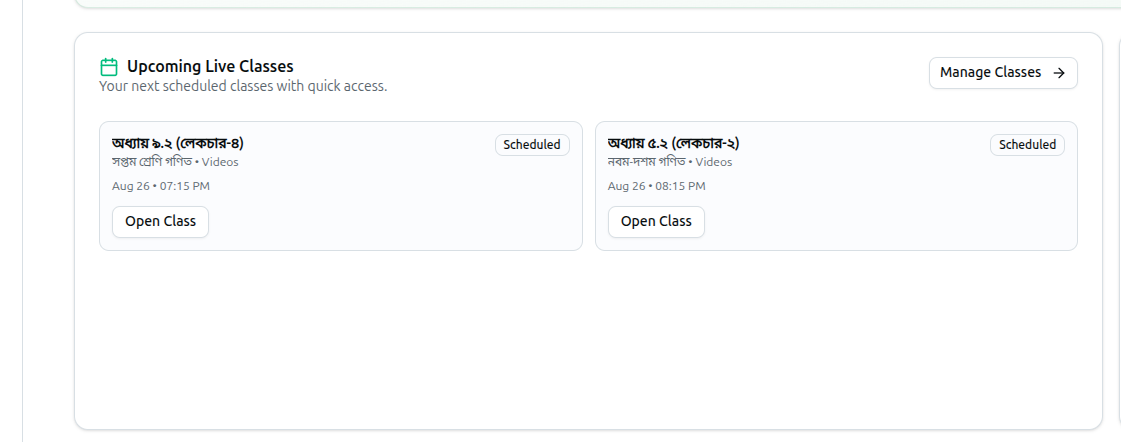
If your organization type is Online Platform or Individual Educator, an Upcoming Live Classes card shows up to 4 scheduled classes:
- Each class shows the title, course name, module name, scheduled date and time, and a status badge (Live or Scheduled)
- Click Open Class or Manage Classes to go to the Courses page
- If nothing is scheduled, the card instead shows a "No classes scheduled" message with a Schedule a class shortcut
Step 6: Review Platform Focus Items
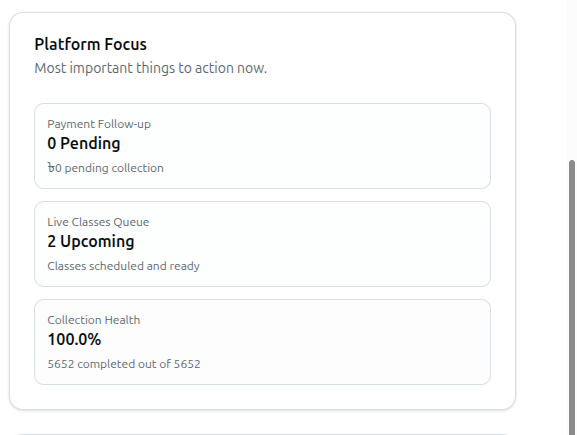
The Platform Focus card highlights the three most important action items:
| Item | Value Shown | Detail |
|---|---|---|
| Payment Follow-up | Number of pending payments | Pending collection amount in ৳ |
| Live Classes Queue | Number of upcoming classes | "Classes scheduled and ready" or "No class scheduled yet" |
| Collection Health | Completion rate percentage | Completed out of total payments |
Click any item to navigate to its management page. For organization types that don't show the Upcoming Live Classes card, Platform Focus expands to fill the full row.
Step 7: Read Operational Insights
The Insights that matter now card shows automated alerts based on your data:
- Student capacity usage exceeding 80%
- Storage usage exceeding 80%
- Any pending payment follow-ups
- Payment completion rate below 70%
- If none of the above are triggered: "No urgent risk detected in current operations"
Below the alerts, three summary boxes show:
- Pending Collection — total pending amount in ৳
- Exam Inventory — total number of exams
- Discount Given — total discount amount in ৳
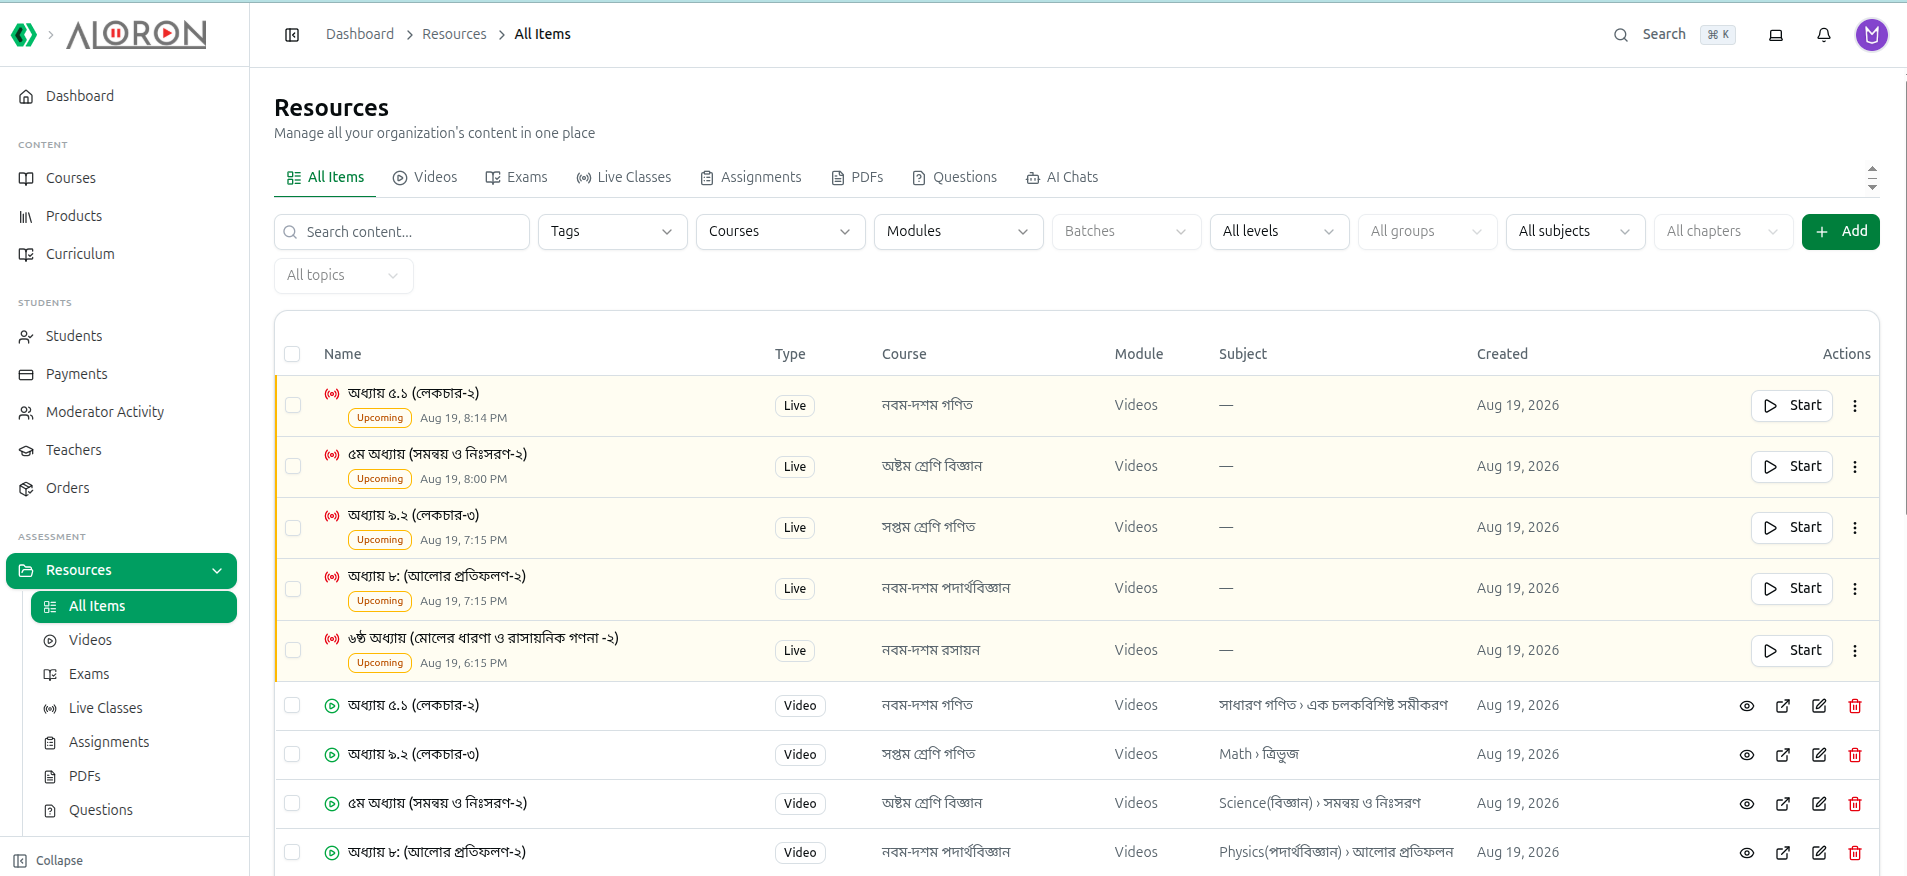
The Exam Inventory count reflects everything visible in your Resources Library — the central place where exams, videos, PDFs, and questions are managed.
Step 8: Use Quick Actions
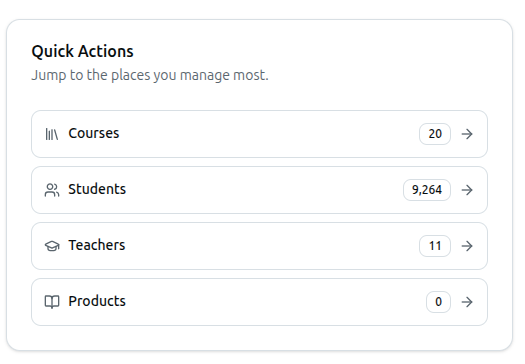
The Quick Actions card provides shortcuts with counts:
| Action | Shows |
|---|---|
| Courses | Total course count |
| Students | Total student count |
| Teachers | Total teacher count |
| Products | Total book count |
Click any row to navigate to that section.
Step 9: Monitor Capacity Overview
If your subscription has resource limits, a Capacity Overview card shows utilization bars for:
| Resource | What It Tracks |
|---|---|
| Students | Current student count vs plan limit |
| Courses | Current course count vs plan limit |
| Exams | Current exam count vs plan limit |
| Storage (MB) | Current storage usage vs plan limit |
Each resource shows a percentage badge and a progress bar. The bar and badge turn amber at 75% usage and red once a resource reaches or exceeds 90% (as shown for Students below, which is over its plan limit).

Related Articles
- Payment Revenue Reports — Detailed payment analytics
- Organization Usage & Resource Metrics — Full usage monitoring
- How to See Visitor Counts — Website analytics setup