
1. The Students Dashboard
Open Students from the left sidebar. The page has two tabs:
- Enrolled Students — students with at least one paid course or book.
- Not Enrolled Students — everyone else: leads, manually-added contacts, and CSV-imported names with no purchase yet. The tab shows a live count badge.
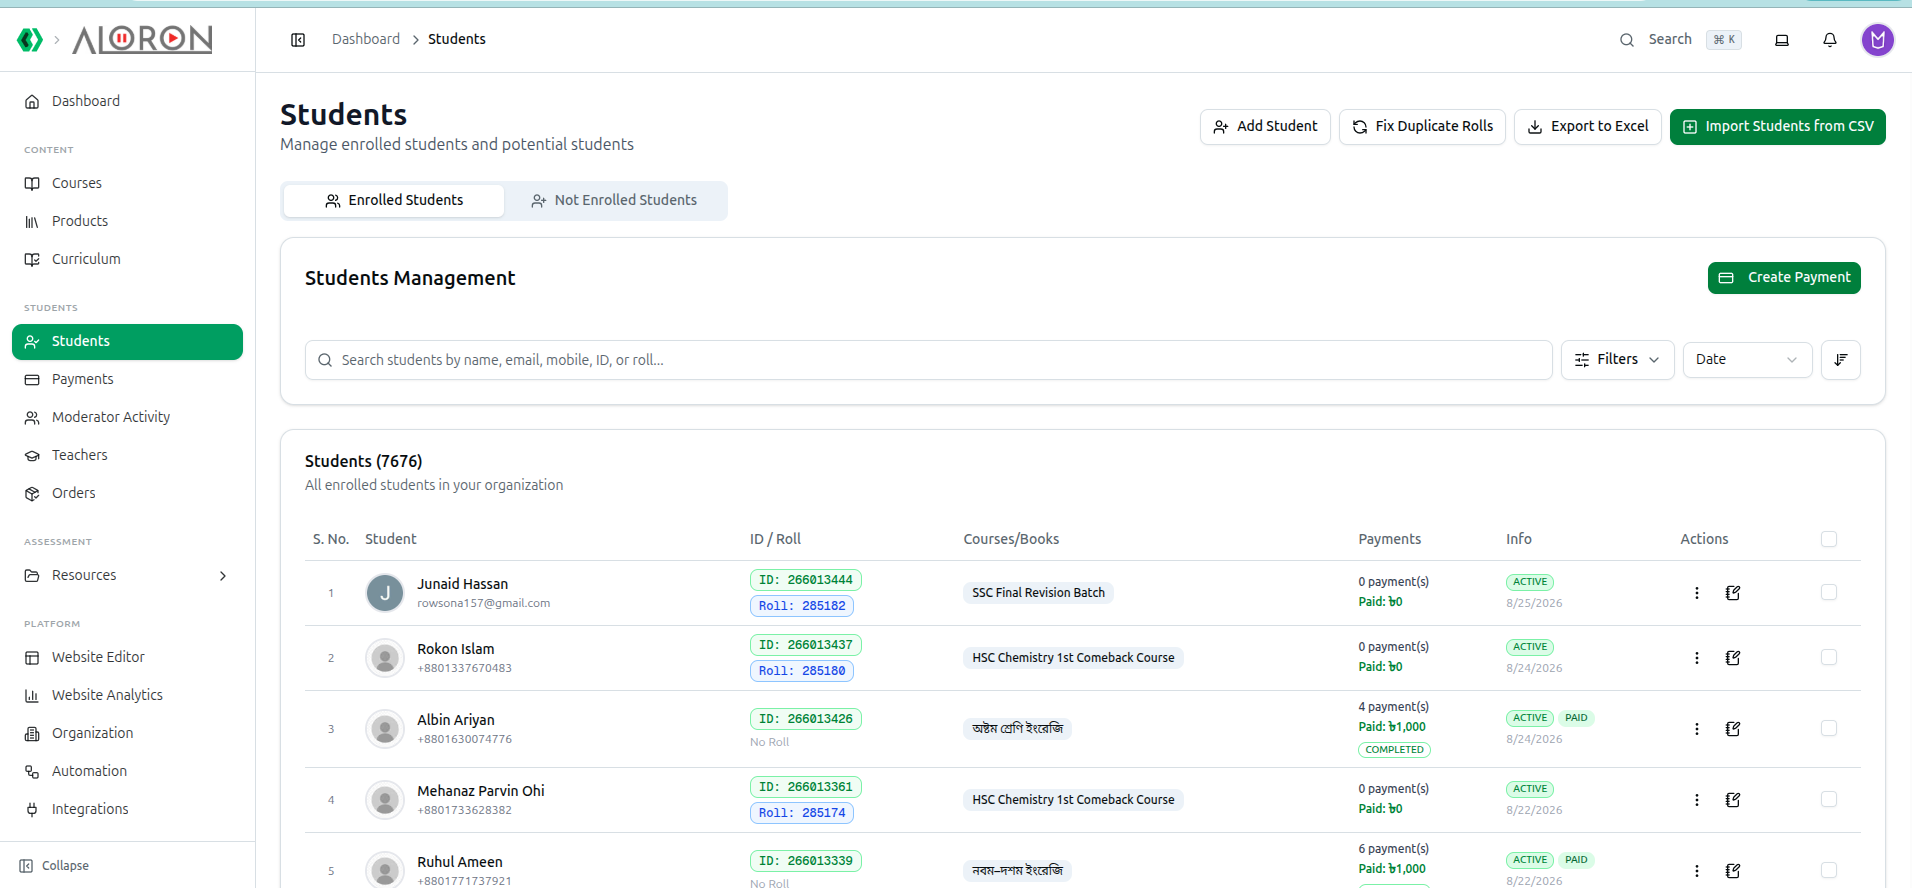
This guide covers the Enrolled Students tab only. The Not Enrolled tab has its own dedicated guide, with its own Add Student form and its own CSV import — see How to Find Students Without a Course.
2. Two Button Rows — Don't Mix Them Up
Page toolbar (top of the page):
- Add Student — opens the same Add New Student form regardless of which tab you're on. It always creates a Not Enrolled student and switches you to that tab — no course is ever assigned from this form, even if you clicked it while viewing Enrolled Students.
- Fix Duplicate Rolls (Enrolled tab only) — re-assigns roll numbers for students with duplicate or missing rolls, after a confirmation prompt explaining the effect.
- Export to Excel (Enrolled tab only) — downloads a payment/financial report covering every student that matches your current filters, not just the students on screen.
- Import Students from CSV (Enrolled tab only) — see § 3.
Students Management card (directly above the search box, Enrolled tab only):
- Create Payment — opens the enrollment dialog. The full field-by-field walkthrough, including the installment-splitting option, lives in How to Enroll Students and Manage Payments & Installments.
3. Importing Students via CSV (Enrolled Roster)
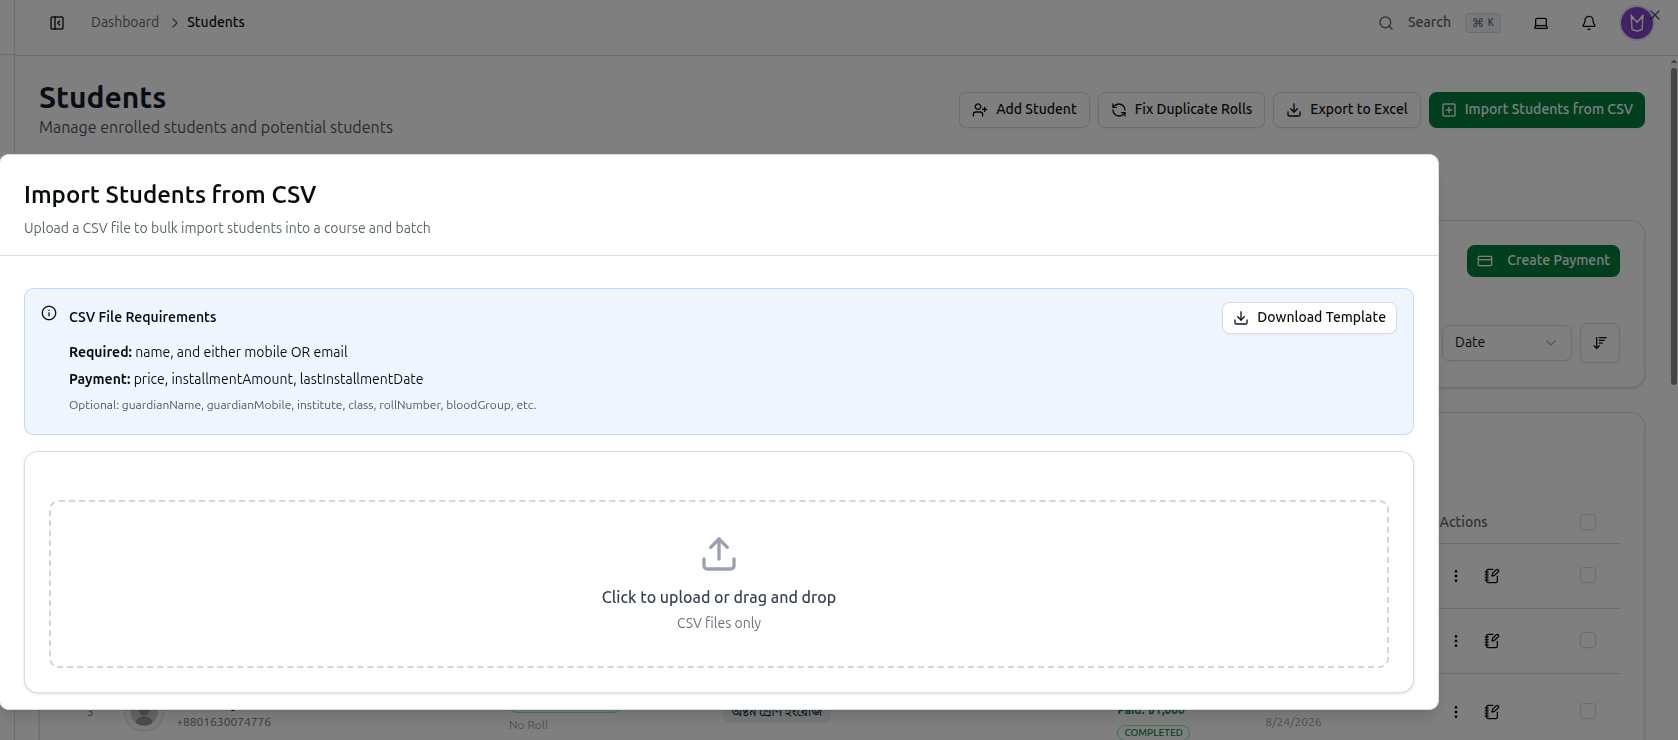
Click Import Students from CSV in the page toolbar. This import is different from the one on the Not Enrolled tab — every row here is attached to a course, so the students it creates land directly on the Enrolled list.
- Click Download Template to get a correctly-headed CSV file. There is only this one button — an earlier version of this guide also mentioned a "Sample CSV" button, which doesn't exist.
- Required:
name, plus eithermobileoremail. Payment (optional):price,installmentAmount,lastInstallmentDate. Also optional:guardianName,guardianMobile,institute,class,rollNumber,bloodGroup, and a few more — the parser also accepts common header variants (e.g. "phone"/"contact" for mobile, "dob" for date of birth). - Click the upload box to choose your file. The label mentions drag-and-drop, but only click-to-browse actually works.
- Rows that fail validation (a bad email, a non-numeric price, and so on) are pulled out into an error banner and never reach the next step — only rows that pass appear in the editable preview table, where you can fix a value with the pencil icon or remove the row entirely.
- Pick a Course and, optionally, a Batch — the batch dropdown stays disabled until a course is chosen.
- Tick Send login credentials via Email/SMS to auto-generate a temporary password (the student's mobile number, last 6 digits) and notify them.
- Click Import N Students. The import runs in batches of 25 with a live progress bar, finishing with a Success / Updated / Failed summary — "Updated" means a row matched an existing student and was merged instead of duplicated.
4. Selecting Students — the Bulk Toolbar
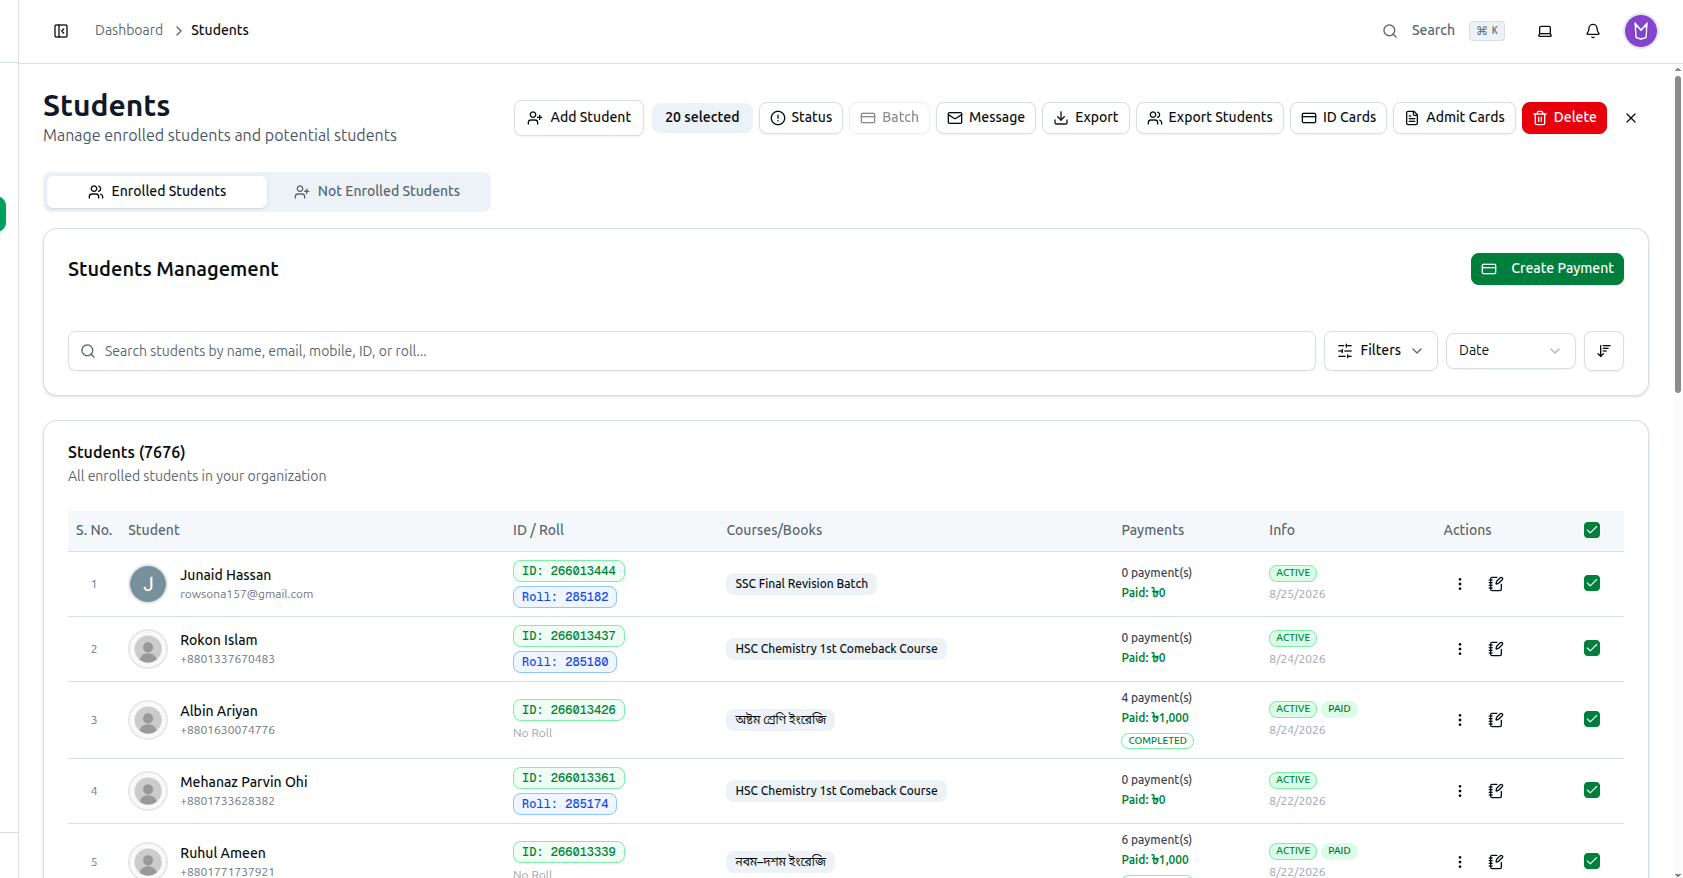
Tick a row's checkbox, or the header checkbox for the whole visible page, to reveal a bulk action bar:
| Button | What it does |
|---|---|
| Status | Bulk-updates status for everyone selected: Active, Payment Due, Access Restricted, Suspended, Graduated, Dropped Out, Inactive |
| Batch | Moves the selection to a different batch. Stays disabled until exactly one course is active in Filters — batch options are fetched per-course, so the tool needs to know which course's batches to offer |
| Message | Opens Send Bulk Communication (Email / SMS / Push). Full guide: How to Send SMS and Bulk Messages to Students |
| Export | A payment/financial report — the same shape as Export to Excel above — limited to the selected students |
| Export Students | A simpler contact list (name, ID, roll, guardian, institution, mobile, enrolled courses) for the selected students only |
| ID Cards | Generate/print ID cards for the selection — § 6 |
| Admit Cards | Generate/print admit cards for the selection — § 6 |
| Delete | Permanently deletes the selected accounts and all related data. Cannot be undone |
"Export" and "Export Students" are not the same file. The first is a financial record; the second is a plain contact/roster list. Pick the one that matches what you actually need before running it against a large selection.
5. Individual Row Actions (⋮)
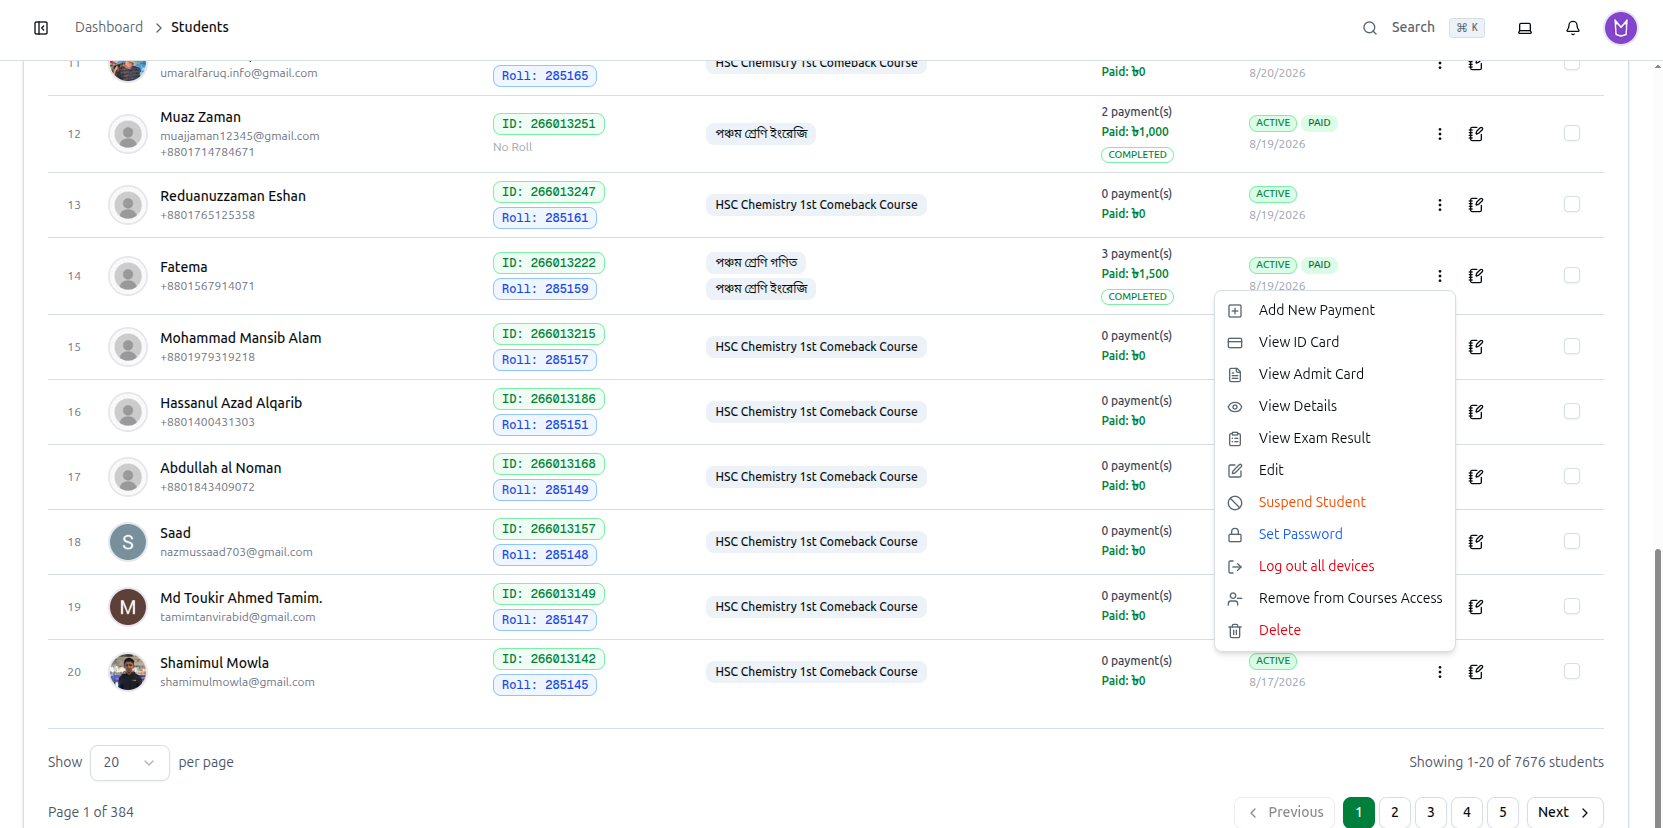
- Add New Payment — enroll this student in another course.
- View ID Card / View Admit Card — open the same designers as the bulk buttons above, scoped to this one student.
- View Details — opens the student's profile.
- View Exam Result — opens the same profile, directly on its Exams tab.
- Edit — edit personal information (name, mobile, blood group, DOB, guardian info, roll number, etc.).
- Suspend Student / Activate Student — the label flips depending on the student's current status.
- Set Password — manually overwrite the login password.
- Log out all devices — visible to Admins and Super Admins only. Asks for confirmation, then revokes every active session for that student.
- Remove from Courses Access — opens the student's profile Overview tab, where access is actually revoked; clicking the menu item itself doesn't remove anything.
- Delete — permanently removes the student.
6. Generating ID Cards and Admit Cards
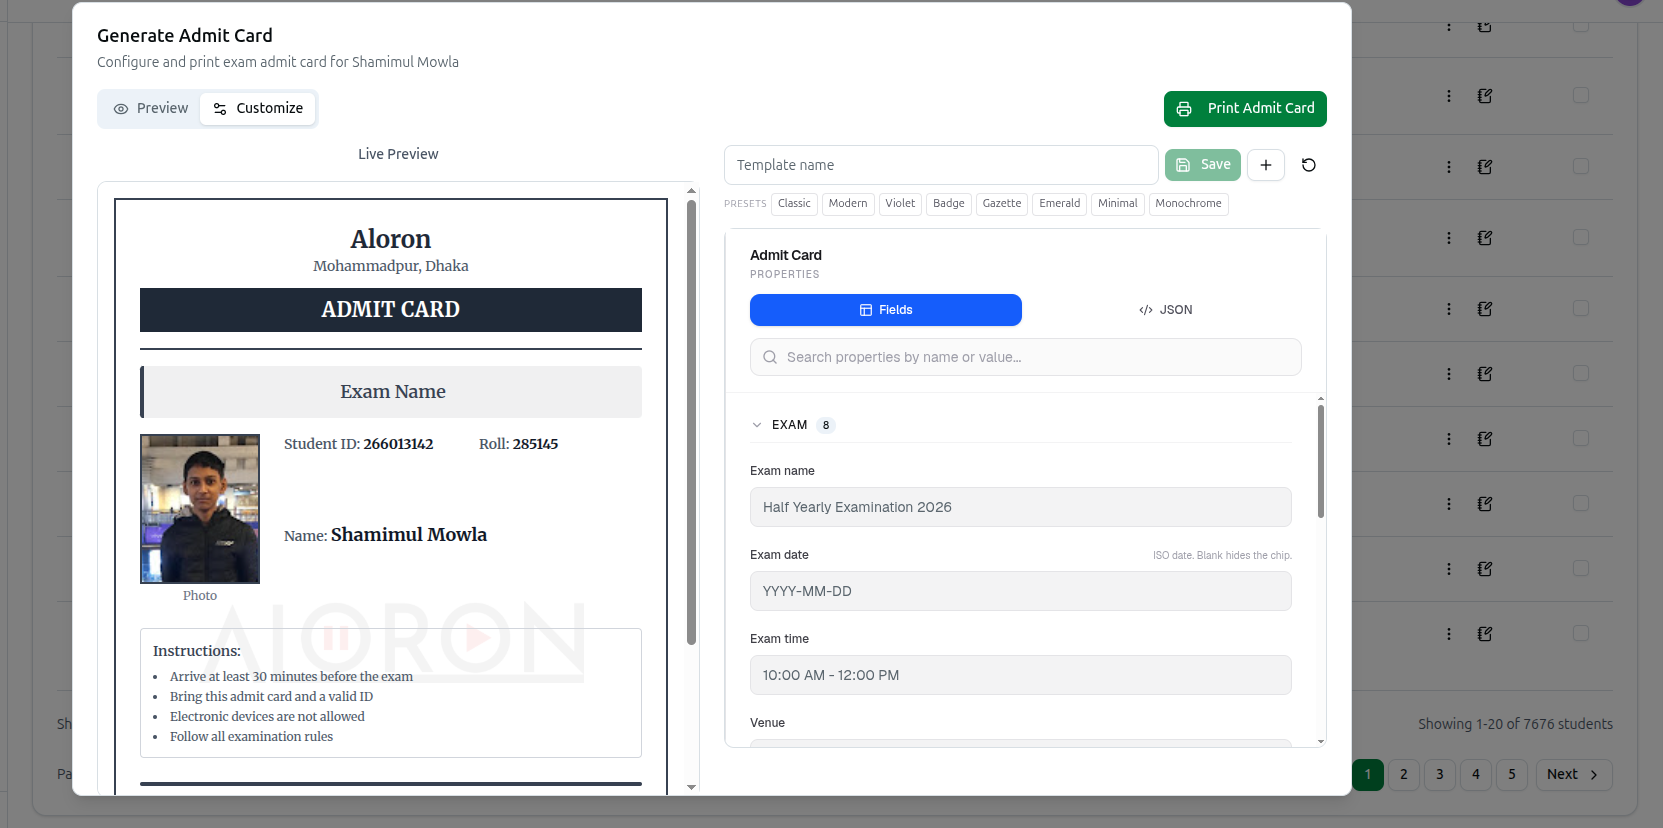
Both open the same Preview / Customize designer used from the student's own profile page. The full field-by-field customization reference — including all 8 Admit Card visual presets — lives in How to Manage a Student Profile.
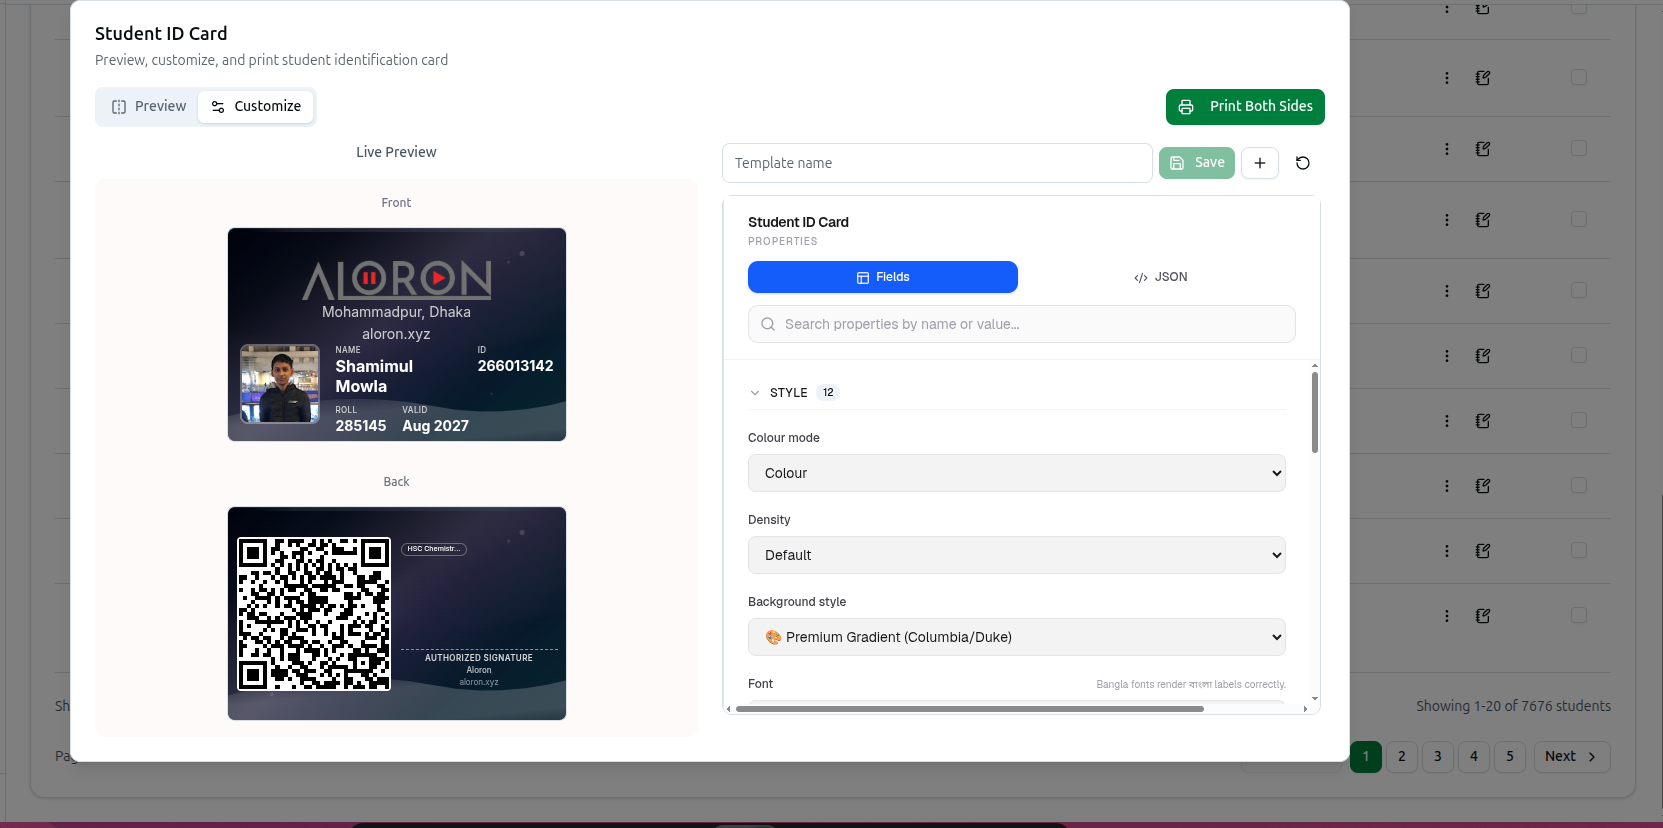
What's specific to generating cards from this list page, in bulk:
- Selecting several students and clicking ID Cards arranges up to 5 cards per A4 page for printing; the button reads Print All ID Cards. (A single student's own dialog instead offers Print Both Sides.)
- The bulk Admit Cards button reads Print All Admit Cards for the same reason. (A single student's dialog says Print Admit Card.)
- Admit Cards pull exam-specific fields — Class, Group, Subject — from the student's course record, so they're only meaningful for enrolled students.
Troubleshooting
| What you see | What it means |
|---|---|
| A CSV import landed students on the wrong tab | The course-required import on this page always creates Enrolled students. For leads with no course yet, use the Not Enrolled tab's own import instead |
| "Please select at least one course first to change batch" | The Batch bulk action needs exactly one course active in Filters before it will run |
| Log out all devices isn't in the menu | Only Admin/Super Admin roles see that item |
| Clicking Remove from Courses Access didn't remove anything | It opens the student's profile Overview tab — the actual removal happens there |
| You expected 8 design presets on an ID Card and only found 2 | The 8 visual presets belong to Admit Cards. ID Cards only offer a Default/Compact density choice, not full style presets |
Related: Find Students Without a Course · Enroll Students & Manage Payments · Manage a Student Profile · Send SMS and Bulk Messages