
Enrolling a Student (Creating a Payment)
Important: an Enrolled student always has a payment record behind them. Clicking Add Student on the Students page instead creates a Not Enrolled contact with no course — enrollment only happens through Create Payment.
Open it from Create Payment in the Students Management card on the Enrolled Students tab, or from a row's ⋮ → Add New Payment.
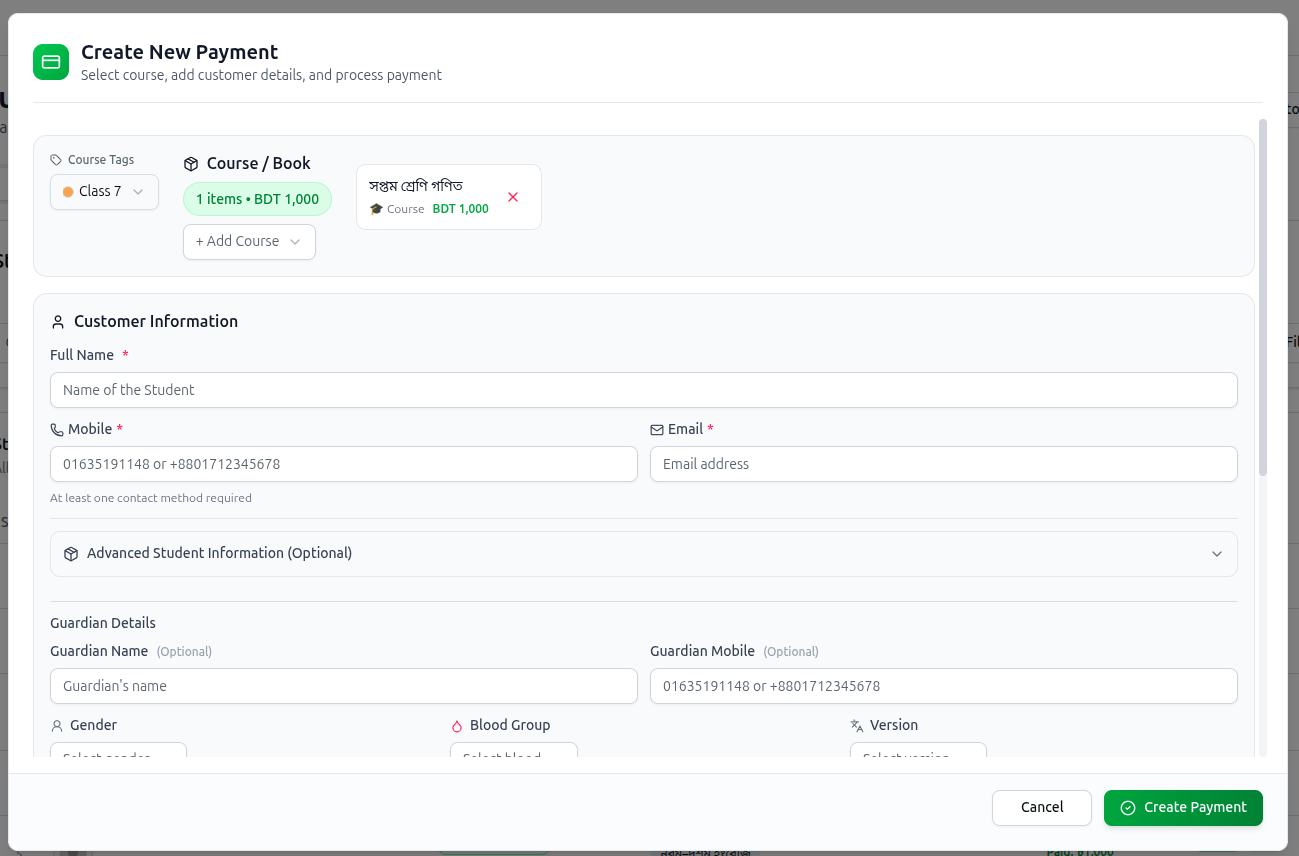
1. Course / Book Selection — pick one or more Course Tags, then use + Add Course to search and add the specific course, physical book, or PDF book. Any book or PDF attached as free-with-course ships automatically once the course is added — you don't add it separately.
2. Customer Information — Full Name is always required; you need at least one of Mobile or Email. As you type, the dialog runs a short debounced lookup and warns you if this person is already enrolled, showing their outstanding balance inline so you don't double-enroll them by mistake.
3. Advanced Student Information (optional, expandable) — Institute/School Name, Date of Birth, Student Address, Gender, Guardian Name, Guardian Mobile, Blood Group, and Version (English / Bangla / Others). Owners additionally get an Admission Date field to backdate the enrollment.
4. Payment Setup
- Payment Method — exactly seven options: bKash, Nagad, Credit/Debit Card, SSLCommerz, Cash, Free, Other.
- Discount Amount — a fixed currency amount, never a percentage, in either this dialog or the installment dialogs.
- Payment Note — an internal memo, visible only to admins.
5. Enable Installment Payment (optional) — this checkbox only appears when at least one selected course supports installments. Turn it on and you get either:
- a single Installment Amount + Next Payment Due Date pair, if only one selected course is installment-eligible, or
- a full per-course breakdown table — installment amount, discount, and due date for each installment-eligible course — when several are selected at once.
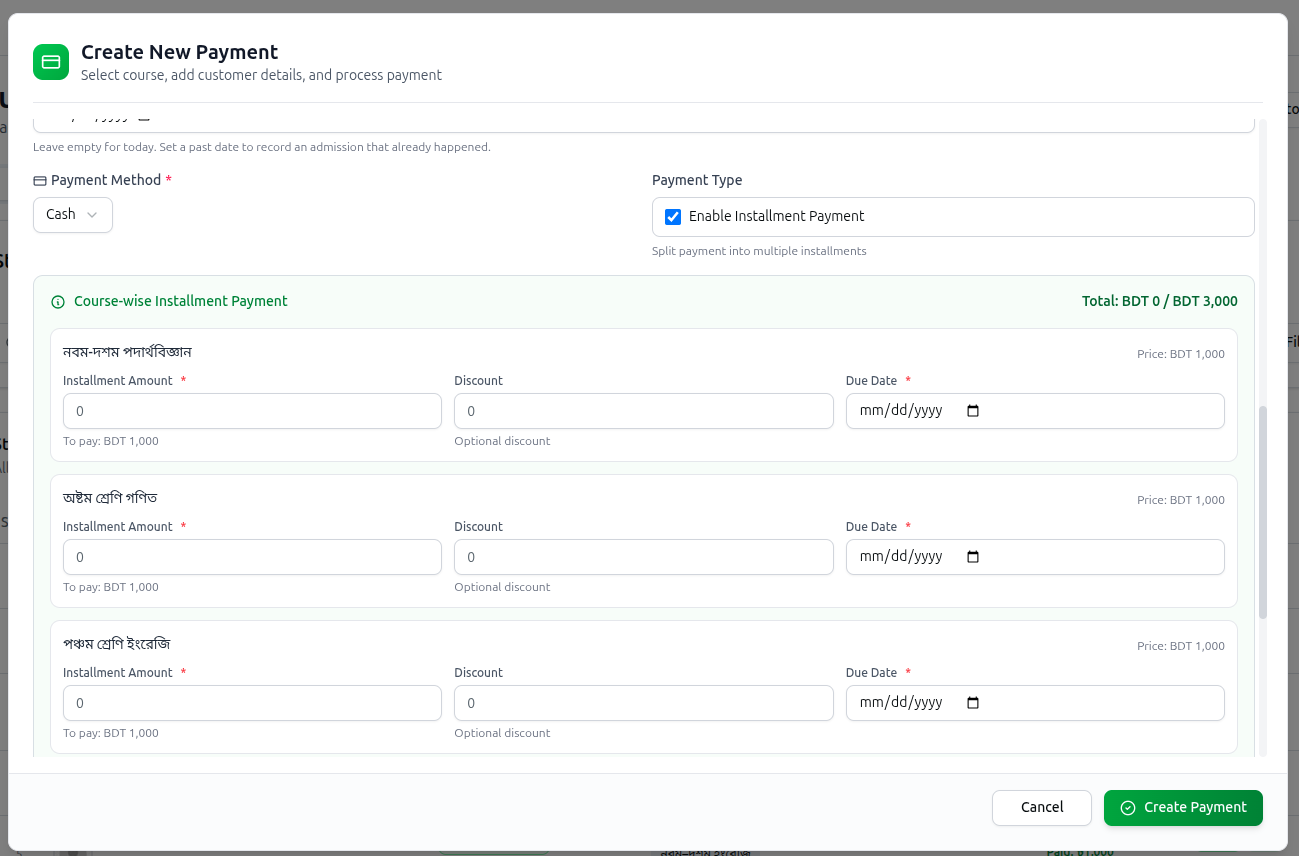
Leave it off and the full price is due immediately (or marked as one lump payment, if Free or Cash is selected).
6. Finish — click Create Payment. The student is enrolled in the selected course(s) the moment this succeeds.
Managing Installments After Enrollment
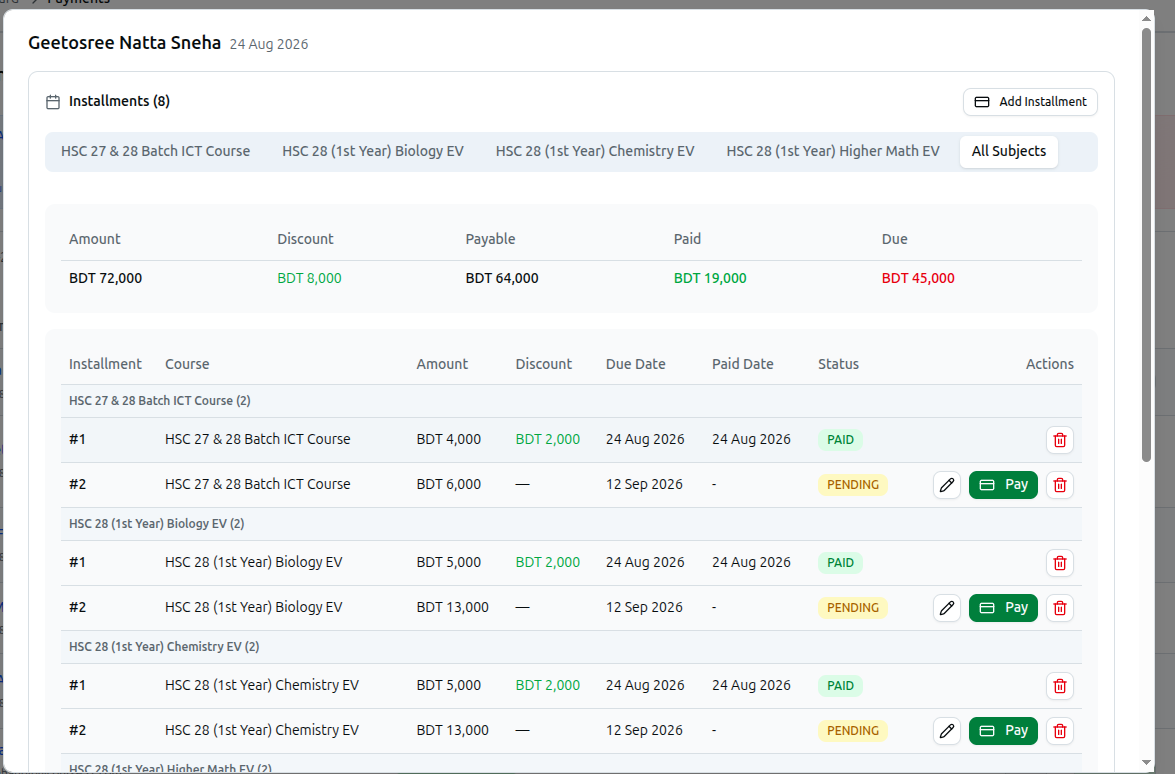
Everything that happens after a payment exists — adding or editing an installment, recording a partial payment, the Follow-up Status and Last Calling Date columns, and printing a two-copy receipt with a QR code — is covered in full, field-by-field, in How to Manage a Student Profile § 5–7. That guide is the canonical reference for the Payments tab; this page only covers getting a student enrolled in the first place.
Troubleshooting
| What you see | What it means |
|---|---|
| No Enable Installment Payment checkbox appears | None of the courses currently selected support installments |
| The installment fields look different from what you expected | One installment-eligible course shows a single amount/date pair; two or more show a full per-course breakdown table instead |
| A free book didn't show up as a separate line to add | Books/PDFs marked free-with-course attach automatically when you add the course — there's nothing extra to select |
| You need to record a payment on an already-enrolled student | Use the same Create Payment dialog from that student's row — see Manage a Student Profile for ongoing installment and receipt handling |
Related: Manage the Enrolled Students List · Manage a Student Profile · Track My Collection