
An OMR template is the design of your printed answer sheet — where the roll number boxes sit, how many questions there are, and where every bubble falls on the page. The scanner uses those coordinates to read filled sheets, so the template is what makes automatic marking possible.
Coaching Centers only. The OMR Template menu appears for organizations of that type. If you cannot see it in the sidebar under Assessment, check your organization type under Organization → Basic Info.
The Template List
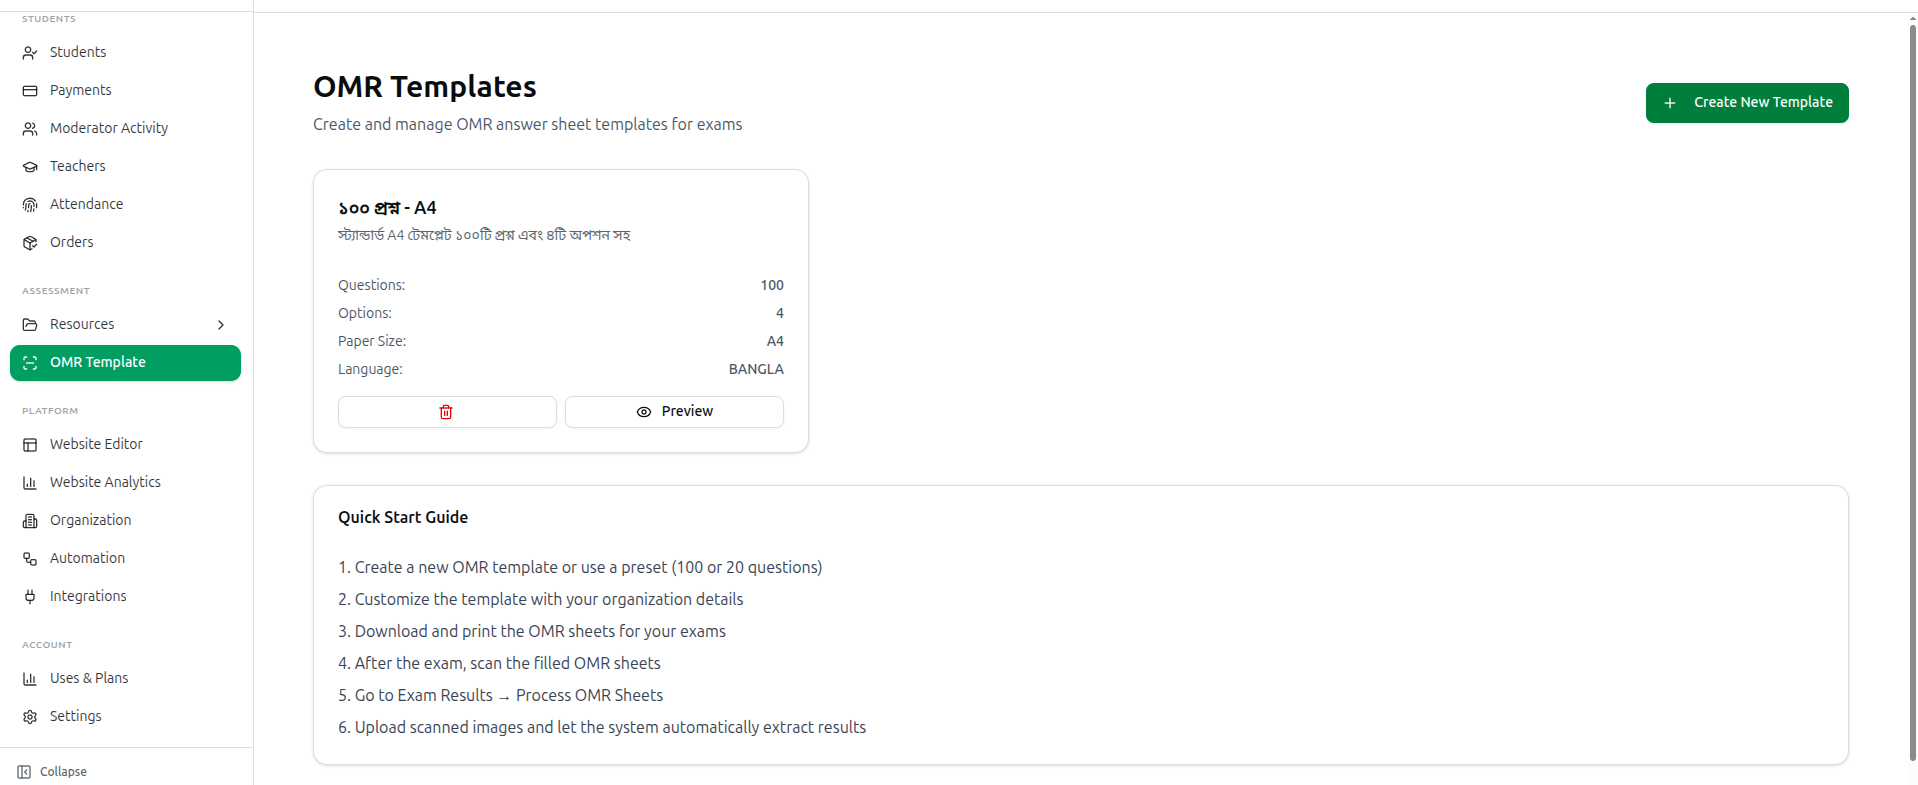
OMR Templates — Create and manage OMR answer sheet templates for exams.
Each template shows as a card with its name, description, and four key facts:
| Field | Example |
|---|---|
| Questions | 100 |
| Options | 4 |
| Paper Size | A4 |
| Language | BANGLA |
A Default badge marks the template used unless you choose otherwise. Two buttons sit at the bottom of each card: a red trash icon, and Preview.
Deleting asks Are you sure you want to delete this template? first.
With none created, the page reads No templates yet — Create your first OMR template to start processing student answer sheets automatically.
The Quick Start Guide at the bottom lays out the whole workflow: create a template or use a preset (100 or 20 questions), customise it with your organization details, print the sheets, run the exam, scan the filled sheets, then go to Exam Results → Process OMR Sheets and upload the images.
Creating a Template
Create New Template opens the editor.
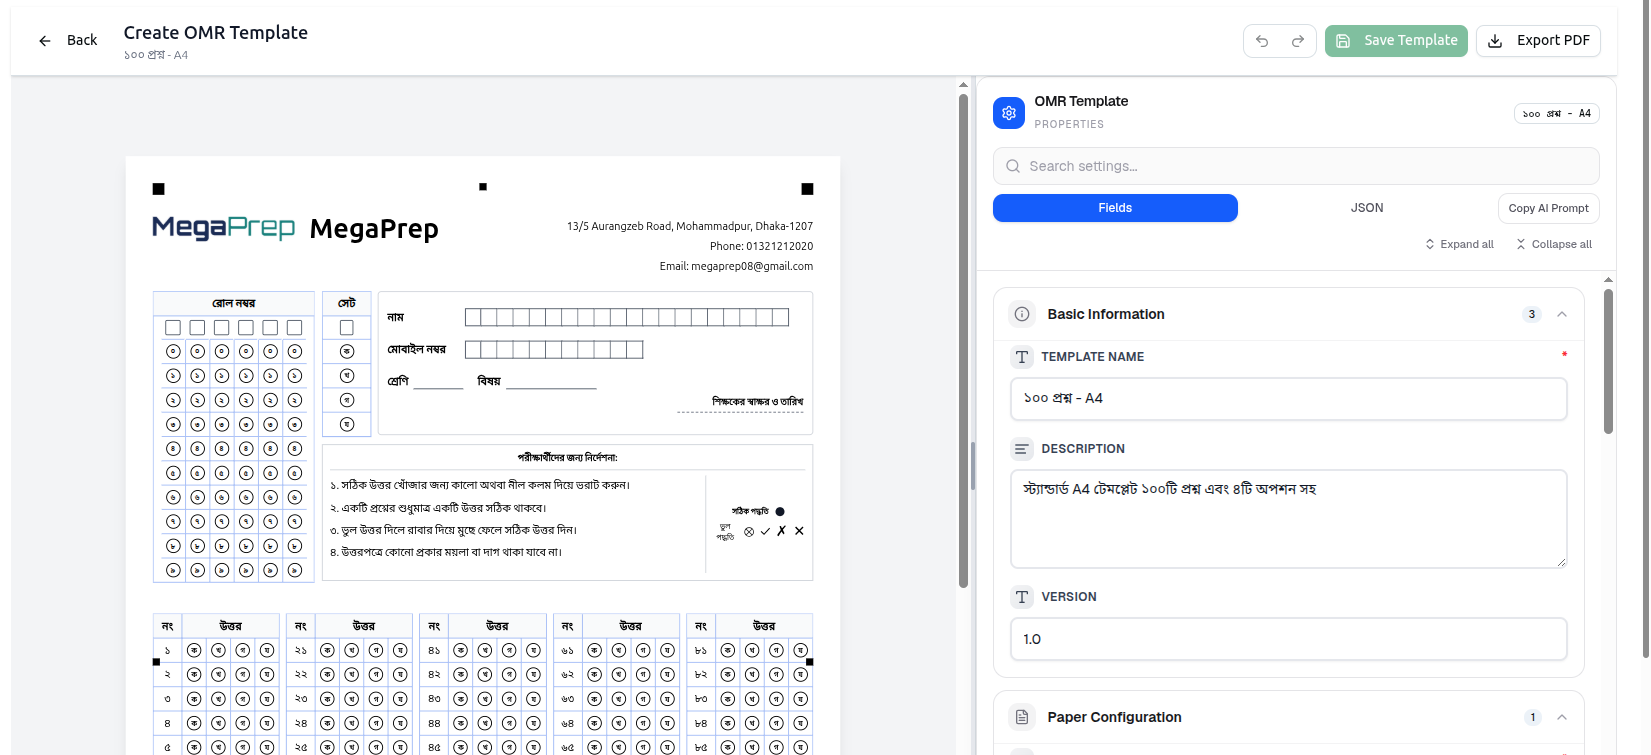
A new template starts from the 100-question A4 preset rather than a blank page — usually easier to adjust than to build from nothing.
The editor splits in two: the live sheet preview on the left, the properties panel on the right. Drag the divider between them to give either side more room.
The toolbar
- Back returns to the list.
- An Unsaved changes badge appears as soon as you edit anything.
- Undo and Redo — also Ctrl+Z and Ctrl+Y. Up to 50 steps are kept.
- Save Template — greyed out until you have made a change and given the template a name.
- Export PDF — prints the sheet, sized to A4 or Letter to match the template.
The Properties Panel
Headed OMR Template · PROPERTIES, it holds every setting, grouped into collapsible sections with a count of the fields in each.
- Search settings... jumps to a field by name — the fastest way around a long panel.
- Fields and JSON are two views of the same template. Fields is the form; JSON is the raw configuration, useful for copying a template between organizations.
- Copy AI Prompt copies a description of the template for use with an AI assistant.
- Expand all / Collapse all open or close every section.
Basic Information covers Template Name (required), Description and Version. Paper Configuration sets the page itself. Further sections cover the Roll Number grid, student fields, instructions, the answer grid, and Scan Settings (Detection) — the tolerances the scanner uses when reading bubbles.
Every change redraws the preview immediately.
What the Sheet Contains
The preview shows the parts that matter for scanning:
- Black registration squares in the corners. The scanner uses these to find and straighten the page — never crop or cover them when printing or photographing.
- Roll number grid — one column of digits per position.
- Set column — where students shade A, B, C or D, matching the set codes on your question sets.
- Student fields — name, mobile, class, subject, signature.
- Instructions — printed guidance with correct and incorrect shading examples.
- Answer grid — the numbered bubbles.
Your organization's name, address, phone, email and logo load automatically from your profile.
Saving
Save Template does more than store the form. It generates the bubble coordinates — the exact position of every bubble on the page — and validates them before saving. Success confirms Template saved with coordinates generated!
If saving fails with a coordinate validation error, the layout is geometrically impossible — bubbles overlapping, or running off the page. Reduce the question count, increase the paper size, or tighten the spacing, then save again. Nothing is stored until the coordinates check out, which is deliberate: a template with bad coordinates would silently misread every sheet.
Previewing and Printing
Preview on any card opens a read-only view with two buttons: Edit Template and Export PDF.
Print one sheet and check it before running off a class set. Confirm the corner squares are crisp and complete, the sheet is not scaled to fit, and the bubbles are cleanly separated. A template that scans badly is nearly always a printing problem rather than a design one.
Troubleshooting
| What you see | What it means |
|---|---|
| No OMR Template in the sidebar | Your organization is not a Coaching Center |
| Save Template is greyed out | No changes yet, or the Template Name is empty |
| Template name is required before saving | Fill in Template Name under Basic Information |
| Saving fails on coordinate validation | The layout does not fit. Fewer questions, larger paper, or tighter spacing |
| Scanned sheets read badly | Check the corner registration squares printed fully and the scan is flat and square-on |
| The wrong template appears when processing | Templates are chosen at scan time — pick the one matching the printed sheet |
Related: OMR Processing & CSV Upload · Question Sets & Answer Keys · Configure Basic Info