
Once students have sat a paper exam, their answers have to get into Course37. The Results & Analysis tab offers three routes, and you will usually use the first two together.
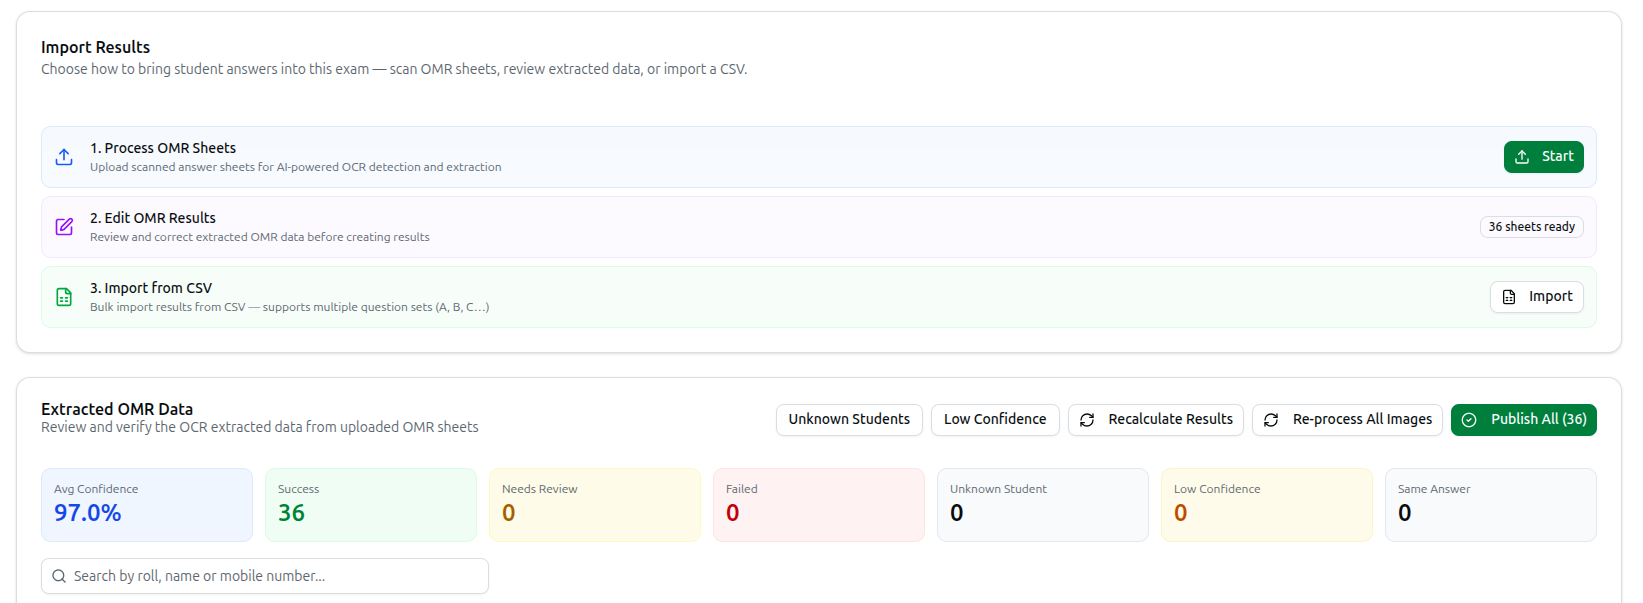
The Import Results panel — Choose how to bring student answers into this exam — scan OMR sheets, review extracted data, or import a CSV — lays them out in order:
| Step | What it does |
|---|---|
| 1. Process OMR Sheets | Upload scanned answer sheets for AI-powered OCR detection and extraction |
| 2. Edit OMR Results | Review and correct extracted OMR data before creating results |
| 3. Import from CSV | Bulk import results from CSV — supports multiple question sets (A, B, C…) |
Steps 1 and 2 are the scanning path. Step 3 is the alternative when marks already exist elsewhere.
Route 1 — Scanning OMR Sheets
Click Start on Process OMR Sheets.
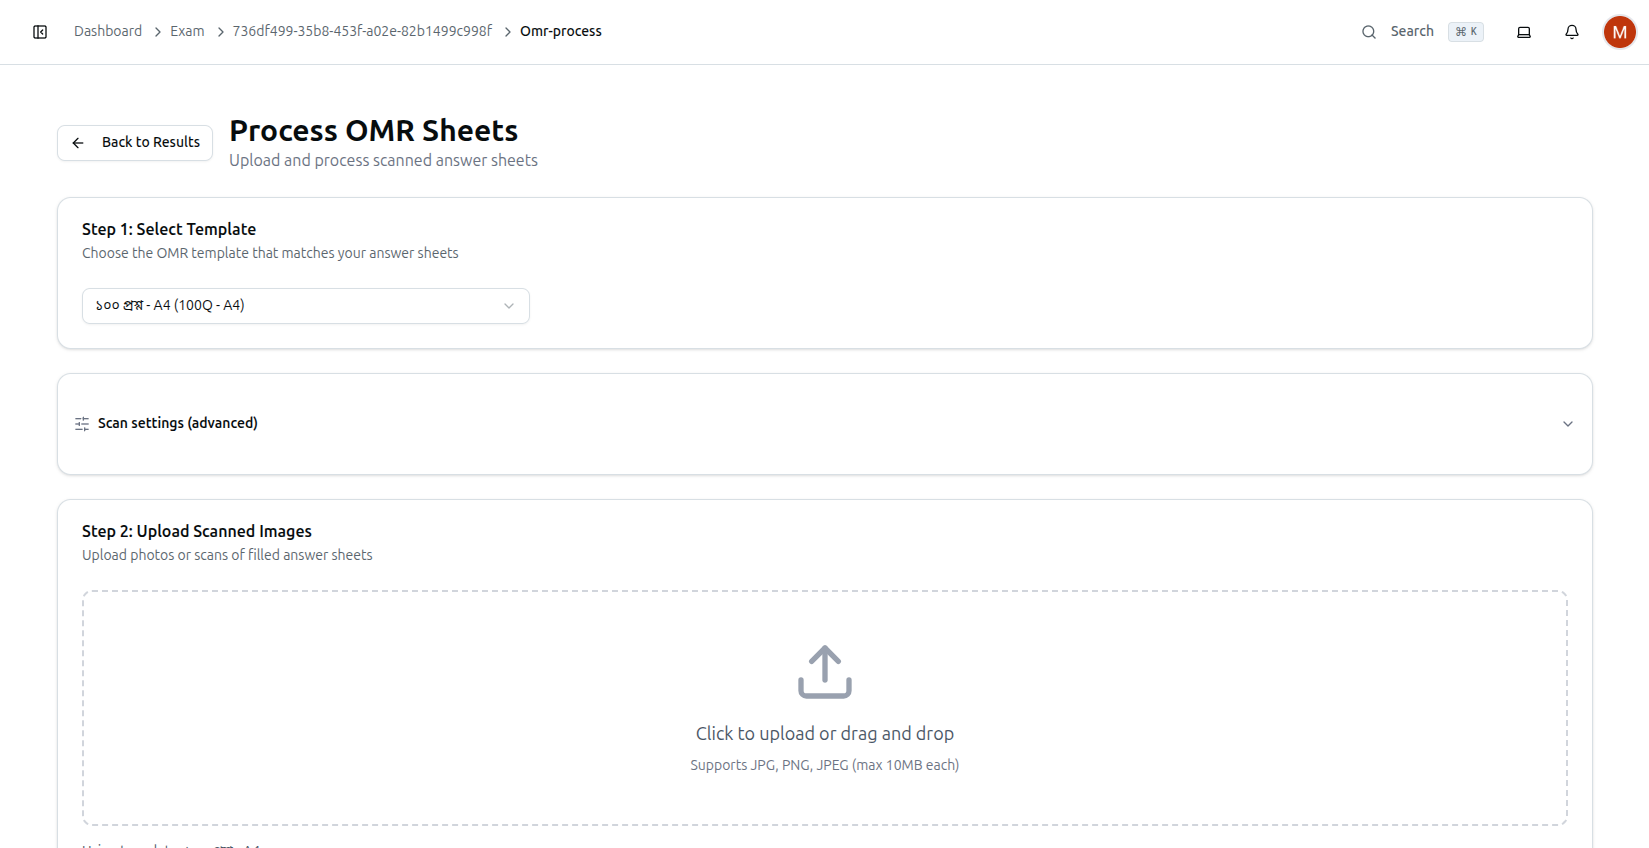
Step 1: Select Template — Choose the OMR template that matches your answer sheets. Pick the template the sheets were printed from, such as ১০০ প্রশ্ন - A4 (100Q - A4).
This must match the printed sheet exactly. The template tells the scanner where every bubble sits on the page. Choose a 100-question A4 template for sheets printed from a 50-question layout and nothing will read correctly.
Scan settings (advanced) holds tuning options you can usually leave alone — worth opening only if a batch scans badly.
Step 2: Upload Scanned Images — Upload photos or scans of filled answer sheets. Drag them in or click to browse. Supports JPG, PNG, JPEG (max 10MB each).
Photos from a phone work, not just flatbed scans — but flat, evenly lit, square-on images read far more reliably.
Reviewing What Was Extracted
After processing, Extracted OMR Data — Review and verify the OCR extracted data from uploaded OMR sheets — shows how it went.
Seven figures summarise the batch:
| Figure | Meaning |
|---|---|
| Avg Confidence | How certain the scanner is overall, such as 97.0% |
| Success | Sheets read cleanly |
| Needs Review | Sheets wanting a human check |
| Failed | Sheets that could not be read |
| Unknown Student | A roll number matching no student |
| Low Confidence | Individual reads the scanner is unsure about |
| Same Answer | Sheets where every answer is identical — usually a misread, occasionally a blank paper |
Aim for Failed, Unknown Student and Needs Review all at zero before publishing. A high Avg Confidence with a handful of unknown students still means those students get no marks. The Unknown Students and Low Confidence buttons filter straight to the problem rows.
Search by roll, name or mobile number finds one student in a large batch.
Recalculate Results re-scores everything against the current answer key — run it if you corrected a key after scanning. Re-process All Images runs the scan again from the original images, for when you fixed the template or scan settings.
When the numbers look right, Publish All (36) creates the results.
Route 2 — Importing a CSV
Click Import on Import from CSV to open Import Exam Results.
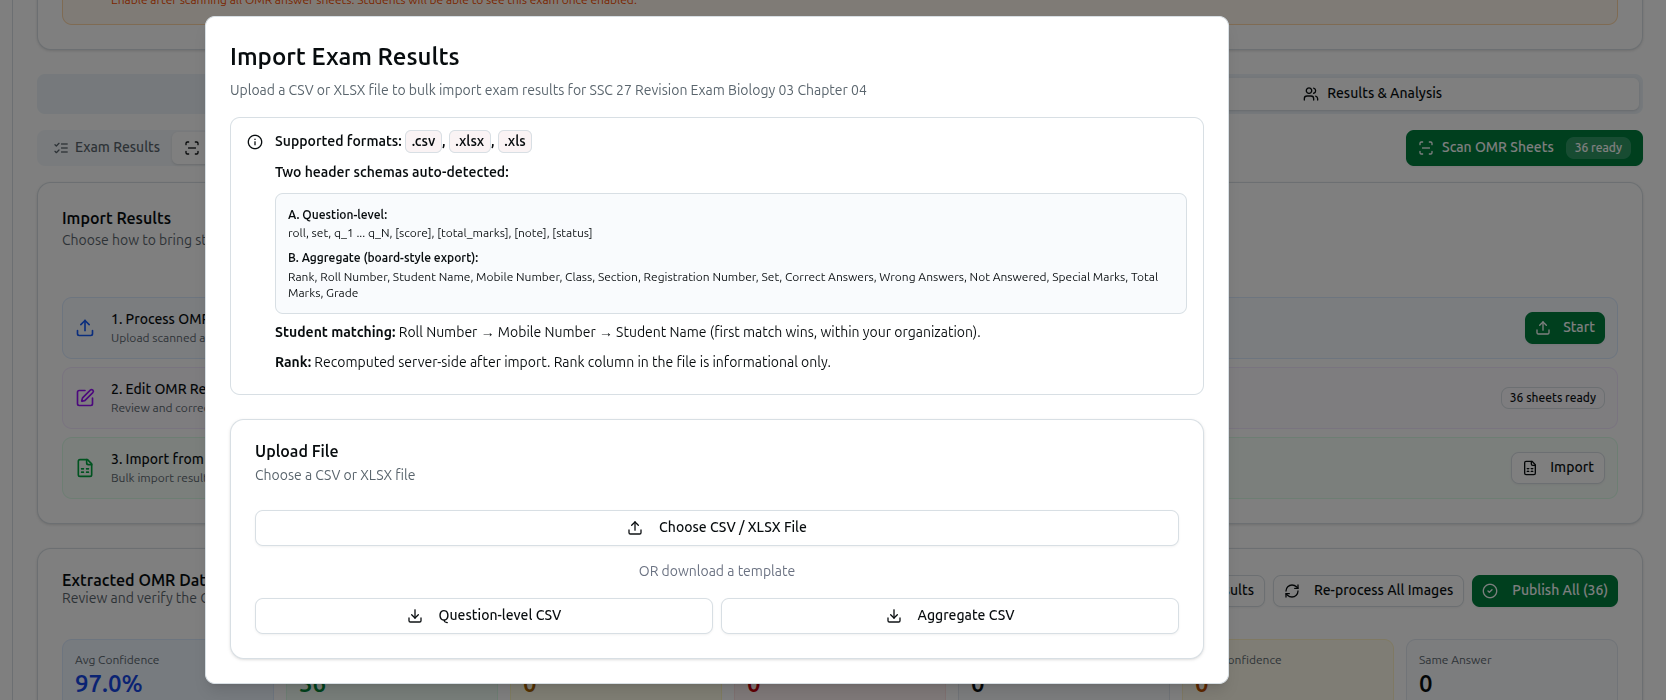
Supported formats: .csv, .xlsx, .xls.
Two Header Schemas, Detected Automatically
A. Question-level — every answer, so Course37 marks them:
roll, set, q_1 ... q_N, [score], [total_marks], [note], [status]
B. Aggregate (board-style export) — final marks already calculated:
Rank, Roll Number, Student Name, Mobile Number, Class, Section,
Registration Number, Set, Correct Answers, Wrong Answers,
Not Answered, Special Marks, Total Marks, Grade
You do not choose between them — the file's headers decide. Download a template with Question-level CSV or Aggregate CSV rather than building the header row by hand.
Note the set column in both: this is what supports multiple question sets (A, B, C…), routing each student's answers to the right key.
How Students Are Matched
Roll Number → Mobile Number → Student Name (first match wins, within your organization).
Roll number is tried first, then mobile, then name. Name-only matching is the fragile one — two students called Rahim and the first found wins. Include roll numbers wherever you can.
Rank Is Recalculated
Rank: Recomputed server-side after import. Rank column in the file is informational only.
A Rank column in your spreadsheet is ignored. Course37 works out positions itself after importing, so you cannot import a hand-adjusted ranking.
Publishing to Students
Importing results does not reveal them. For an offline exam, students see nothing until OMR Scan Completed is switched on in Exam Information.
That is deliberate — it stops anyone seeing a half-scanned result.
Full guide: Managing Exams, Questions and Results
Troubleshooting
| What you see | What it means |
|---|---|
| Everything reads wrong | The wrong template was selected — it must match the printed sheet |
| Unknown Student above zero | Those roll numbers match no student. Click Unknown Students to see them |
| Same Answer above zero | Usually a misread or a blank sheet — check those images |
| Low Avg Confidence | Poor scans. Re-photograph flat and evenly lit, then Re-process All Images |
| Marks are wrong after fixing a key | Run Recalculate Results |
| CSV import matched the wrong student | Matching fell through to name. Add roll numbers |
| Your Rank column was ignored | Expected — rank is always recomputed after import |
| Students still cannot see results | OMR Scan Completed is still off on the exam |
Related: Question Sets & Answer Keys · OMR Templates · Printable Question Papers