
How to Upgrade Subscription Plans
When you're ready to scale your educational business, upgrade your subscription from the Upgrade Plans tab on the Uses & Plans page (/dashboard/uses-and-plans).
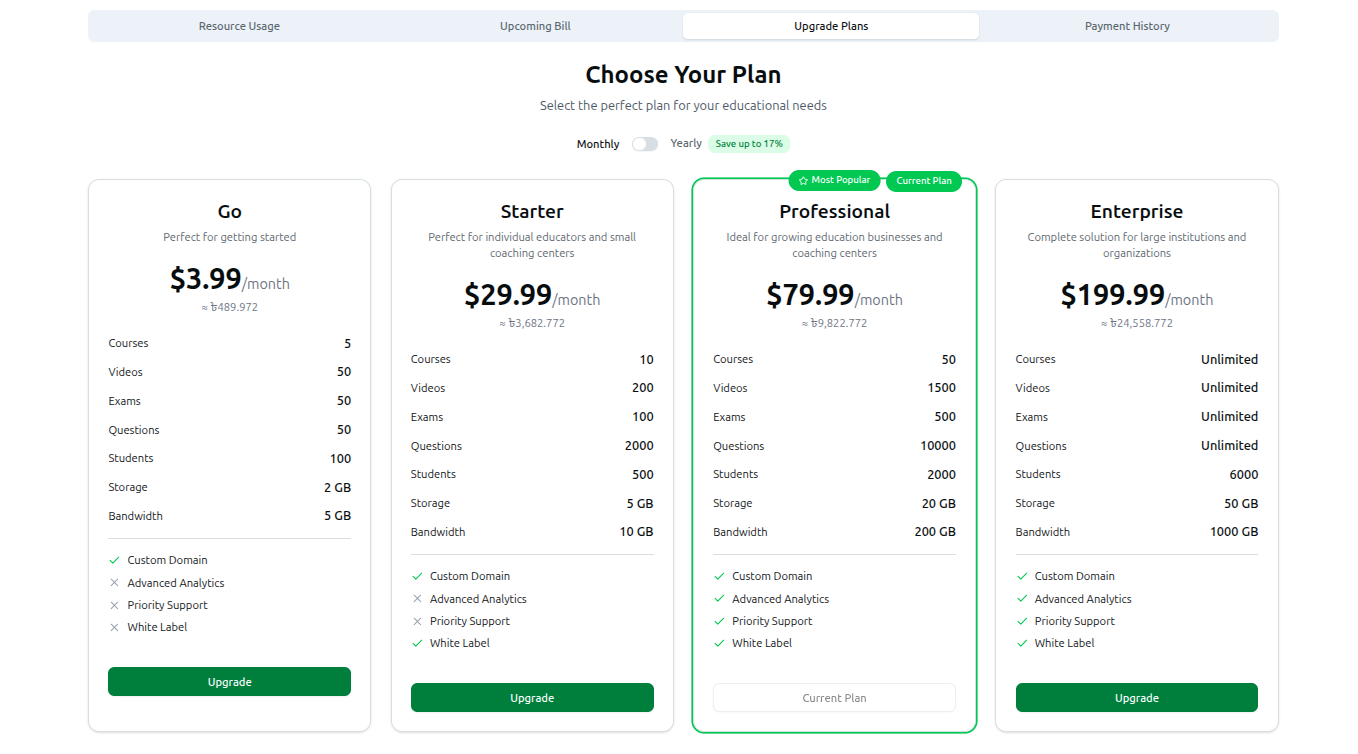
- Monthly vs. Yearly: Use the toggle at the top to switch between Monthly and Yearly billing. Yearly billing includes a built-in discount (e.g., "Save up to 17%").
- Choosing a Tier: Review the available tiers — Go, Starter, Professional, and Enterprise (there is no free tier; Go is the entry-level paid plan). Each tier lists its specific limits for Courses, Videos, Exams, Questions, Students, Storage, and Bandwidth, along with 4 premium features shown as checkmarks: Custom Domain, Advanced Analytics, Priority Support, and White Label.
- Checkout Process:
- Click the Upgrade button under your desired plan.
- A Complete Your Purchase dialog opens showing the price in ৳ (with a USD equivalent) and, for yearly billing, how much you save compared to paying monthly.
- Payment is processed through SSLCommerz — the dialog isn't asking you to choose a gateway, it just confirms Secure checkout and Instant activation. SSLCommerz itself accepts local & international cards, mobile banking (bKash, Nagad, etc.), and internet banking on its own payment page.
- Enter your Phone number (required by SSLCommerz for the receipt) and click Pay with SSLCommerz.
- You're redirected to the SSLCommerz payment page to complete the transaction, then brought back automatically once payment succeeds.
Related: Managing Usage, Plans & Settings — Full walkthrough