
Managing Usage, Plans, and Settings
Keeping track of your platform's limits, upgrading your subscription, and maintaining your personal account security are crucial parts of running your LMS smoothly.
How to get here: Look at your left-hand sidebar menu, scroll down to the Account section, and click on Uses & Plans or Settings.
Part 1: Uses & Plans
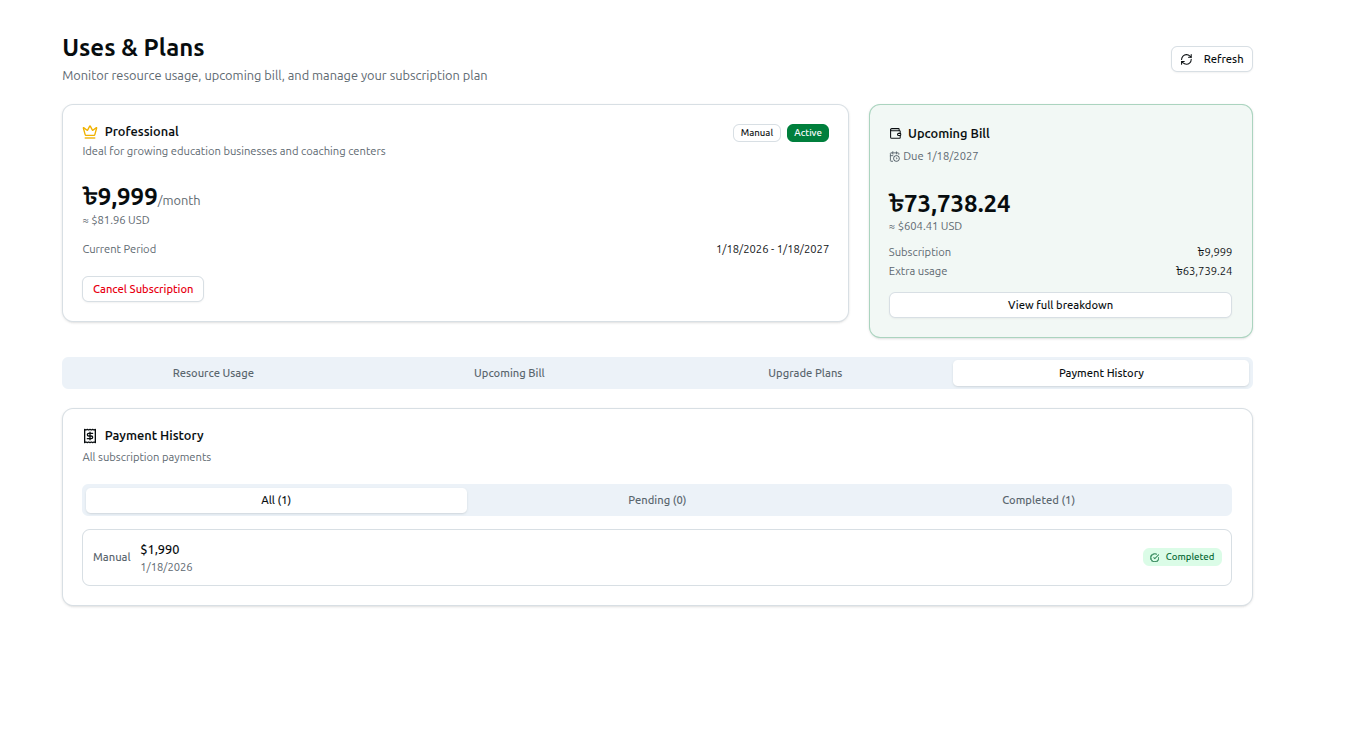
The Uses & Plans page (/dashboard/uses-and-plans) is your billing and resource dashboard.
1. Current Plan & Upcoming Bill
At the top of the page, two cards summarize your subscription at a glance:
- Current Plan — shows your plan name and description, a payment gateway badge (Stripe, SSLCommerz, or Manual for subscriptions an admin recorded by hand), a status badge (Active, etc.), the price per month/year in ৳ with a USD equivalent, your current billing period dates, total paid to date, and a warning banner if your subscription is set to cancel at period end. Stripe subscriptions get a Manage Billing button (opens the Stripe billing portal); active subscriptions also get a Cancel Subscription button.
- Upcoming Bill — shows the estimated total due on your next billing date (in ৳ and USD), split into Subscription and Extra usage amounts, with a View full breakdown button that jumps to the Upcoming Bill tab.
Click Refresh in the page header at any time to reload all the data below.
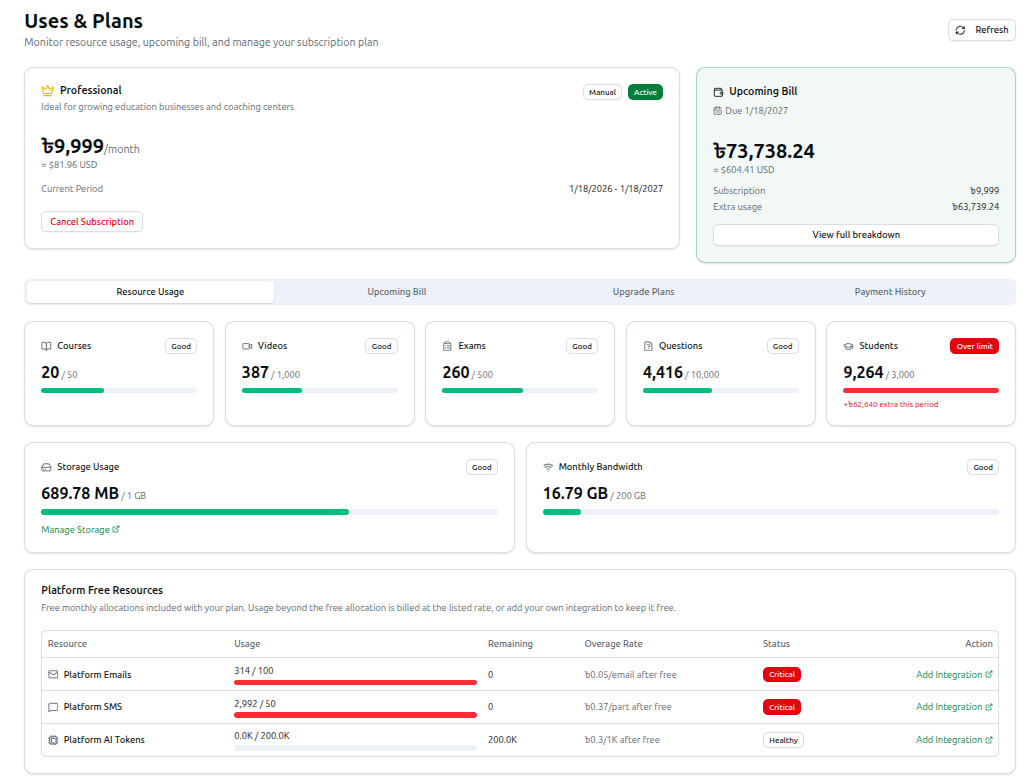
2. Resource Usage tab
This tab provides a real-time overview of how much of your current plan's allocation you have consumed.
- Detailed Usage Bars: Five cards track Courses, Videos, Exams, Questions, and Students, each showing
{used} / {limit}and a status badge — Good, Warning (75%+ used), Critical (90%+ used), Over limit, or Unlimited if your plan has no cap on that resource. A resource over its limit also shows an extra-charge note (e.g. "+৳62,640 extra this period"). - Storage & Bandwidth: Two more cards track file Storage Usage (with a Manage Storage shortcut) and Monthly Bandwidth, using the same badge/limit format.
- Platform Free Resources: A table lists free monthly allocations included with your plan — Platform Emails, Platform SMS, and Platform AI Tokens — with columns for Usage, Remaining, Overage Rate, and Status (Healthy, Warning, or Critical), plus an Add Integration action to connect your own provider and avoid overage charges.
Any usage counted above your resource limits appears as Extra usage on your Upcoming Bill.
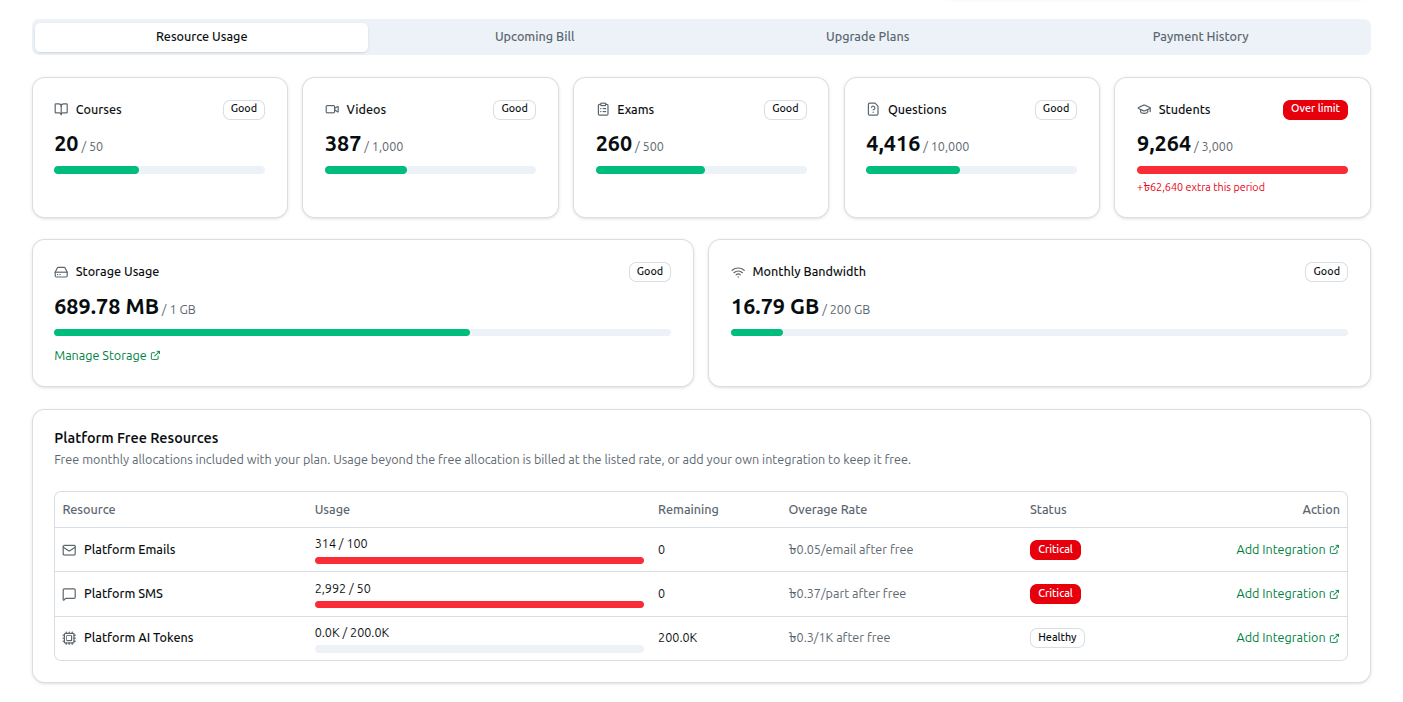
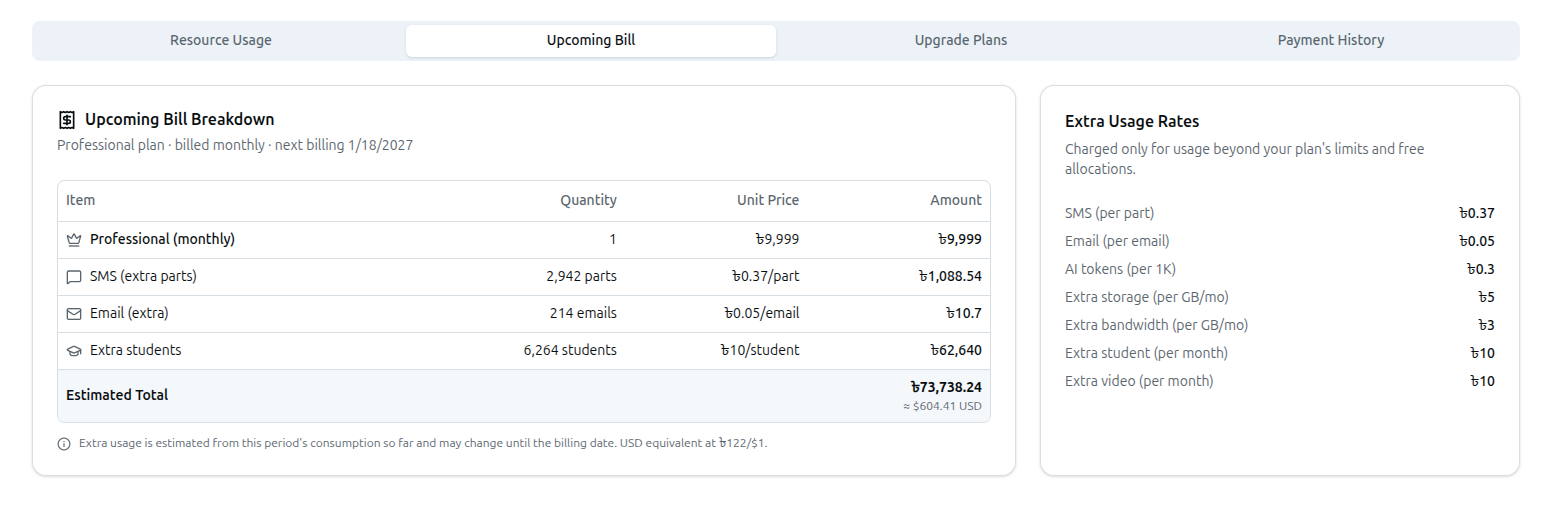
3. Upcoming Bill tab
This tab shows exactly what you'll be charged next billing cycle:
- A line-item table lists your Subscription charge plus any overages — extra SMS, email, AI tokens, storage, bandwidth, students, or videos beyond your plan's free allocation — each with quantity, unit price, and amount.
- An Estimated Total row sums everything, shown in ৳ with a USD equivalent.
- An Extra Usage Rates card on the side lists the per-unit price for each overage type, so you know the rate before you exceed a limit.
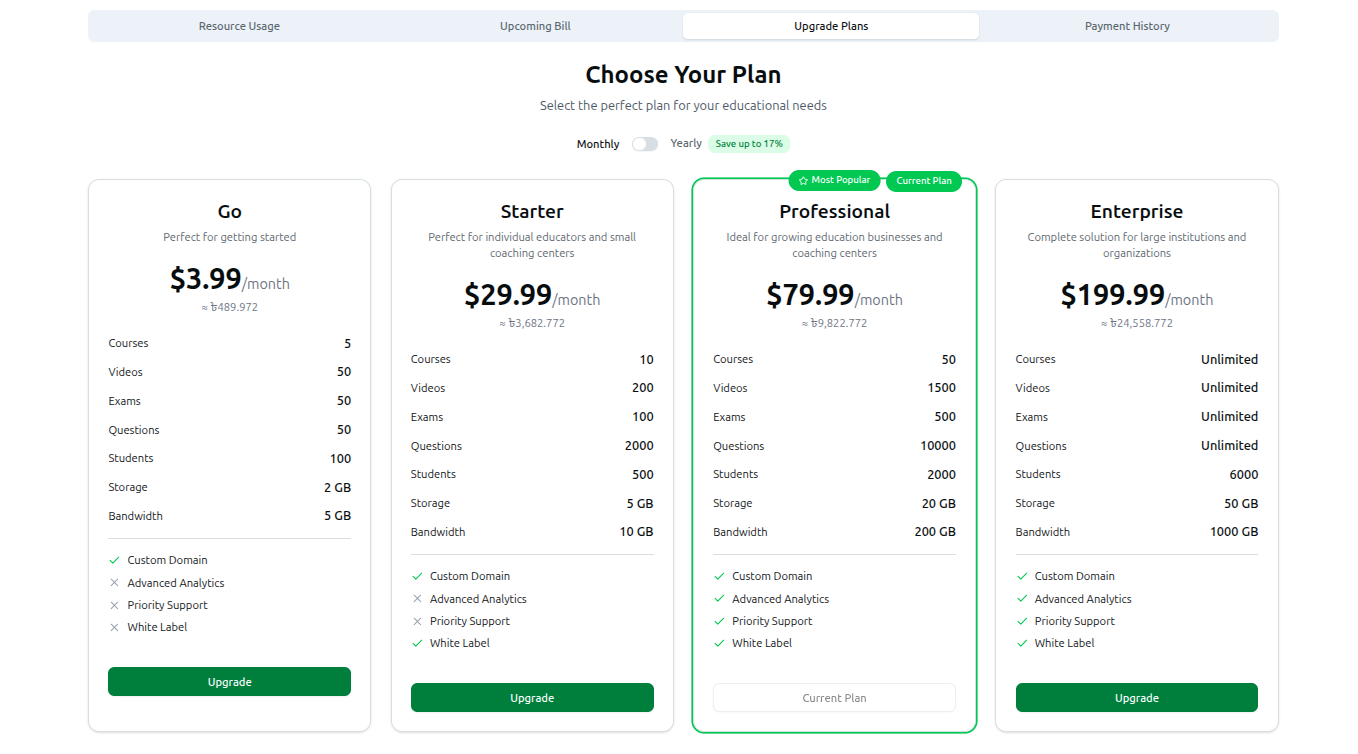
4. Upgrade Plans tab
When you are ready to scale your educational business, you can upgrade your subscription here.
- Monthly vs. Yearly: Use the toggle at the top to switch between Monthly and Yearly billing. Yearly billing includes a built-in discount (e.g., "Save up to 17%").
- Choosing a Tier: Review the available tiers — Go, Starter, Professional, and Enterprise (there is no free tier; Go is the entry-level paid plan). Each tier lists its specific limits for Courses, Videos, Exams, Questions, Students, Storage, and Bandwidth, along with 4 premium features shown as checkmarks: Custom Domain, Advanced Analytics, Priority Support, and White Label.
- Checkout Process:
- Click the Upgrade button under your desired plan.
- A Complete Your Purchase dialog opens showing the price in ৳ (with a USD equivalent) and, for yearly billing, how much you save compared to paying monthly.
- Payment is processed through SSLCommerz — the dialog isn't asking you to choose a gateway, it just confirms Secure checkout and Instant activation. SSLCommerz itself accepts local & international cards, mobile banking (bKash, Nagad, etc.), and internet banking on its own payment page.
- Enter your Phone number (required by SSLCommerz for the receipt) and click Pay with SSLCommerz.
- You're redirected to the SSLCommerz payment page to complete the transaction, then brought back automatically once payment succeeds.
5. Payment History tab
This tab maintains a ledger of your financial transactions with the platform.
- Use the All / Pending / Completed filter tabs (each with a live count) to narrow the list.
- Each entry shows the payment gateway (Stripe, SSLCommerz, or Manual), amount, date, and a status badge — completed payments show a green checkmark, failed ones show an X.
Part 2: Account Settings
The Settings page (/dashboard/settings) manages your personal profile, your signed-in devices, and (for organization owners) the student device-login policy.
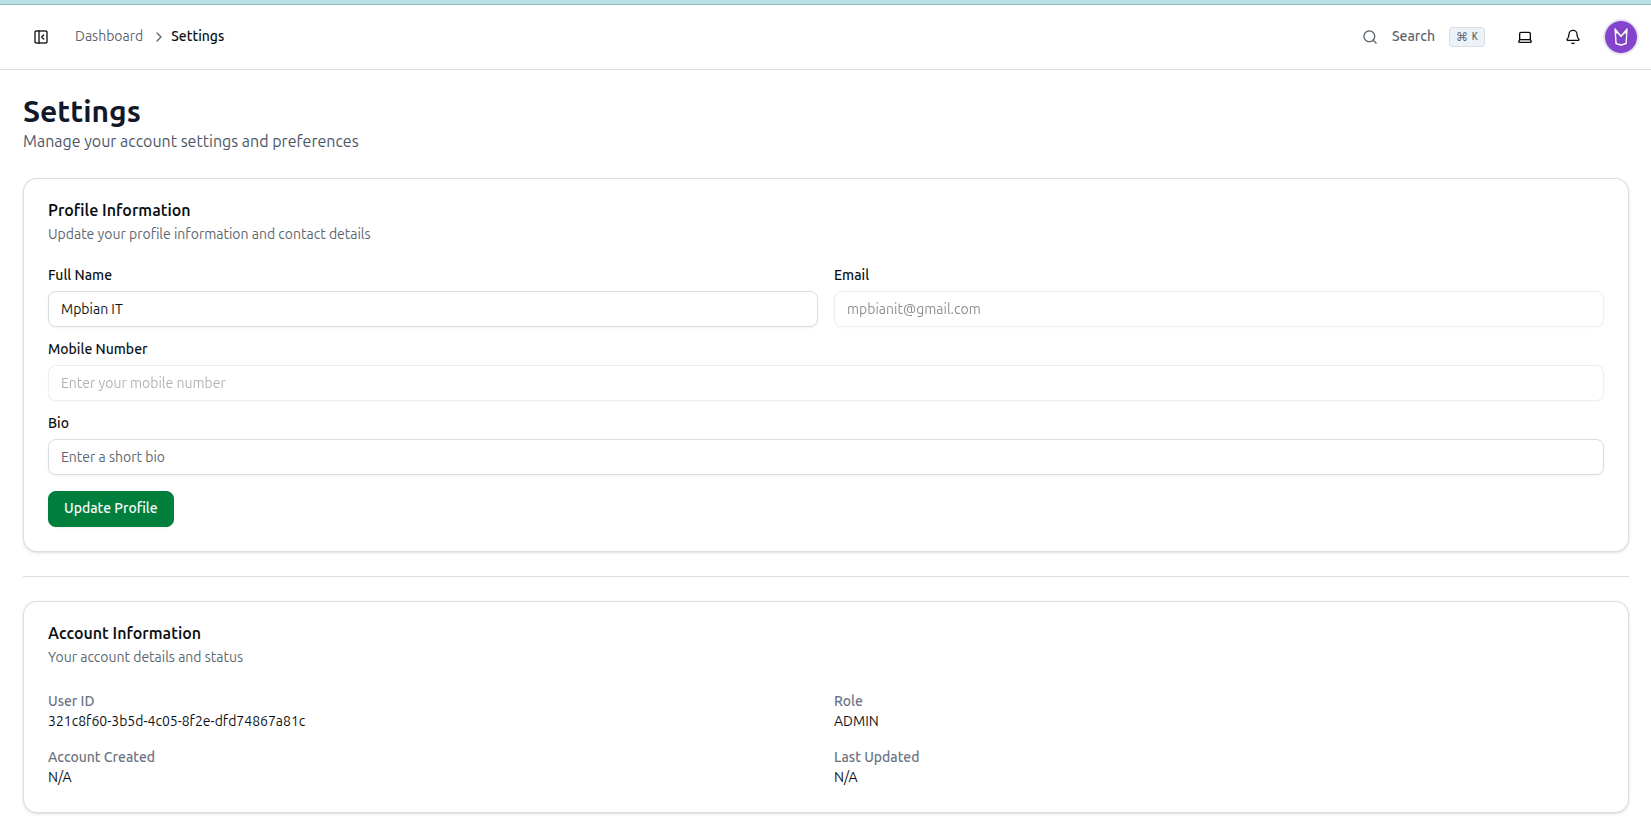
1. Profile Information
- Update your Full Name and Bio — both are editable.
- Email and Mobile Number are shown for reference but are read-only on this page and cannot be changed here.
- Click Update Profile to save your changes.
2. Active Devices
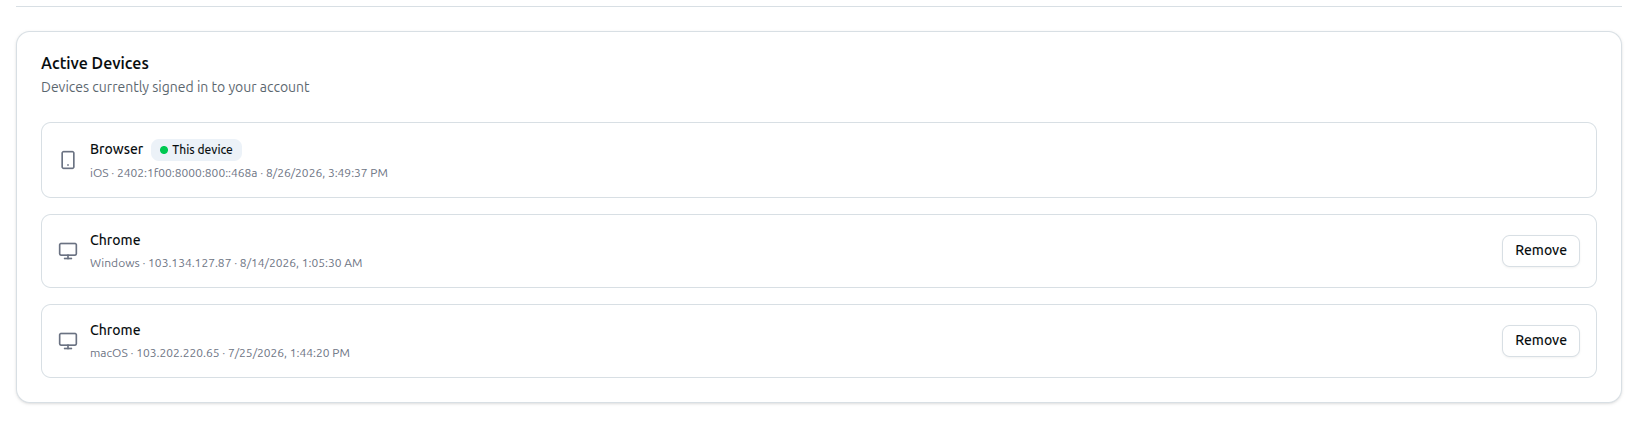
Every device currently signed in to your account is listed here, with its browser, an OS-based icon (phone icon for Android/iOS, monitor icon otherwise), IP address, and sign-in date. Your current device is marked with a This device badge; click Remove next to any other device to sign it out remotely.
3. Student device limit
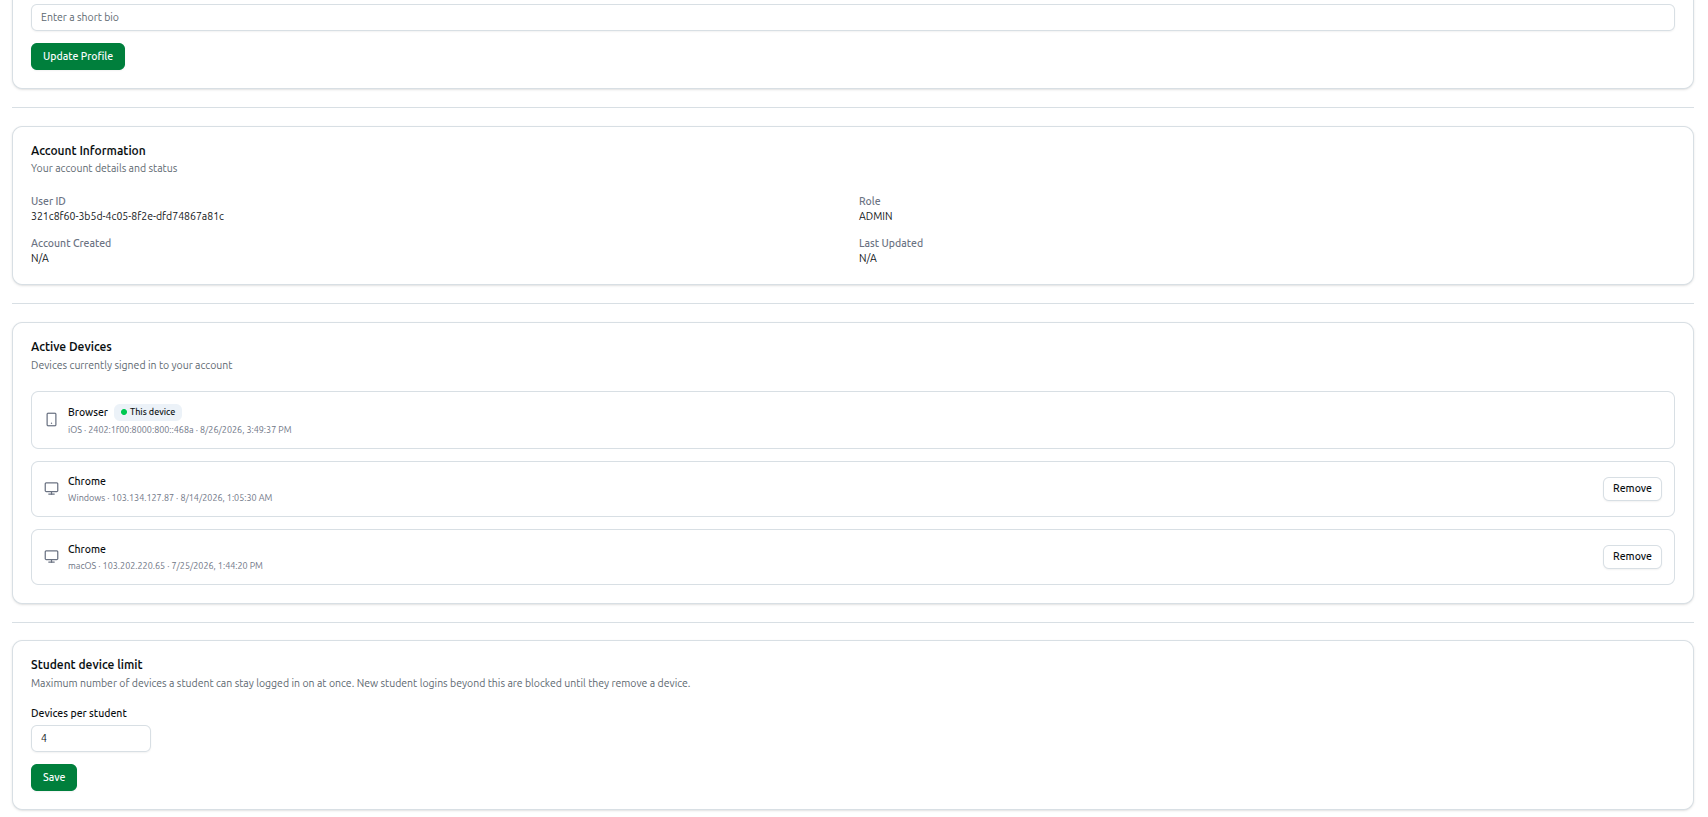
Organization owners can set the maximum number of devices a student is allowed to stay logged in on at once (1–20, default 4). New student logins beyond this limit are blocked until the student removes a device. Adjust the number and click Save to apply it.
4. Account Information
A read-only section displaying your backend system details:
- User ID: Your unique alphanumeric identifier in the database.
- Role: Your current permission level (e.g., ADMIN).
- Account Created & Last Updated: Timestamps showing when your profile was created and when it was last modified.

Looking to change your password? That's not on this page — see How to Update Account Security.