
Automation Overview
The Workflow Automation system lets you build visual "if-this-then-that" processes — payment reminders, live-class notifications, tagging students automatically — that run entirely in the background once activated.
The Automation Dashboard
Navigate to Dashboard > Automation.
- Stats cards: Total Workflows, Active (count with status
ACTIVE), Total Executions (summed across every workflow), and Scheduled (workflows that are bothACTIVEand trigger typeSCHEDULE). - Filter tabs: All, Active, Draft, Paused — filters the list below.
- Browse Templates and Create Workflow buttons, top-right.

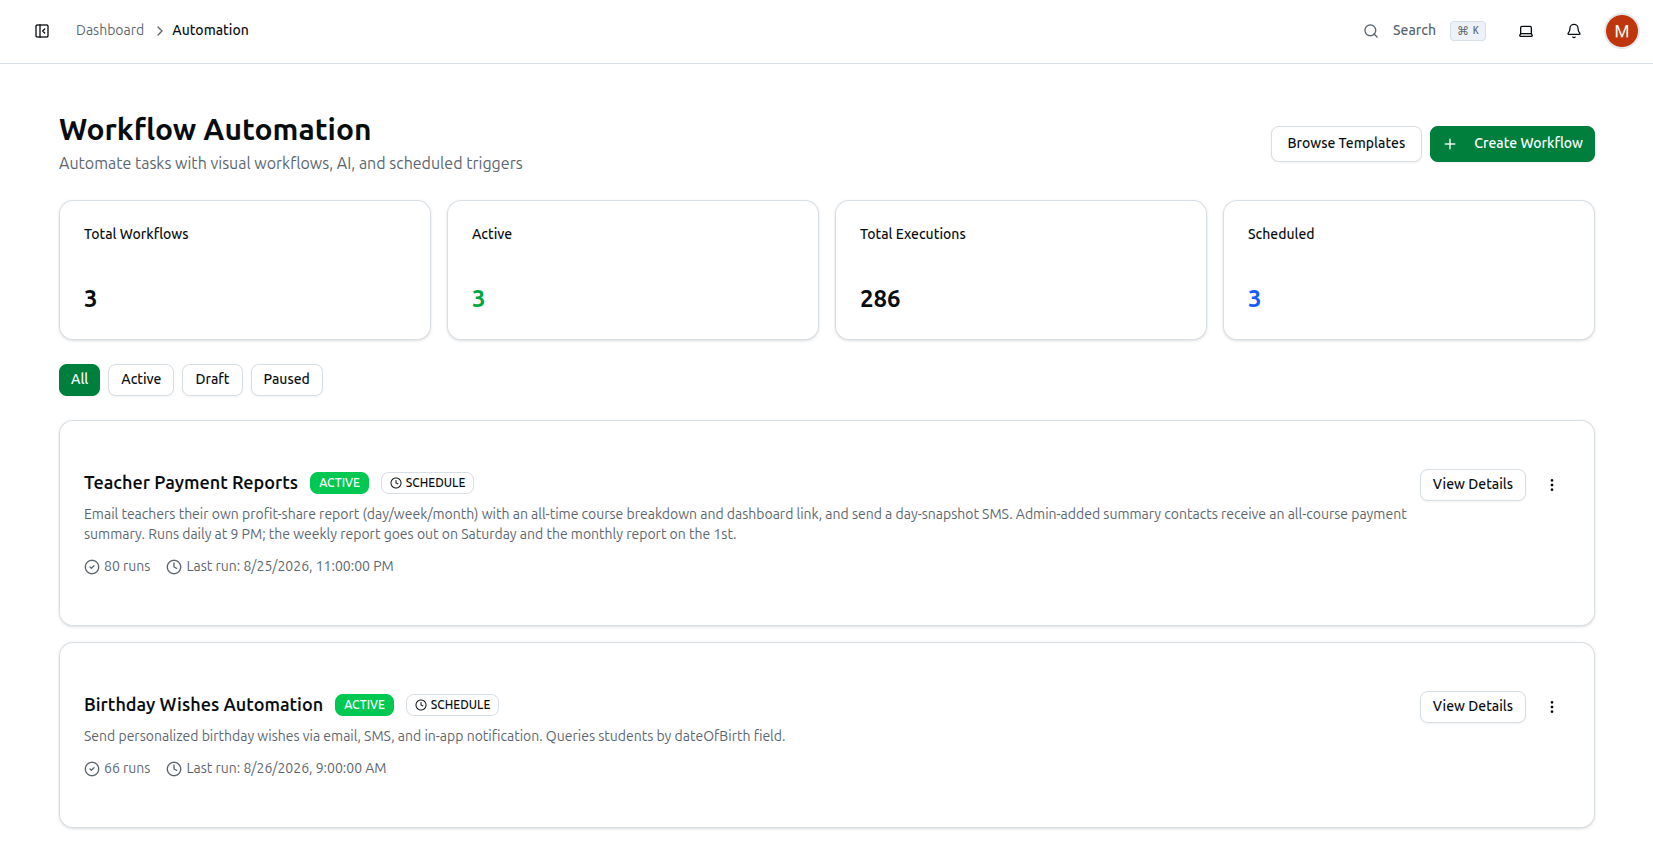
Each workflow card shows its name (linking to the editor), a status badge, a trigger-type badge with an icon (Manual ▶, Schedule 🕐, Event ⚡, Webhook, Date Condition 📅), its description, run count, and — when applicable — Last run and Next run timestamps.
Managing Existing Workflows

Each card's ⋮ menu and inline buttons:
- Activate / Pause: Toggles between the two — only an ACTIVE workflow actually listens for its trigger; pausing keeps the configuration intact.
- Run Now: Fires the workflow immediately. On this list page it only appears when the workflow is both Active and trigger type Manual — a scheduled or event-based workflow doesn't get this shortcut here (though it does on the workflow's own detail page — see below).
- Duplicate: Creates an exact copy, useful for testing a change without touching the live version.
- Delete: Permanently removes the workflow, after a browser confirmation prompt.
Workflow Statuses
| Status | Meaning |
|---|---|
| DRAFT | Being built; does not execute. |
| ACTIVE | Live and listening for its trigger. |
| PAUSED | Temporarily disabled; configuration is kept. |
| ARCHIVED | Retired but kept for historical record. |
Browsing Templates
Click Browse Templates to open a category-filtered gallery of pre-built workflows — categories are All, Attendance, Communication, Content, Payment, Student.
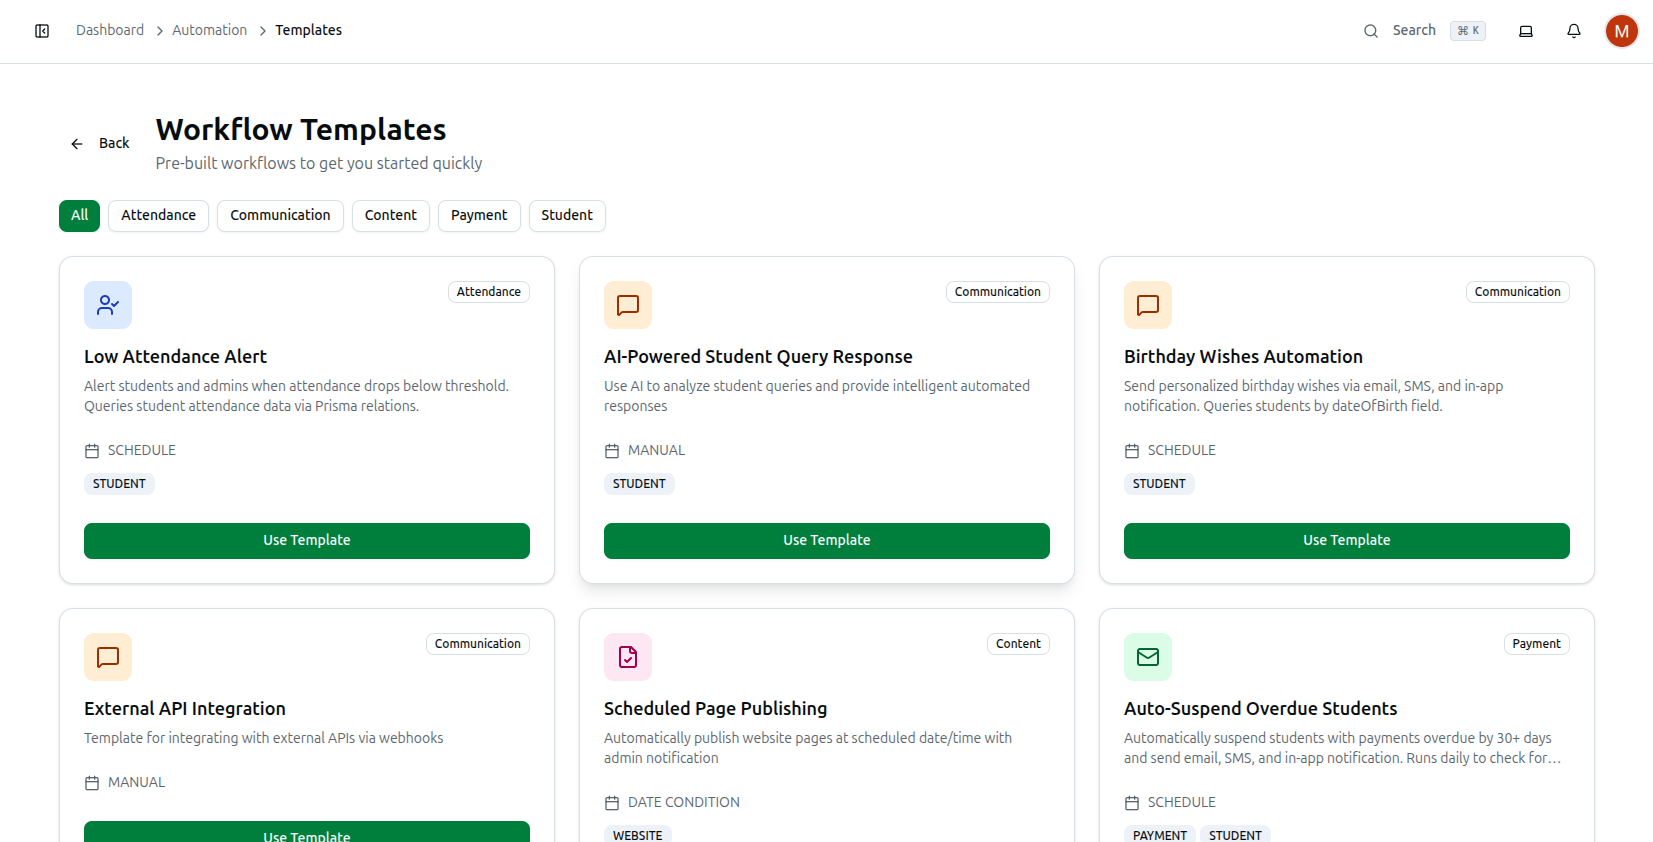
Each card shows a category badge, a description, its trigger type (e.g. Schedule, Manual, Date Condition), and any required modules it depends on (e.g. Student, Payment, Website). Click Use Template and a ready-made workflow is created from it immediately, already Active — unlike a workflow you build from scratch, which starts as Draft — and you're taken straight to its editor rather than the blank Create form.
Creating a Workflow From Scratch
Click Create Workflow.
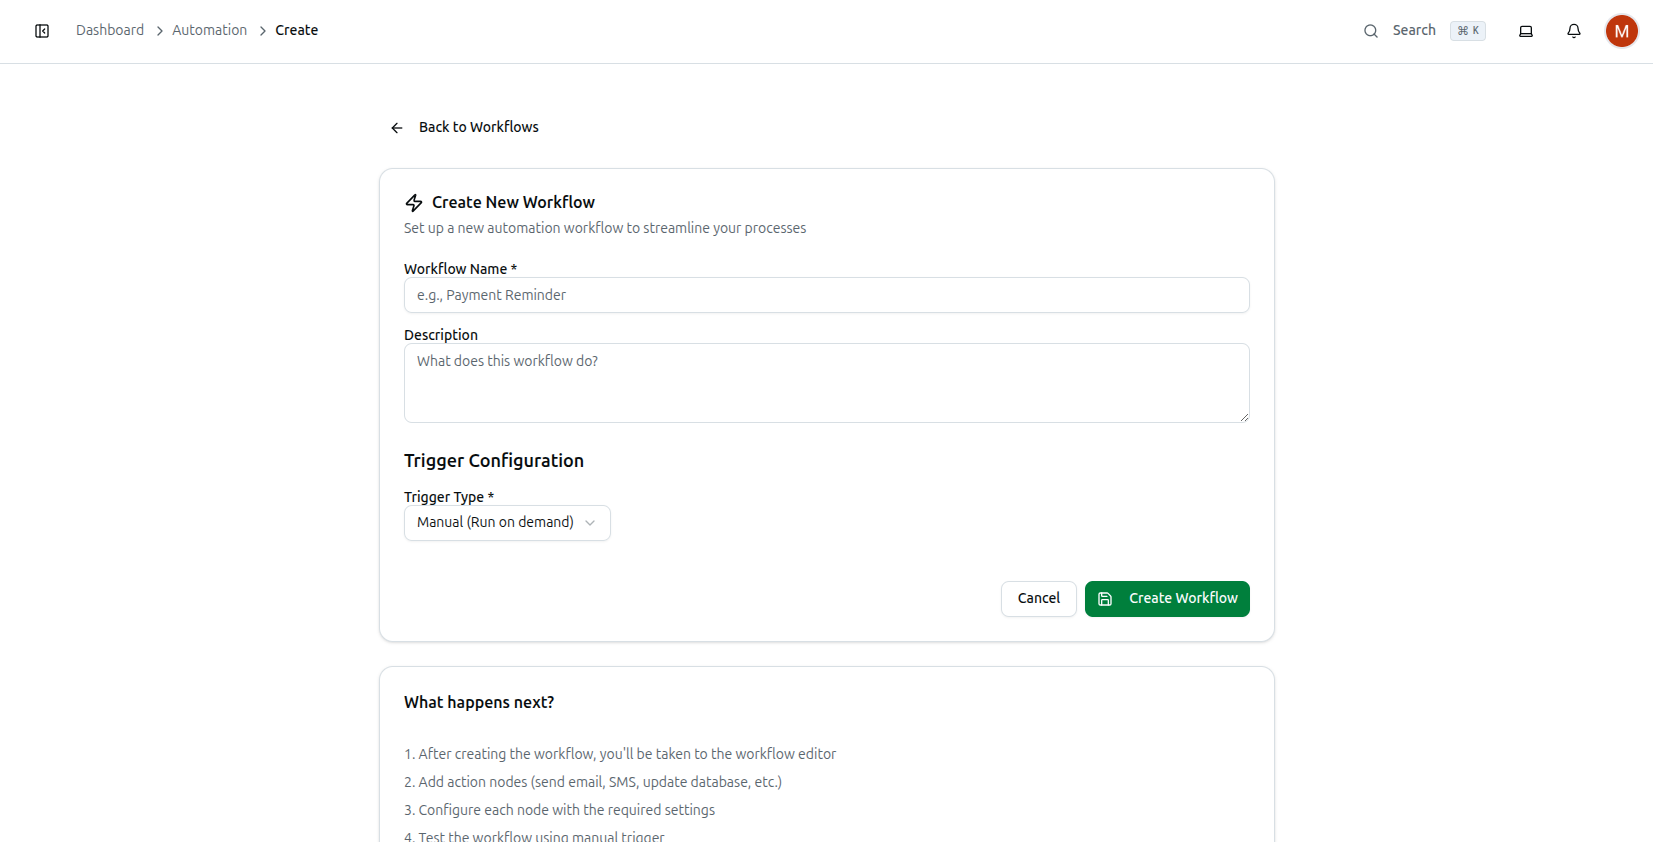
The form has a Workflow Name* (required, e.g. "Payment Reminder") and a Description, then a Trigger Configuration section with a Trigger Type* dropdown defaulting to Manual (Run on demand), with five options — each reveals its own fields:
- Manual (Run on demand) — no extra fields; the workflow only fires when someone clicks Run Now.
- Schedule (Cron-based) — a Cron Expression* field (e.g.
0 9 * * *for every day at 9 AM, with a link to crontab.guru for building one) and a Timezone field, defaulting toAsia/Dhaka. - Event (System trigger) — an Event Type* dropdown: Student Created, Student Enrolled in Course, Payment Completed, Payment Failed, Assignment Submitted.
- Date Condition (X days before/after) — a Date Field* dropdown (Payment Due Date, Course Start Date, Course End Date, Expiration Date) and a Days Before/After* number (negative = before, positive = after).
- Webhook (External trigger) — no fields to fill in; a note explains the webhook URL is generated after you save, and the field shown here just stays disabled as a placeholder.
The Create form's Date Condition trigger is always scoped to payment records, no matter which Date Field you pick. Its saved configuration hardcodes
model: 'payment'regardless of the dropdown choice — so Payment Due Date works as expected, but choosing Course Start Date, Course End Date, or Expiration Date here doesn't yet wire up to those models. If you need a genuine course-date trigger, it isn't available from this form as currently built. This limitation is specific to the manual Create form — a template (like the Content-category Scheduled Page Publishing, whose Date Condition trigger targets a Website module rather than a payment) isn't bound by it, since templates carry their own pre-built configuration.
Click Create Workflow and you're dropped straight into the visual editor with a single Trigger node already on the canvas, workflow status starting at DRAFT. A "What happens next?" panel on the same page spells out the rest: add action nodes, configure each one, test with a manual run, then activate.
The Workflow Editor
Opening any workflow (from the list, a template, or right after creating one) takes you to its detail page.
Header: name, description, status badge, trigger-type badge, a cron-expression badge (with timezone) when the trigger is Schedule, and a Next run badge once one is scheduled. Buttons: Activate/Pause, Run Now (always available here, regardless of trigger type), and Delete.
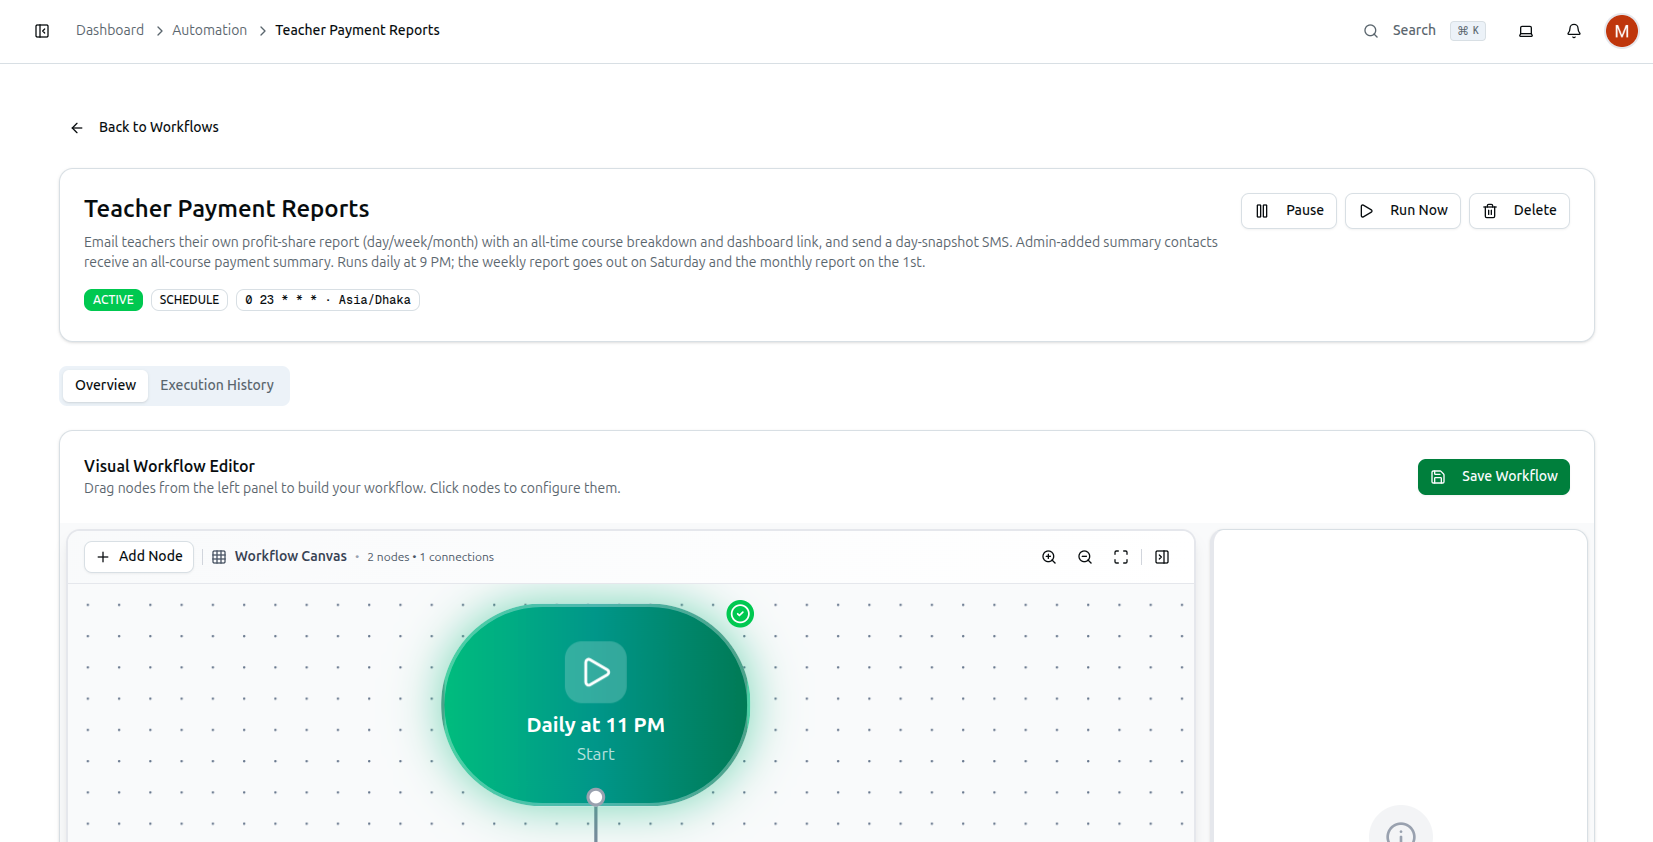
Overview tab — Visual Workflow Editor: drag nodes from the left panel onto the canvas, click a node to configure it. The canvas toolbar has its own + Add Node button and shows a live "N nodes · M connections" count alongside zoom controls; the Trigger node itself renders a human-readable summary of its schedule (e.g. "Daily at 11 PM") rather than the raw cron string. An amber "Unsaved changes — click Save Workflow to apply" notice appears the moment you touch anything, and the Save Workflow button itself grows an asterisk (Save Workflow *) while changes are pending. Saving re-derives the workflow's trigger type and configuration from whatever the Trigger node on the canvas currently holds — so editing a schedule directly on the canvas (not just from the original Create form) takes effect the next time you save.
Execution History tab: every past run, each with a status icon, its start time, duration in seconds (once finished), and a truncated error message if it failed. Click any row to open its full execution details in a dialog.
Execution statuses you'll see here are a separate set from the workflow statuses above:
| Execution status | Meaning |
|---|---|
| PENDING | Queued, not yet started |
| RUNNING | In progress |
| SUCCESS | Completed without error |
| FAILED | Errored out |
| CANCELLED | Stopped before completion |
| PARTIAL | Some steps succeeded, others didn't |
Troubleshooting
| What you see | What it means |
|---|---|
| No Run Now button on a workflow card in the list | It's only shown there for Active workflows with a Manual trigger — open the workflow's own page instead, where Run Now always appears |
| A Date Condition workflow built around a course date never fires | The Create form's Date Condition trigger only ever targets payment records under the hood — course-date triggers aren't wired up yet, regardless of which Date Field you selected |
| You edited the trigger node's schedule on the canvas and it didn't apply | Click Save Workflow — the schedule only updates once you save, not as you edit |
| A workflow shows no executions | It has either never run, or has only ever been Draft/Paused — trigger it manually or activate it to generate history |
Related: Send SMS and Bulk Messages