
2. Managing & Creating New Pages
Open Website Editor from the left sidebar under Platform to reach Website Pages — Manage your website pages and sections.
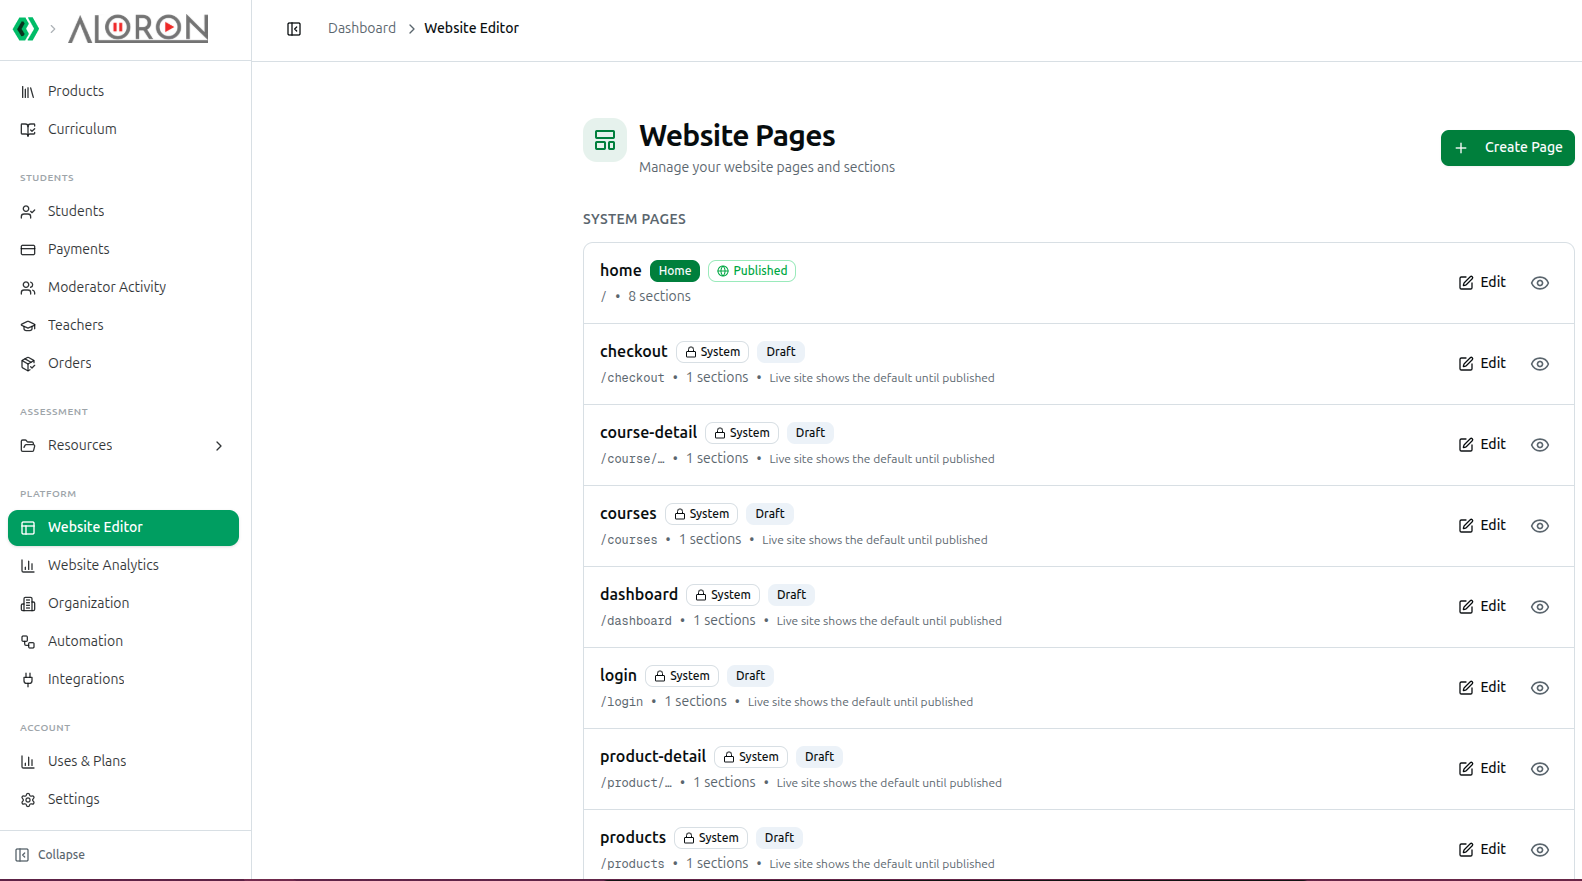
SYSTEM PAGES lists the pages the platform needs to function — home, checkout, course-detail, courses, dashboard, login, products, product-detail and more. Each shows a System badge (except home, which carries an Home badge instead), a Published or Draft status, and its section count.
Most system pages start as an invisible Draft with one section. The row tells you directly: Live site shows the default until published. Until you publish checkout, course-detail, courses, dashboard, login or products, your live site quietly serves a built-in default in their place — customizing one and forgetting to publish is the most common reason a change never appears to students.
Creating a New Page
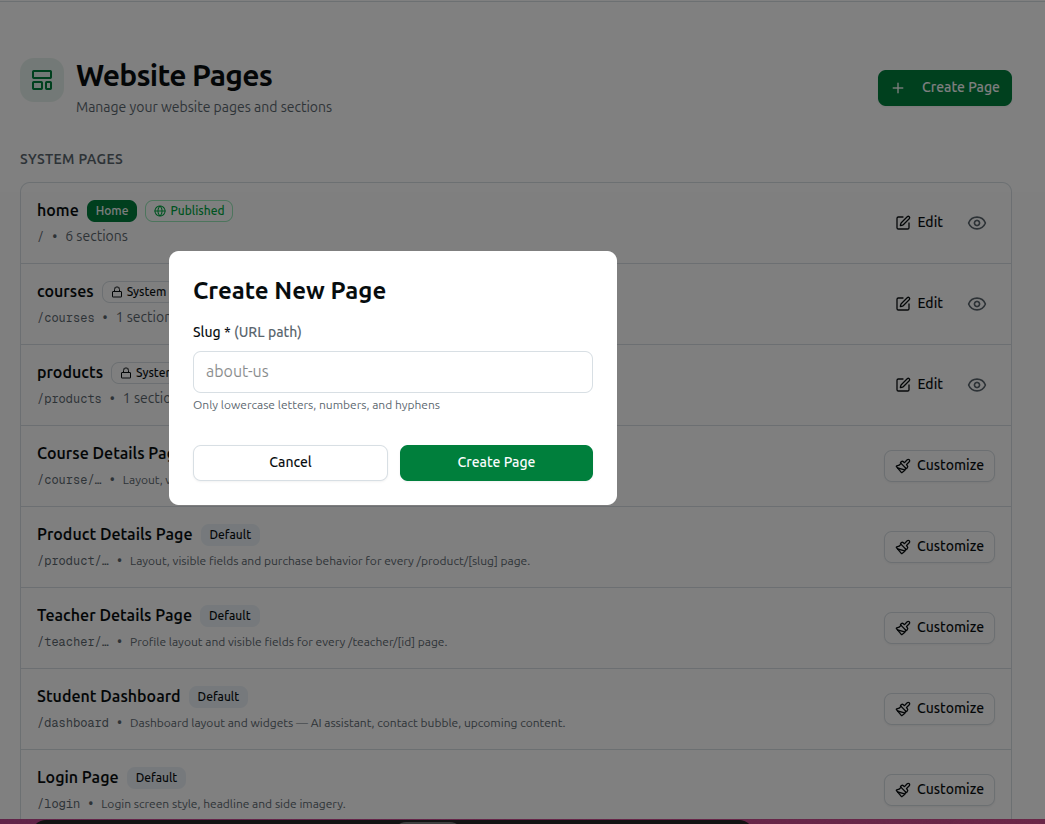
Click + Create Page to open Create New Page. There is exactly one field:
Slug (URL path) (required) — e.g., about-us — Only lowercase letters, numbers, and hyphens. Whatever you type becomes your page's address: about-us creates a page at yourdomain.com/about-us.
There is no page-type dropdown. Every page created here is a blank Custom Page, built entirely from the components you add afterward — there is no choice between "Home Page," "Course Detail," "Dashboard" or similar built-in types at creation time. Those already exist as fixed System Pages and Template Pages (below); this dialog is only for pages you invent yourself.
Click Create Page, then Edit the new row to start building it in the Page Editor.
Template Pages — a Different Kind of Page Entirely
Below your custom pages sit rows with a Customize button instead of Edit — these are not single pages, they are layout templates applied to every matching page across your platform:
| Template | Governs |
|---|---|
| Course Details Page | Layout, visible fields and enroll behavior for every /course/[slug] page |
| Product Details Page | Layout, visible fields and purchase behavior for every /product/[slug] page |
| Teacher Details Page | Profile layout and visible fields for every /teacher/[id] page |
| Student Dashboard | Dashboard layout and widgets — AI assistant, contact bubble, upcoming content |
| Login Page | Login screen style, headline and side imagery |
| Checkout | Layout, promo/installment visibility and support contact |
This is the distinction that matters most on this whole page. Editing "Product Details Page" does not create or change one product's page — it changes the layout that every product detail page on your site uses, for every product you sell. You are styling a template, not a single instance.
Click Customize on any of these and Course37 creates the underlying page record the first time, then opens it in the same Page Editor you use for everything else — nothing about the editing experience is special, only what the page represents.
Troubleshooting
| What you see | What it means |
|---|---|
| You edited a page but the live site looks unchanged | The page is still a Draft — publish it |
| You can't find a way to set a page's type when creating it | There isn't one — new pages are always blank Custom Pages |
| Changing "Product Details Page" changed every product's page | Correct and expected — it is a shared template, not one product's page |
| A template row has no Edit button, only Customize | Normal — the underlying page is created on your first click |
| A system page shows 1 sections by default | That is its starting state before you customize it |
Related: Page Editor & Components · Website Setup Wizard · Theme & Branding