
1. Opening the All Items Tab
In the left sidebar under Assessment, click Resources. The page opens with the heading Resources and the note Manage all your organization's content in one place, and lands you on the first tab, All Items.
Across the top you will see one tab per content kind: All Items, Videos, Exams, Live Classes, Assignments, PDFs, Questions and AI Chats.
All Items is the only tab that mixes everything together. In one list you get every Video, PDF, Exam, Assignment, Live session and Embed that is attached to a module of one of your courses. There is no separate "content type" dropdown on this tab — if you want only one kind, switch to that kind's tab.
Everything you pick is written into the page address, so you can bookmark a filtered view or paste the link to a colleague and they will see exactly the same list.
2. Searching by Name
The first control in the filter row is the Search content... box.
- Type any part of a name — "chapter 3", "model test", "physics".
- The list refreshes as you type; you do not press Enter.
- Matching ignores capital letters and matches anywhere inside the name (for a live class it matches the session title).
Searching always returns you to page 1 and clears any rows you had ticked, so you never act on rows you can no longer see.
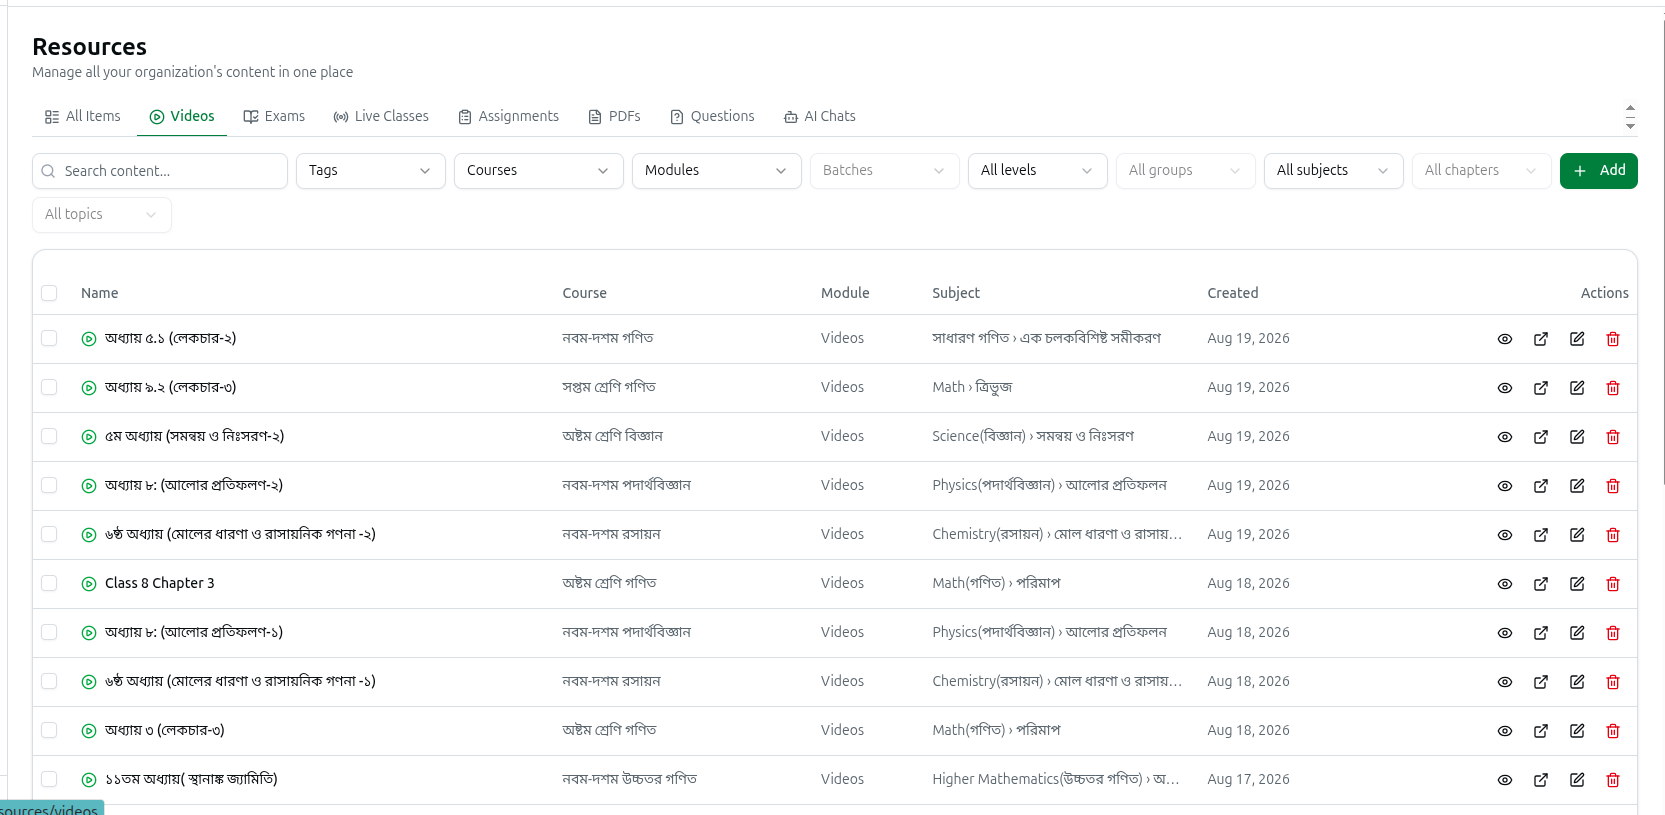
The same filter row appears on every tab. The screenshot above shows it on Videos, but the controls are identical on All Items — only the columns beneath change. Filters do not carry across when you switch tabs, so re-apply them after moving.
3. Filtering by Tag, Course, Module and Batch
Next to the search box sit four multi-select dropdowns. Each one opens a small panel with its own type-to-find box; tick as many entries as you like and the button then reads "3 selected". Click a ticked entry again to remove it.
- Tags: Filters on the tags attached to your courses. A resource is kept if its course carries any of the tags you tick. Tags also narrow what the Courses and Modules dropdowns offer, and any course, module or batch pick that no longer qualifies is dropped automatically.
- Courses: Restrict the list to one or several courses. Changing the course selection resets your Modules and Batches picks, because those options depend on the course.
- Modules: Restrict the list to specific modules. When you have exactly one course selected the options are plain module names; otherwise each is labelled Course name — Module name so you can tell duplicates apart.
- Batches: Only content released to the chosen batches. This dropdown stays greyed out until you pick a course first.
When at least one filter is active, a Clear button appears at the end of the row and resets the whole filter bar in one click.
On a phone or narrow screen the dropdowns collapse behind a Filters button, which carries a small number badge showing how many filters are currently applied.
4. Filtering by Curriculum
The All Items tab shows the complete curriculum cascade — five dropdowns in order:
- Level: All levels or one education level.
- Group: All groups or one group. Disabled until you choose a level.
- Subject: All subjects, Unassigned, or one subject. Choosing a group shortens this list to the subjects belonging to that group.
- Chapter: All chapters or one chapter. Disabled until you choose a subject.
- Topic: All topics or one topic. Disabled until you choose a chapter.
Two behaviours are worth remembering:
- The dropdowns cascade. Picking a new Subject clears the Chapter and Topic below it, so you never keep a stale combination.
- Unassigned in the Subject dropdown finds everything that was never given a subject — the fastest way to spot content that still needs to be categorised. While Unassigned is selected, Chapter and Topic go dead, because nothing below a subject can apply.
One important side effect: assignments and live classes do not carry subject, chapter or topic information at all. The moment you choose a specific level, group, subject, chapter or topic, assignments and live sessions disappear from the results. Clear the cascade to bring them back. Unassigned is the exception — it keeps them, since they genuinely have no subject.
5. What Each Row Shows
Results appear as a single table (there is no card or grid view on this tab). The columns are:
- Name: A coloured icon for the kind of item, followed by the title. For a live class a status badge and the scheduled date and time appear underneath.
- Type: A small badge reading Video, PDF, Exam, Assignment, Live or Embed.
- Course: The course the item belongs to, or a dash if none.
- Module: The module inside that course.
- Subject: The subject, and the chapter after a small arrow (Physics › Motion), or a dash when unassigned.
- Created: The date the item was added (Mar 14, 2026). For a live class this is its scheduled date.
- Actions: The buttons described below.
Live classes are highlighted so you cannot miss them. A session that is ● LIVE or Starting soon gets a red tint and a red left edge; an Upcoming session due within the next 24 hours gets an amber tint. Finished sessions show a faded Ended or Cancelled badge.
Clicking a row does something sensible for each type: an assignment opens its own page, where its submissions are listed; a running live class opens the live room; and everything else opens a details panel with the item's statistics — viewers, watch time, completion and comments for a video; attempts, average score and pass rate for an exam; and a View on website button that opens the student-facing page.
The buttons at the right end of each row:
- The eye icon opens the same Details panel.
- The outward-arrow icon opens the item on your public website (shown only when the item has a student-facing page).
- The pencil icon opens the edit form. Exams jump to the full exam manager instead.
- The red bin icon deletes the item, after a confirmation. For an exam the tooltip reads Unlink from module — see below.
A live class row shows extra buttons instead: Start for a scheduled session, Join Live / Open Room and End while it is running, plus a ⋮ menu with Open Live Room, End Session, Start Session, Cancel Session, Details, Edit, View on website, Copy Join Link and Delete.
Single-item delete confirmation. For most types the dialog is titled Delete Video (or PDF, Assignment, Live) and warns that the action cannot be undone. For an exam the dialog is titled Unlink Exam and explains that the exam is only unlinked from its module — the exam itself is kept and can be reconnected. The confirm button reads Unlink instead of Delete.
6. Ordering and Paging
The mixed list is always ordered newest first, using each item's creation date (a live class is placed by its scheduled time). There is no sort control on All Items, because six different kinds of content have to be merged into one page — the Assignments tab has its own sort dropdown, because only one kind is listed there.
Underneath the table:
- On the left, a count of what you are looking at, for example 1–20 of 348.
- On the right, a page-size dropdown offering 10 / page, 20 / page, 50 / page and 100 / page. The default is 20; changing it returns you to page 1.
- Arrow buttons to step back and forward, with the current position shown between them as 3 / 18.
There is no infinite scrolling — you page through the list. Very deep paging is not allowed: you cannot page past the 10,000th result, and the system will ask you to narrow the filters instead. In practice, use search or a course/subject filter rather than clicking forward dozens of pages.
7. Selecting Several Items at Once
Every row has a checkbox on the left, and the header row has one too.
- Tick individual rows, or tick the header checkbox to select every row on the current page. It deliberately does not reach rows you cannot see.
- Your ticks survive paging. Select ten rows on page 1, move to page 2, tick five more, and all fifteen stay selected.
- Changing any filter or the search text clears the selection, because a new filter reshuffles the results underneath you.
As soon as one row is ticked, a grey selection strip appears between the filter bar and the table. It shows a N selected badge, the bulk action buttons, and a Clear button on the right to drop the whole selection.
8. The Bulk Actions
The strip offers exactly four actions: Move, Copy, Set Hierarchy and Delete. An action is greyed out whenever one of the selected items cannot support it, and hovering the greyed button tells you why ("Live sessions can't be copied", "Assignments and Live sessions have no subject/chapter/topic").
Move
Opens Move to another Module. You see the full list of selected items with their type badges, then a Target Module dropdown listing every module in your organization as Course name — Module name, so you can move content into a different course, not just a different module. Click Move 12 Items to confirm, or Cancel. A message confirms how many items moved.
Copy
Opens Copy to another Course. Videos and assignments are duplicated; PDFs and exams are shared, meaning the same item becomes attached to both modules. Live sessions and embeds cannot be copied at all — with any of them selected the button is disabled. Choose:
- Filter by Tag: Optional, narrows the course list.
- Target Course: The course to copy into. When everything you picked comes from one course, that course is left out of the list.
- Target Module: The module inside that course. Stays disabled until a course is chosen.
Click Copy 8 Items to run it. If some items could not be copied you get a warning listing how many were skipped and why.
Set Hierarchy
Opens Bulk Update Educational Hierarchy. Pick Education Level, Group, Subject, Chapter and Topic, then click Update 20 Items. The dialog warns you plainly that this will overwrite the current values for every selected item, so use it on a filtered selection you have checked. This is the quickest way to clean up everything you found with the Unassigned subject filter. Assignments and live classes have no hierarchy, so the button is disabled if any are selected.
Delete
Opens the red confirmation Delete 15 Items?. Read the description carefully — it spells out exactly what will happen:
- Videos, PDFs, assignments, live sessions and embeds are permanently deleted, and the dialog adds This cannot be undone.
- Exams selected from the Resources page are only removed from their module — the exams and all student results are kept.
- Any exam that is not attached to a module is skipped, and an amber note tells you how many.
Below the text you get a scrollable list of every item about to be affected, each with its type badge, so you can double-check before committing. Confirm with Delete 15 Items (or Remove 15 Items when only exams are selected), or click Cancel. Afterwards a message reports how many were deleted, how many were removed from a module, and how many were skipped.
9. Adding Content from This Page
At the top right of the list sits the Add button. Because every resource has to live inside a module, it first opens the small dialog Where should this content go?:
- Tag: Optional, narrows the course list below.
- Course: The course the new content belongs to.
- Module: The module inside that course. Disabled until a course is chosen.
Click Continue and the content creation dialog opens with tabs for Video, Live, Quiz, Assignment, PDF and Embed. Once you save, the new item appears at the top of the All Items list, since the list is ordered newest first.