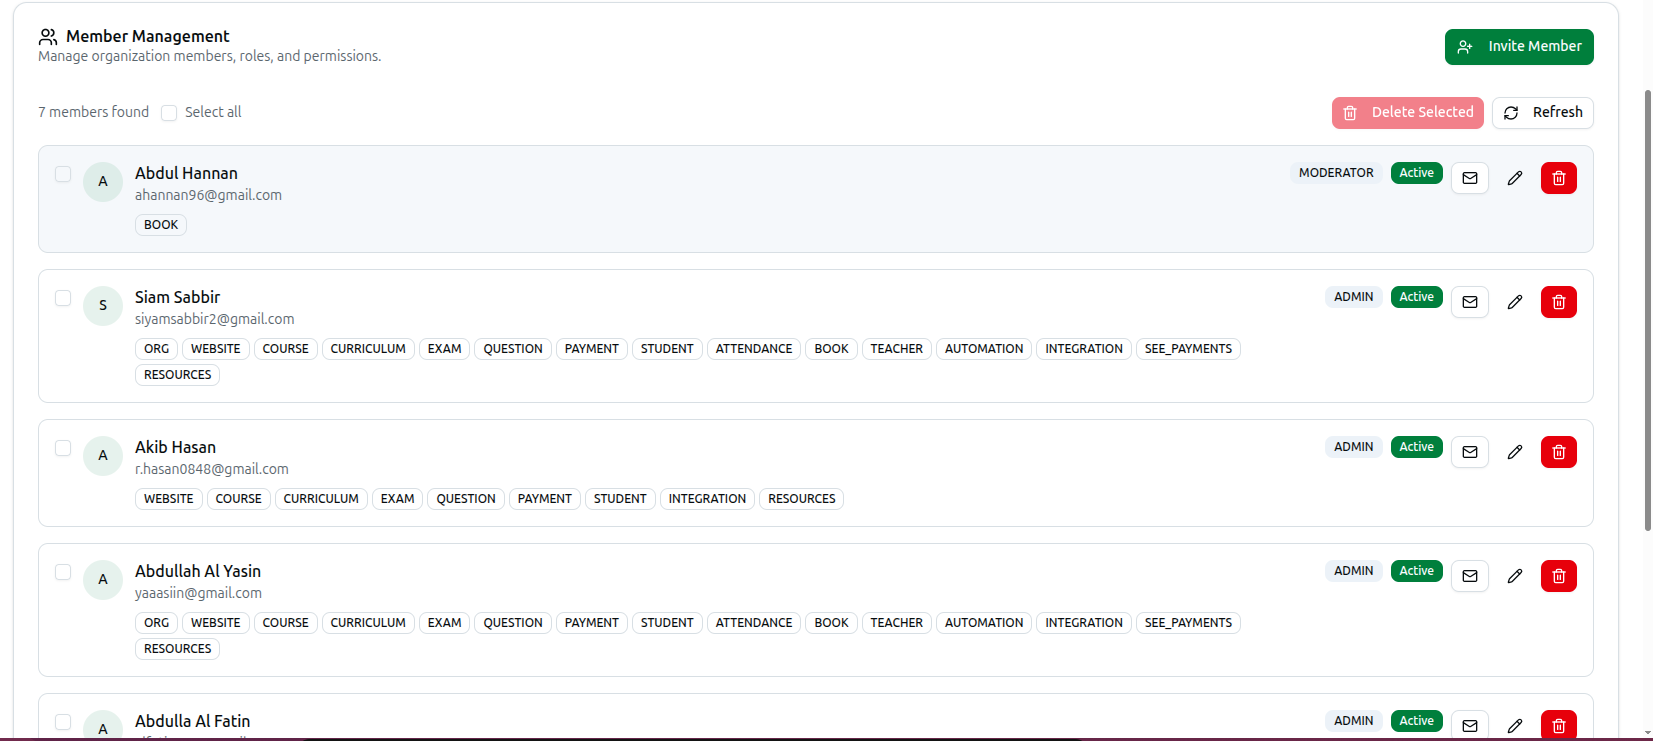
How to Invite Users
Control internal staff access and module privileges by inviting new members to your organization and managing existing ones directly from your dashboard.
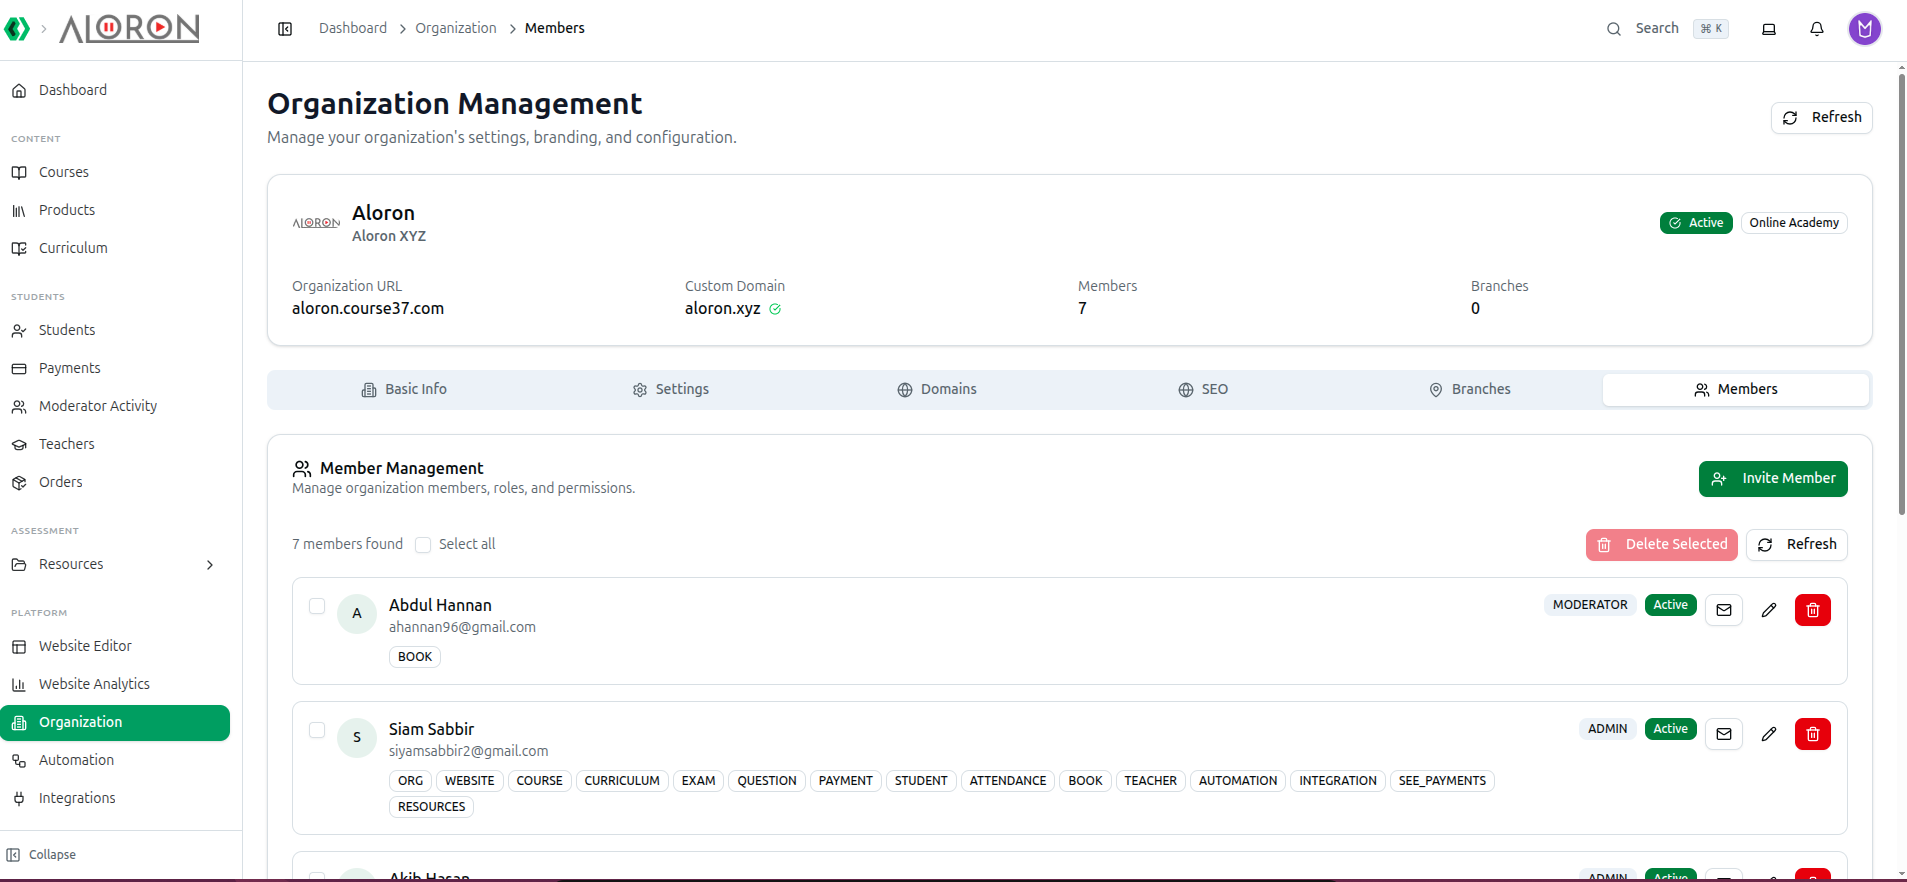
Step 1: Navigate to Members
- Select Organization from the left sidebar of your dashboard.
- Below the summary section, navigate to the Members tab to view your current user list.
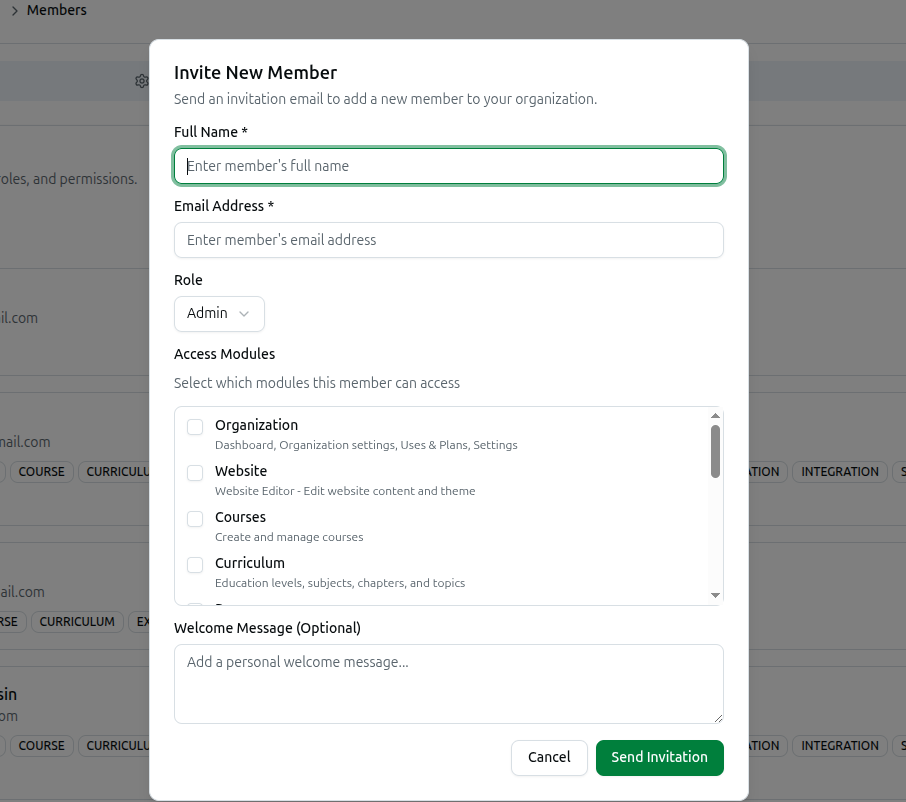
Step 2: Invite a New Member
- Click the green + Invite Member button to open the invitation dialog.
- Enter the user's Full Name and Email Address.
- Check the exact Access Modules they are permitted to manage (e.g., Organization, Website, Courses, Payments).
- Add an optional Welcome Message.
- Click Send Invitation to complete the process.
Step 3: Manage Existing Members
Next to an active user in your list, you can use the quick-action icons to manage their access:
- Envelope Icon: Resend their invitation email if they haven't accepted it yet.
- Pen Icon: Open the Edit Member Access dialog to check or uncheck their access modules, then click Update Member to apply changes.
- Trash Can Icon: Remove the user entirely from the organization dashboard.