
Step 1: Create an Attendance Session
- Go to Dashboard > Attendance (Sessions tab) and click Create Session.
- The dialog explains what this is for: "A one-off session for a specific date. For recurring classes, set up a weekly Timetable under Classrooms — biometric device punches create sessions automatically." A blue banner also shows your organization's Timezone, so you know what the times below are relative to.
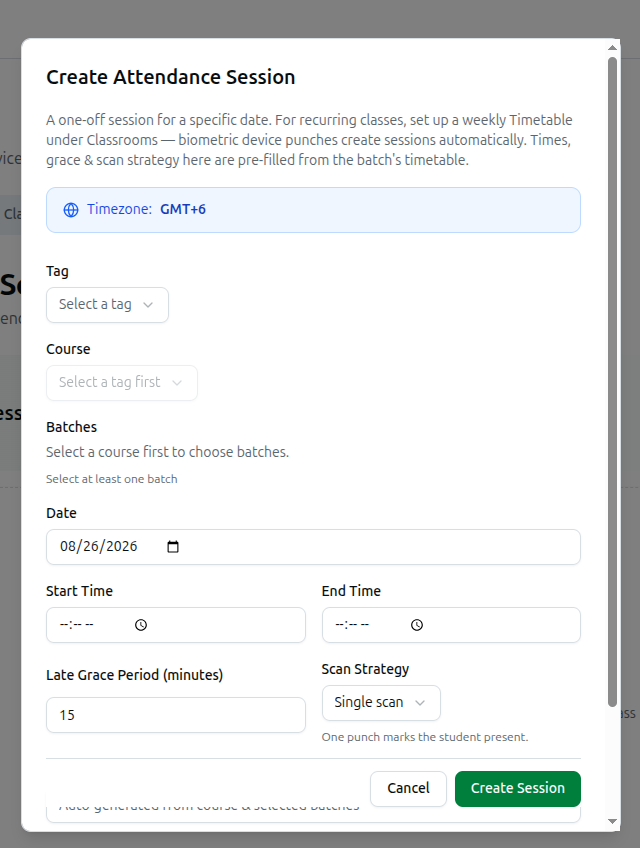
- Tag, then Course: if your organization uses course tags, the Course dropdown stays disabled until you pick a tag first ("Select a tag first"). Organizations with no tags at all skip straight to a course list, with a note explaining why.
- Batches: tick one or more. If the course has none yet, you'll see "No batches found for this course. Create at least one batch first to take attendance." Selecting a batch auto-fills the session's start/end times and title from that batch's schedule — pick more than one and it spans the earliest start to the latest end.
- Date, Start Time, End Time: adjust if the auto-filled values aren't right.
- Late Grace Period (minutes) and Scan Strategy, side by side: Scan Strategy is either Single scan ("One punch marks the student present") or Check-in & out ("First punch = check-in, a later punch = check-out"). If the batch's classroom has a weekly Timetable slot, both fields are pre-filled from it — a hint text says so, and you're free to override either one.
- Session Title: auto-generated from the course and batch names; edit it if you like.
- Click Create Session.
Related: Managing Attendance Sessions · Activate a Session