
Website Editor, in the left sidebar under Platform, opens a two-step setup wizard the first time your organization has no website yet: Details — your organization info, logo, favicon and social links — then a live Design step where you pick a theme and arrange your homepage in a real, working preview.
Full guide: How to Use the Website Setup Wizard
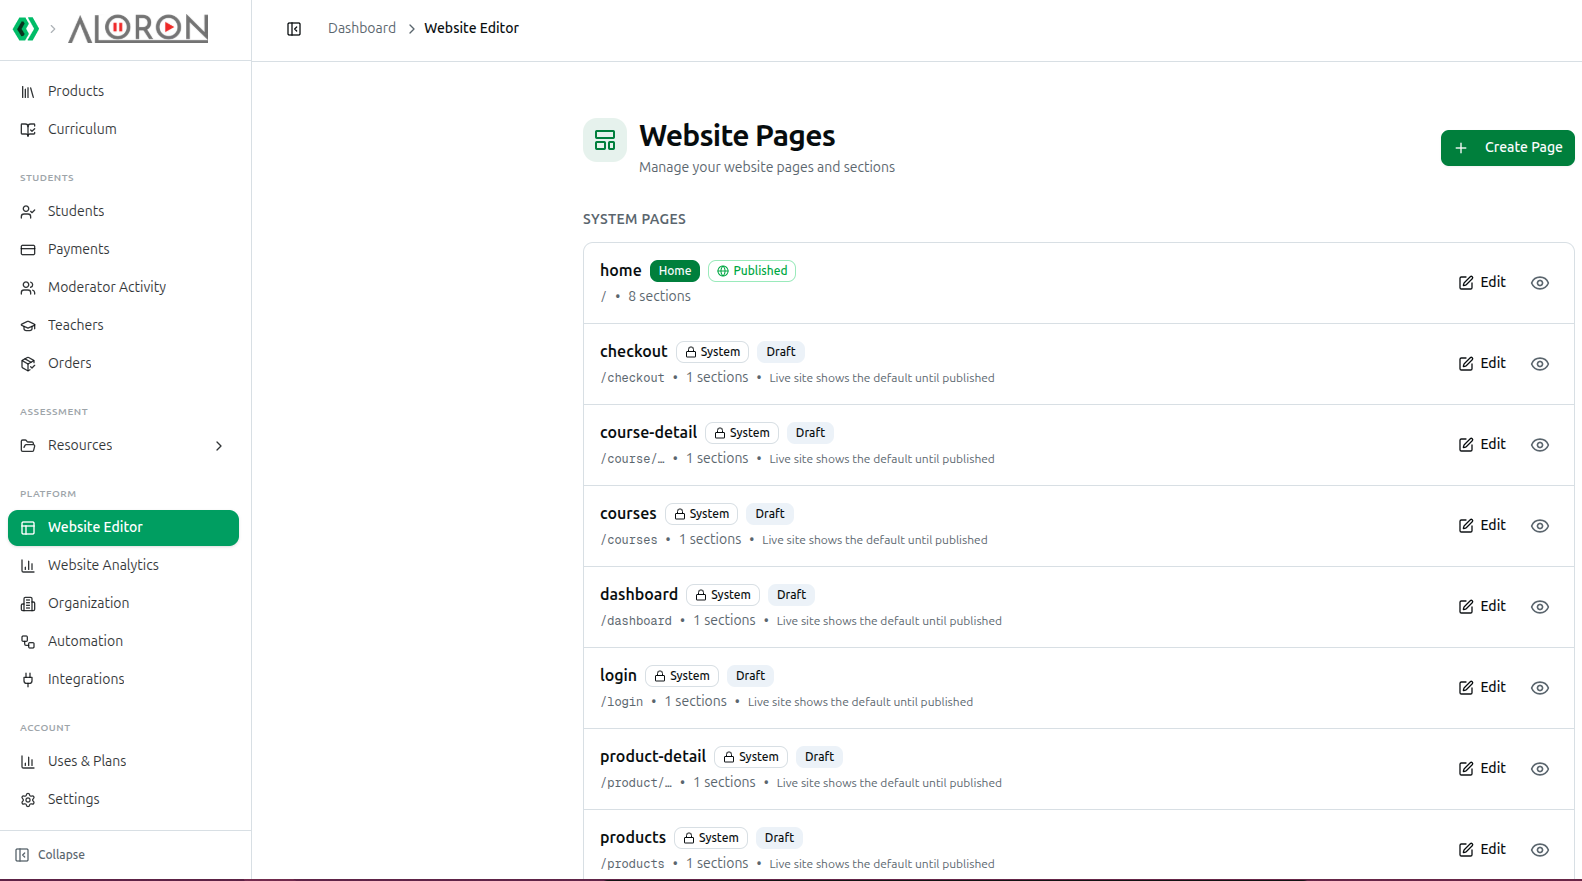
Once your website is enabled, Website Editor in the left sidebar under Platform opens Website Pages — Manage your website pages and sections — the list of every page on your site.
System Pages
At the top sits a fixed set under SYSTEM PAGES — pages the platform needs to function, which you customize but cannot delete: home, checkout, course-detail, courses, dashboard, login, product-detail, products, and more.
Each row shows:
- The page name and its URL path, such as
/checkout. - A System badge — every system page except home carries this.
- A status badge — Published or Draft.
- Section count — how many blocks the page currently has.
- Edit and Preview (the eye icon).
A Draft system page is not empty — it is invisible. The row explains it directly: Live site shows the default until published. Your checkout, course-detail, courses, dashboard, login and products pages exist as drafts from the start, each with one section, and every one of them silently falls back to a built-in default layout on your live site until you publish it. Customizing a system page and forgetting to publish is the most common reason a change "doesn't show up."
home behaves differently — it carries an Home badge instead of System, and is the only page shown with Published in this example, at 8 sections.
Creating a New Page
Click + Create Page to add a Custom Page — a page with no predefined role, built entirely from the components you choose.
Full guide: Manage & Create New Pages
Editing a Page
Click Edit on any row to open it in the visual page editor.
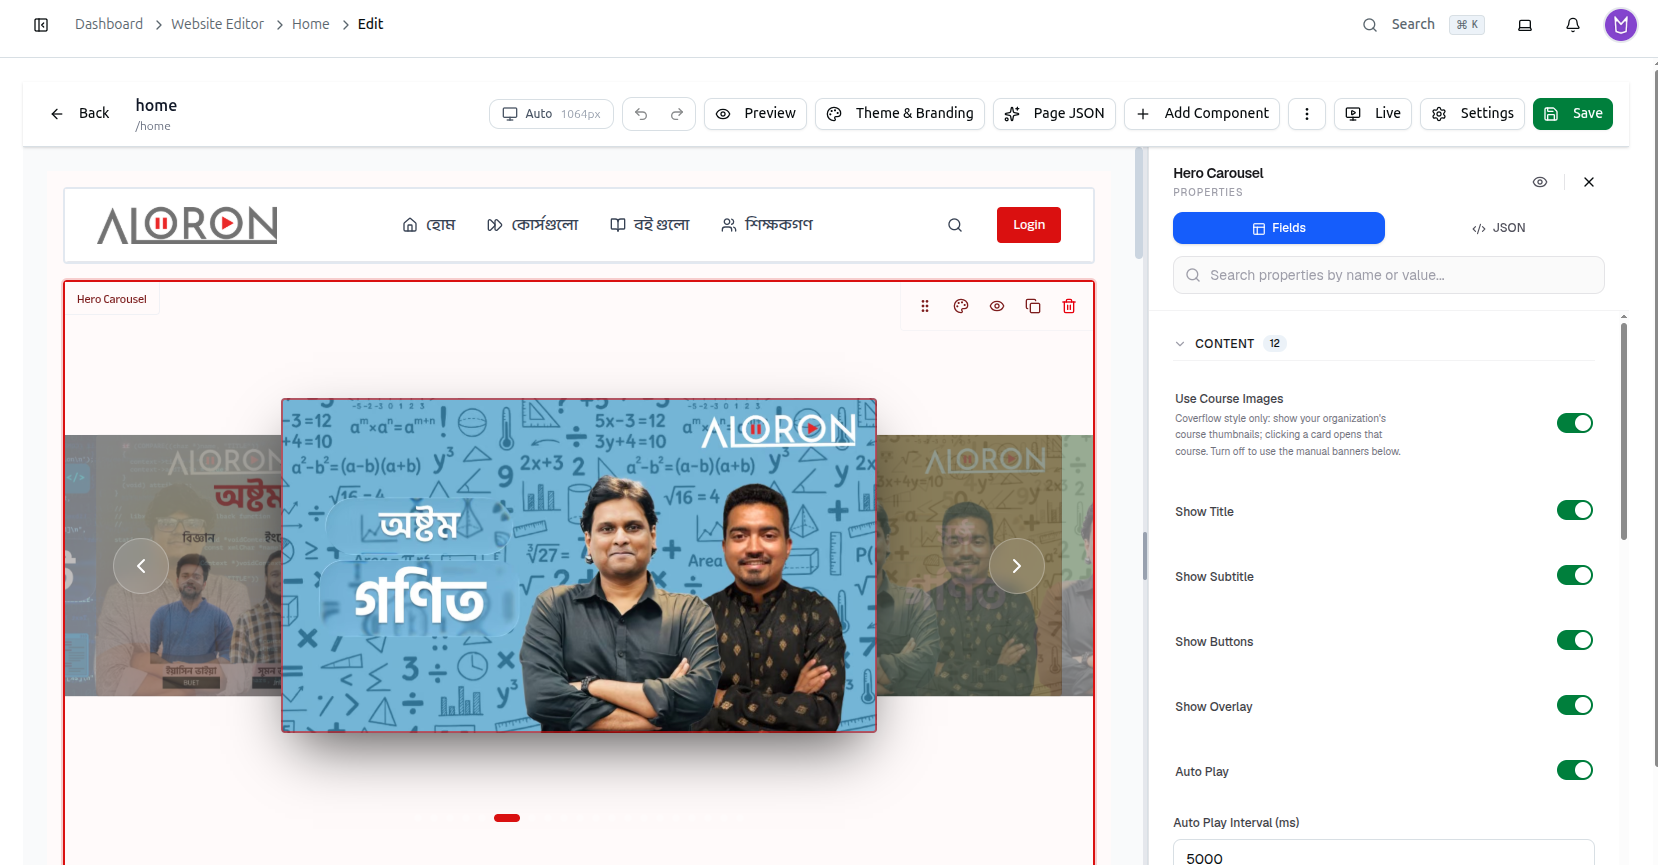
Full guide: Using the Page Editor & Adding Components
Troubleshooting
| What you see | What it means |
|---|---|
| You edited a page but the live site looks unchanged | The page is still a Draft — publish it |
| A system page shows 1 sections by default | That is its starting state before you customize it |
| home has no System badge | Correct — it carries an Home badge instead, since it is not optional like the others |
| You cannot find a way to delete a system page | System pages cannot be deleted, only customized |
Related: Manage & Create New Pages · Page Editor & Components · Website Setup Wizard